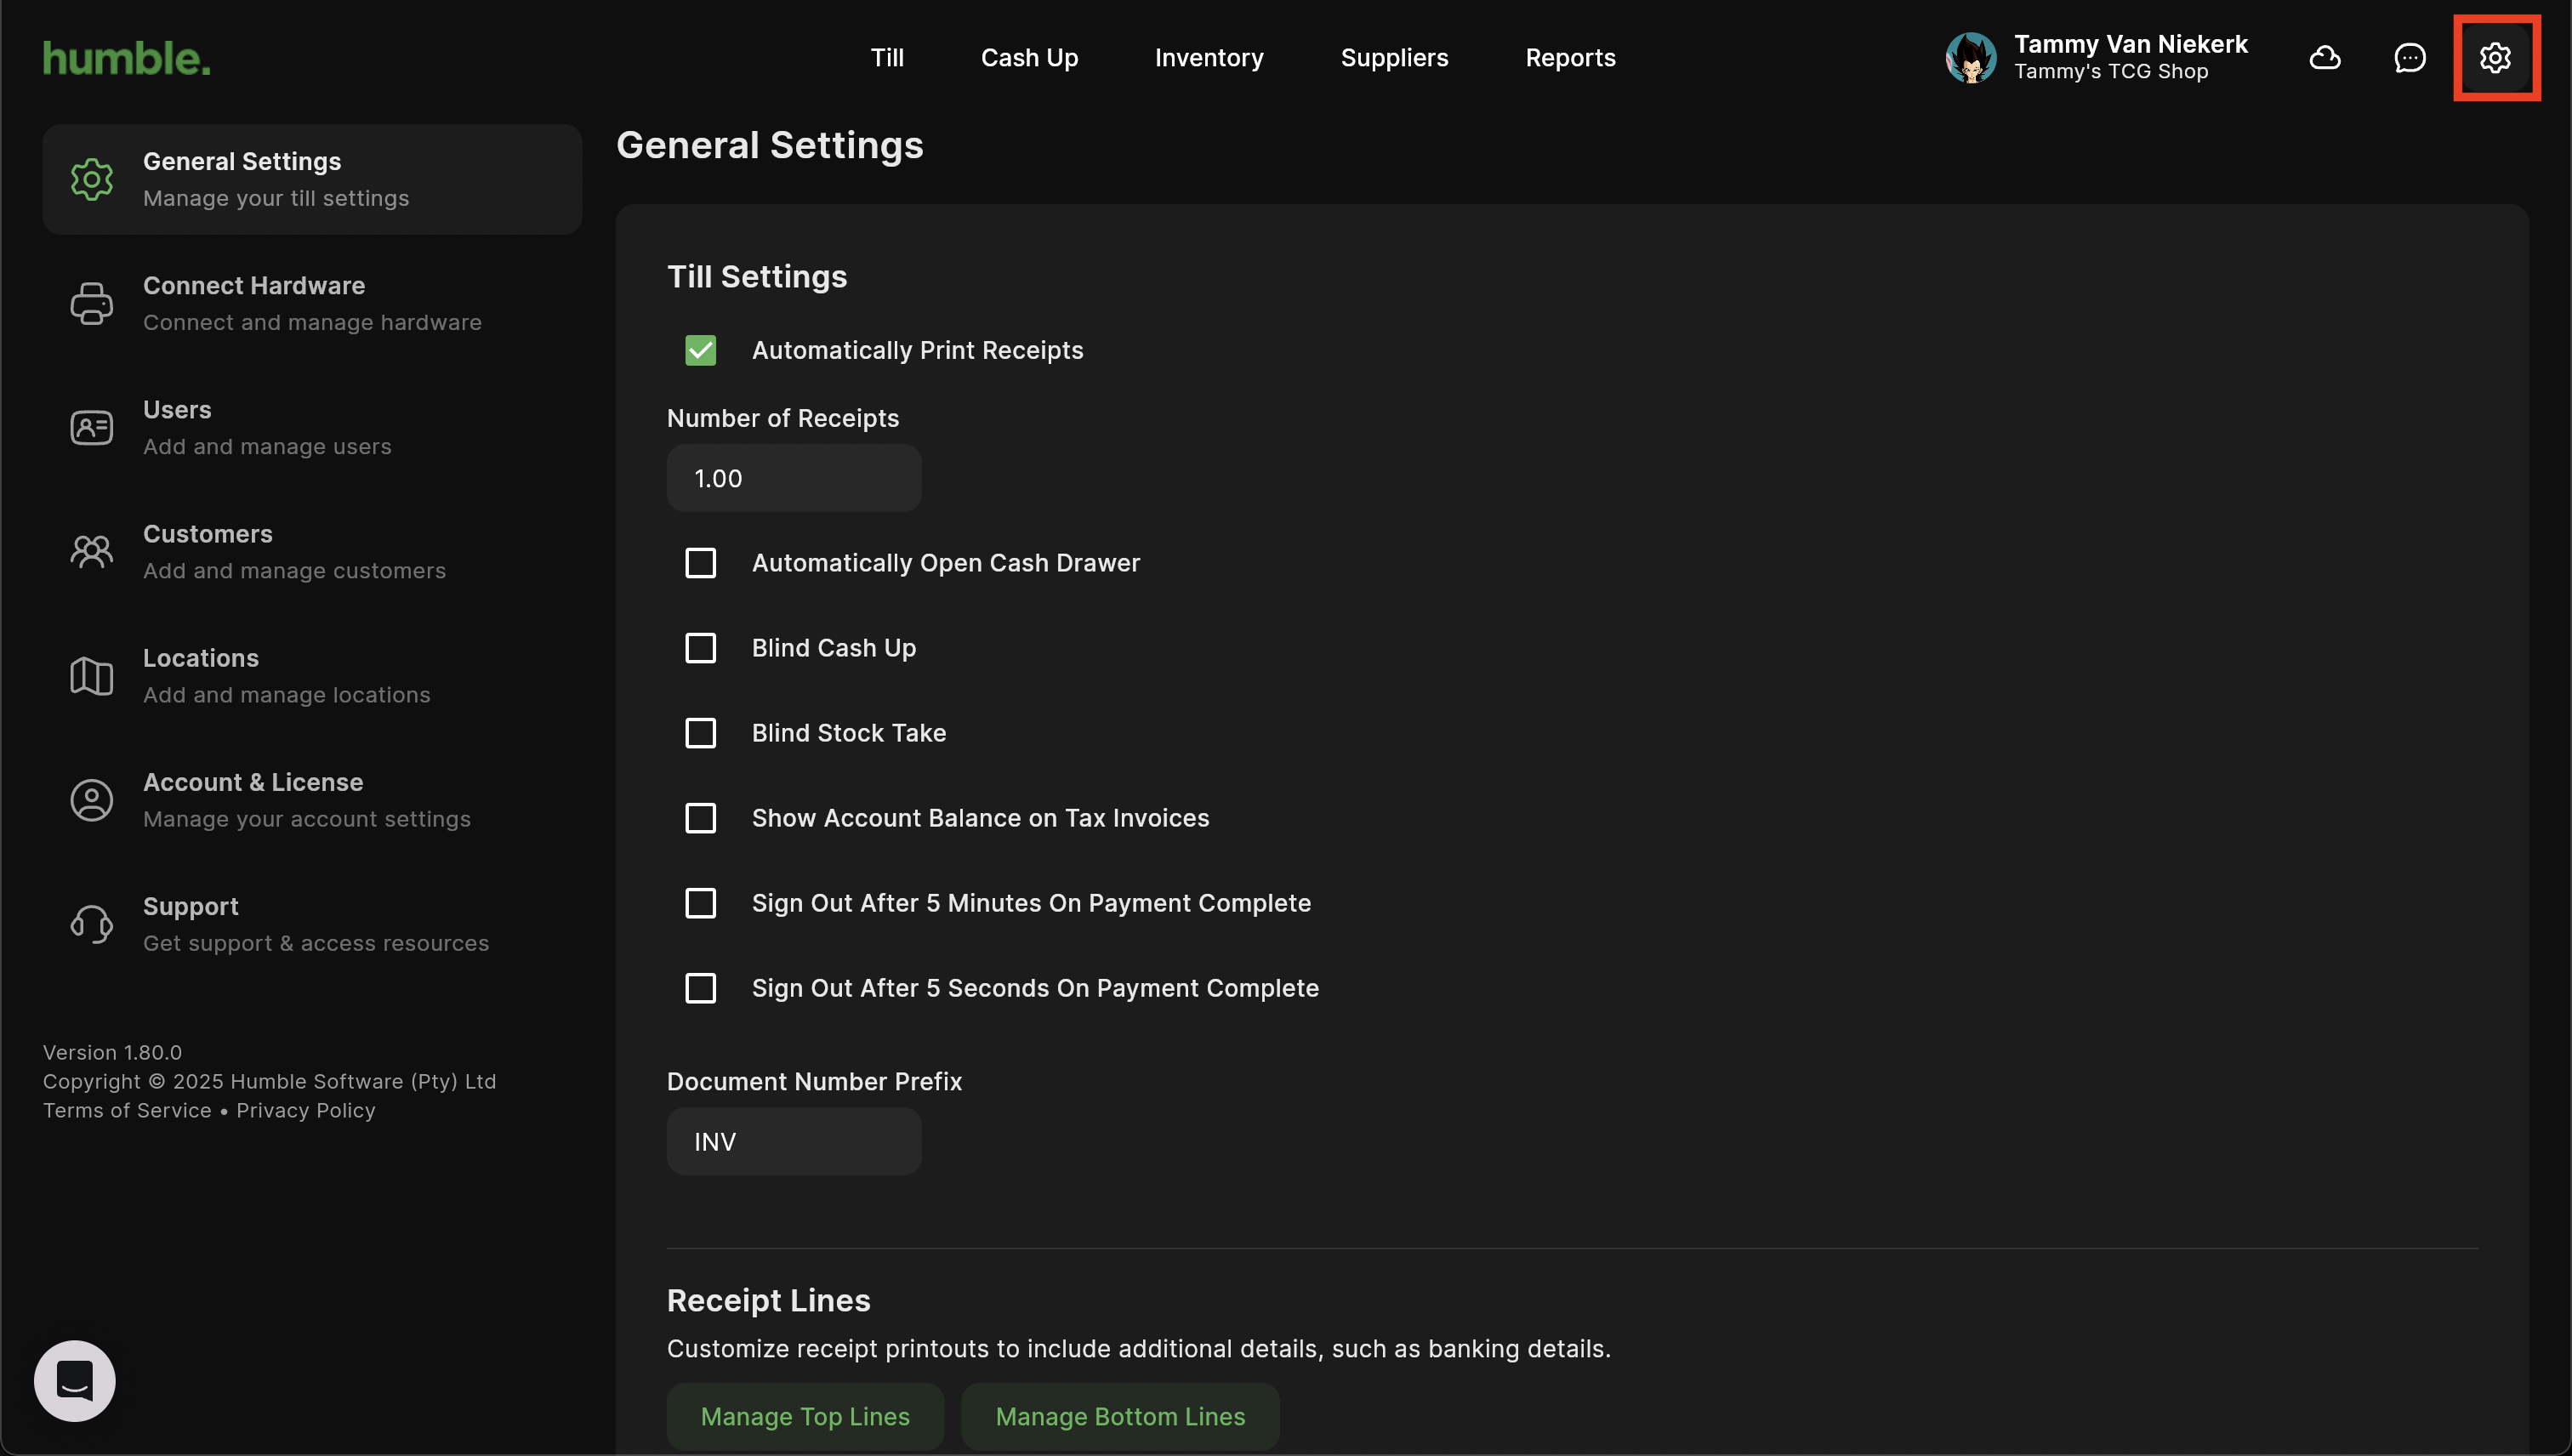
To navigate to your Settings, click on the cog on the top right next to your name.
General
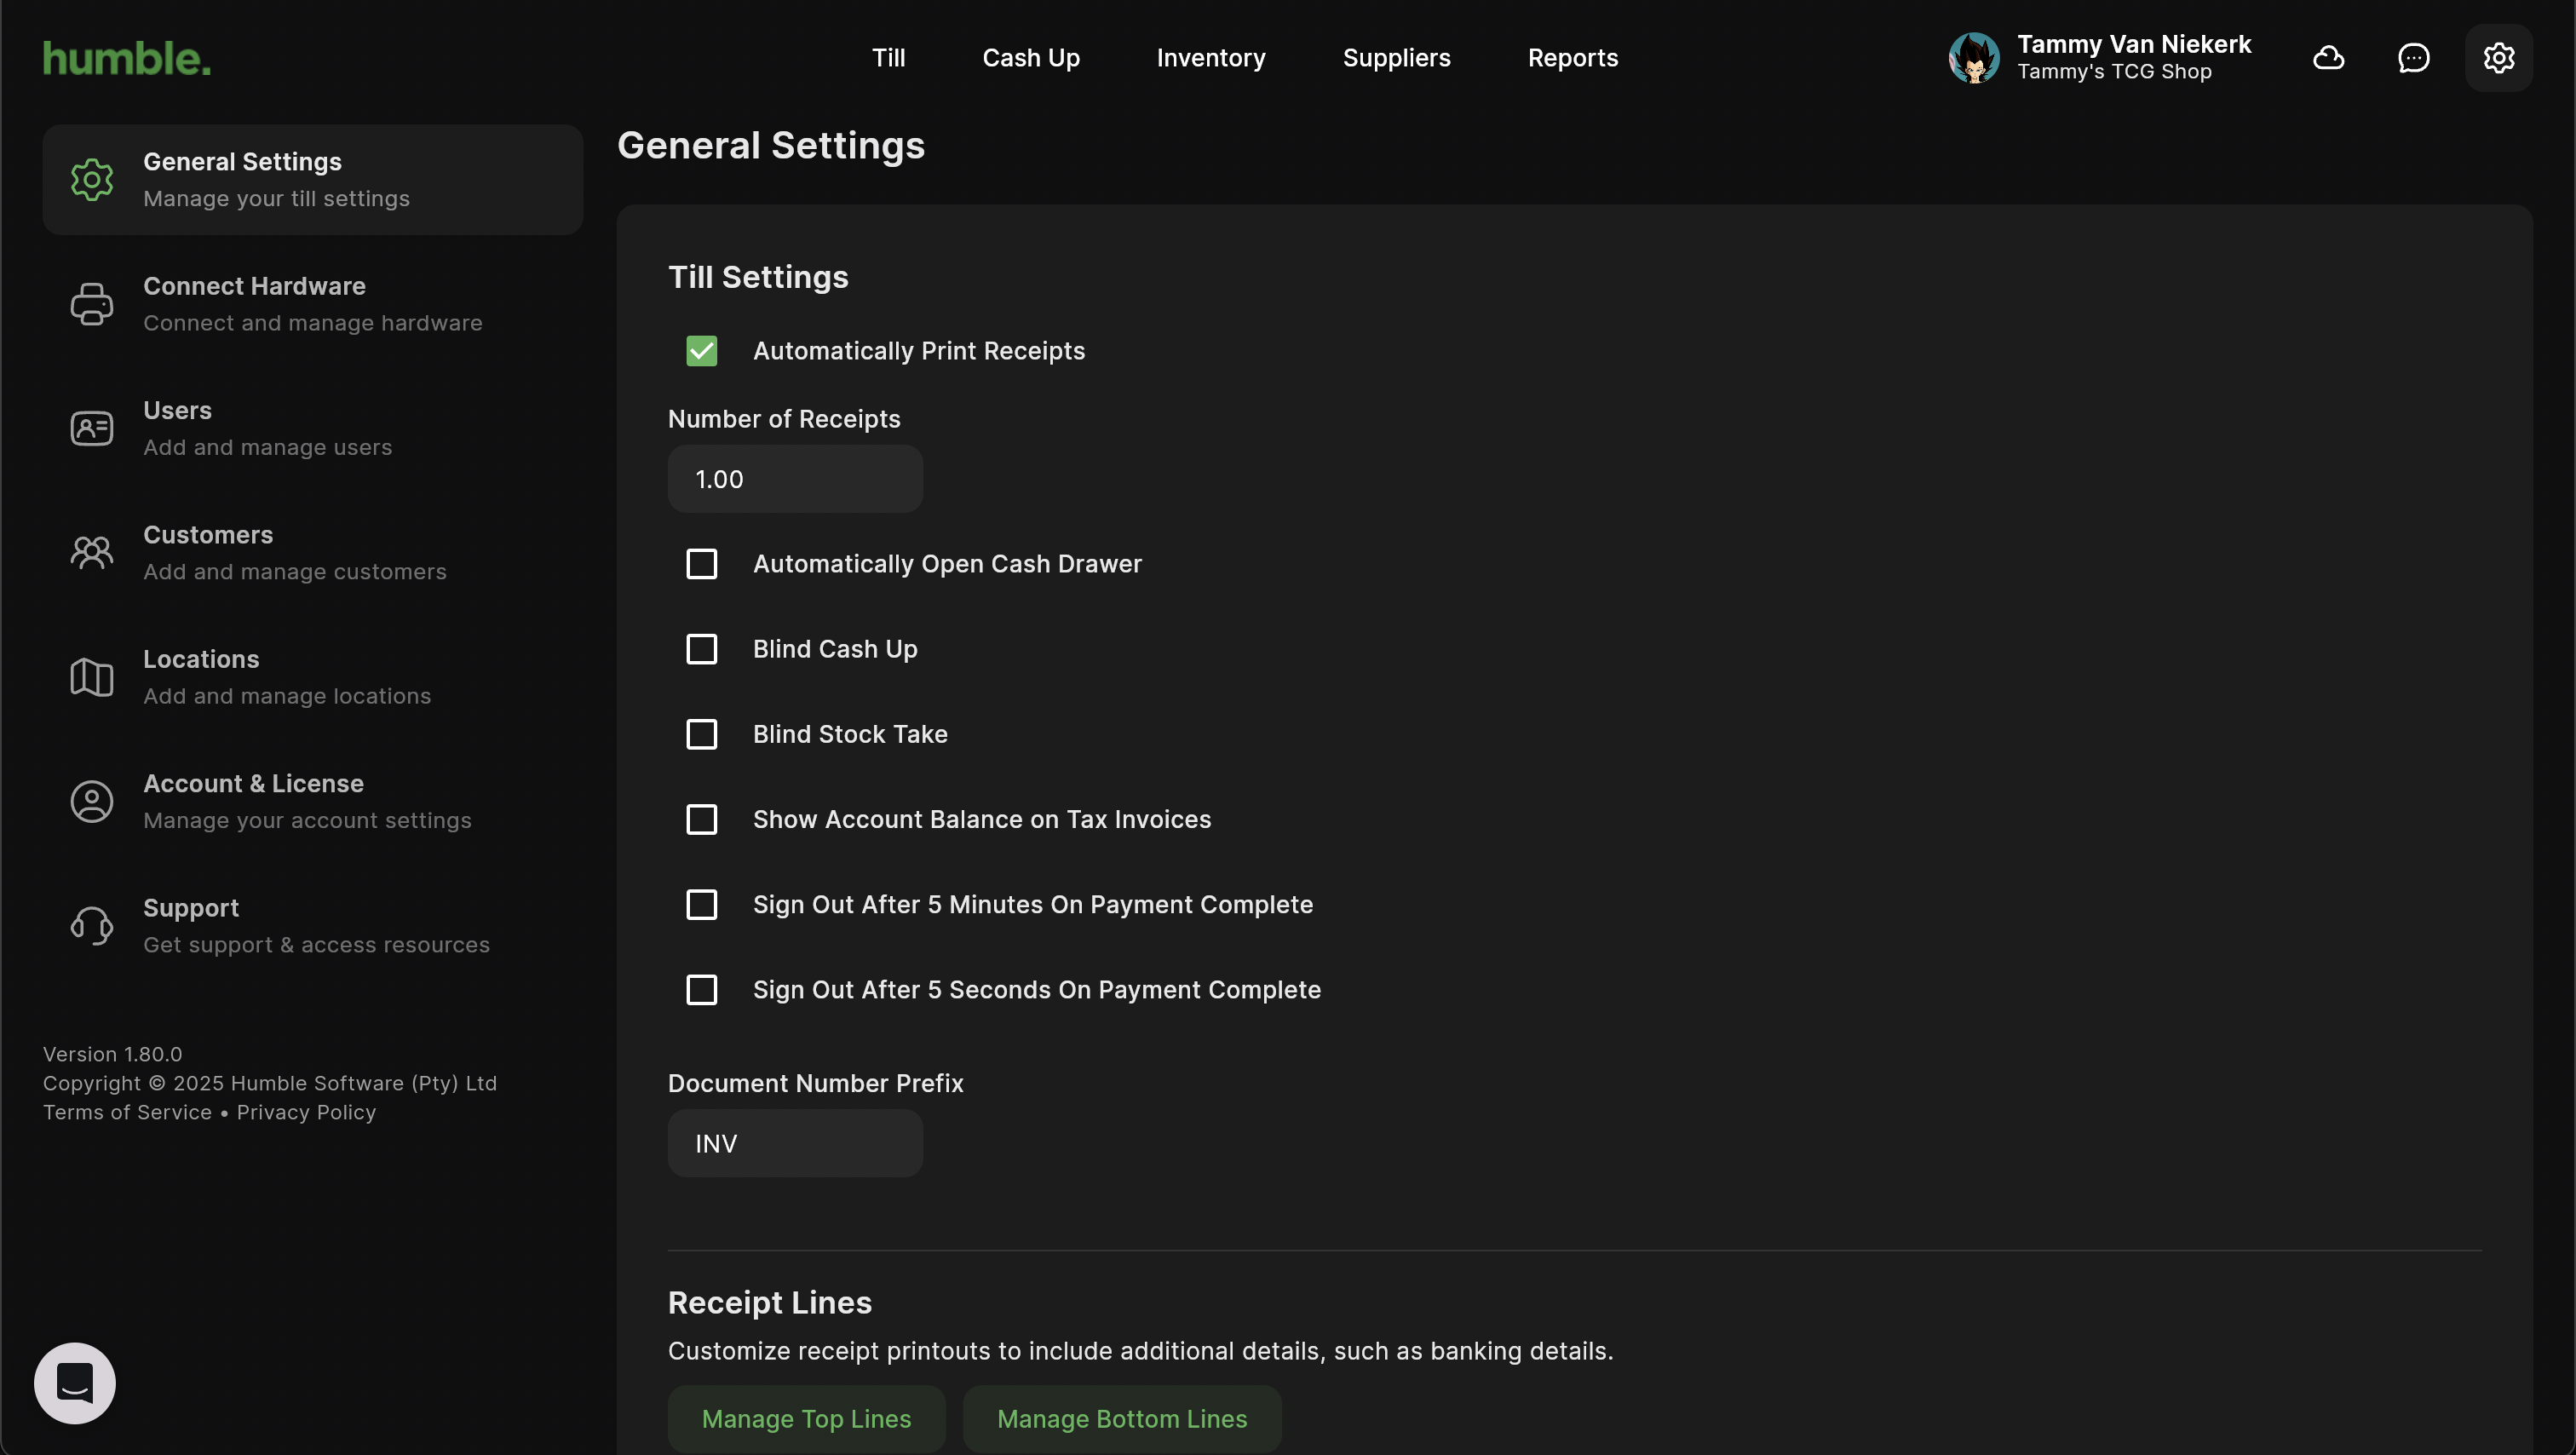
Till Settings
You Till settings include:
Automatically Print Receipts - This will print receipts automatically once a sale has been complete.
- Automatically Open Cash Drawer - This will allow you to use your cash drawer when you don't want to print receipts. Note: You will still need to have your cash drawer connected to your receipt printer.
Blind Cash Up - The “Amount Expected” values are hidden. The user can only see the Amount Counted columns. This can be used to prevent fraud.
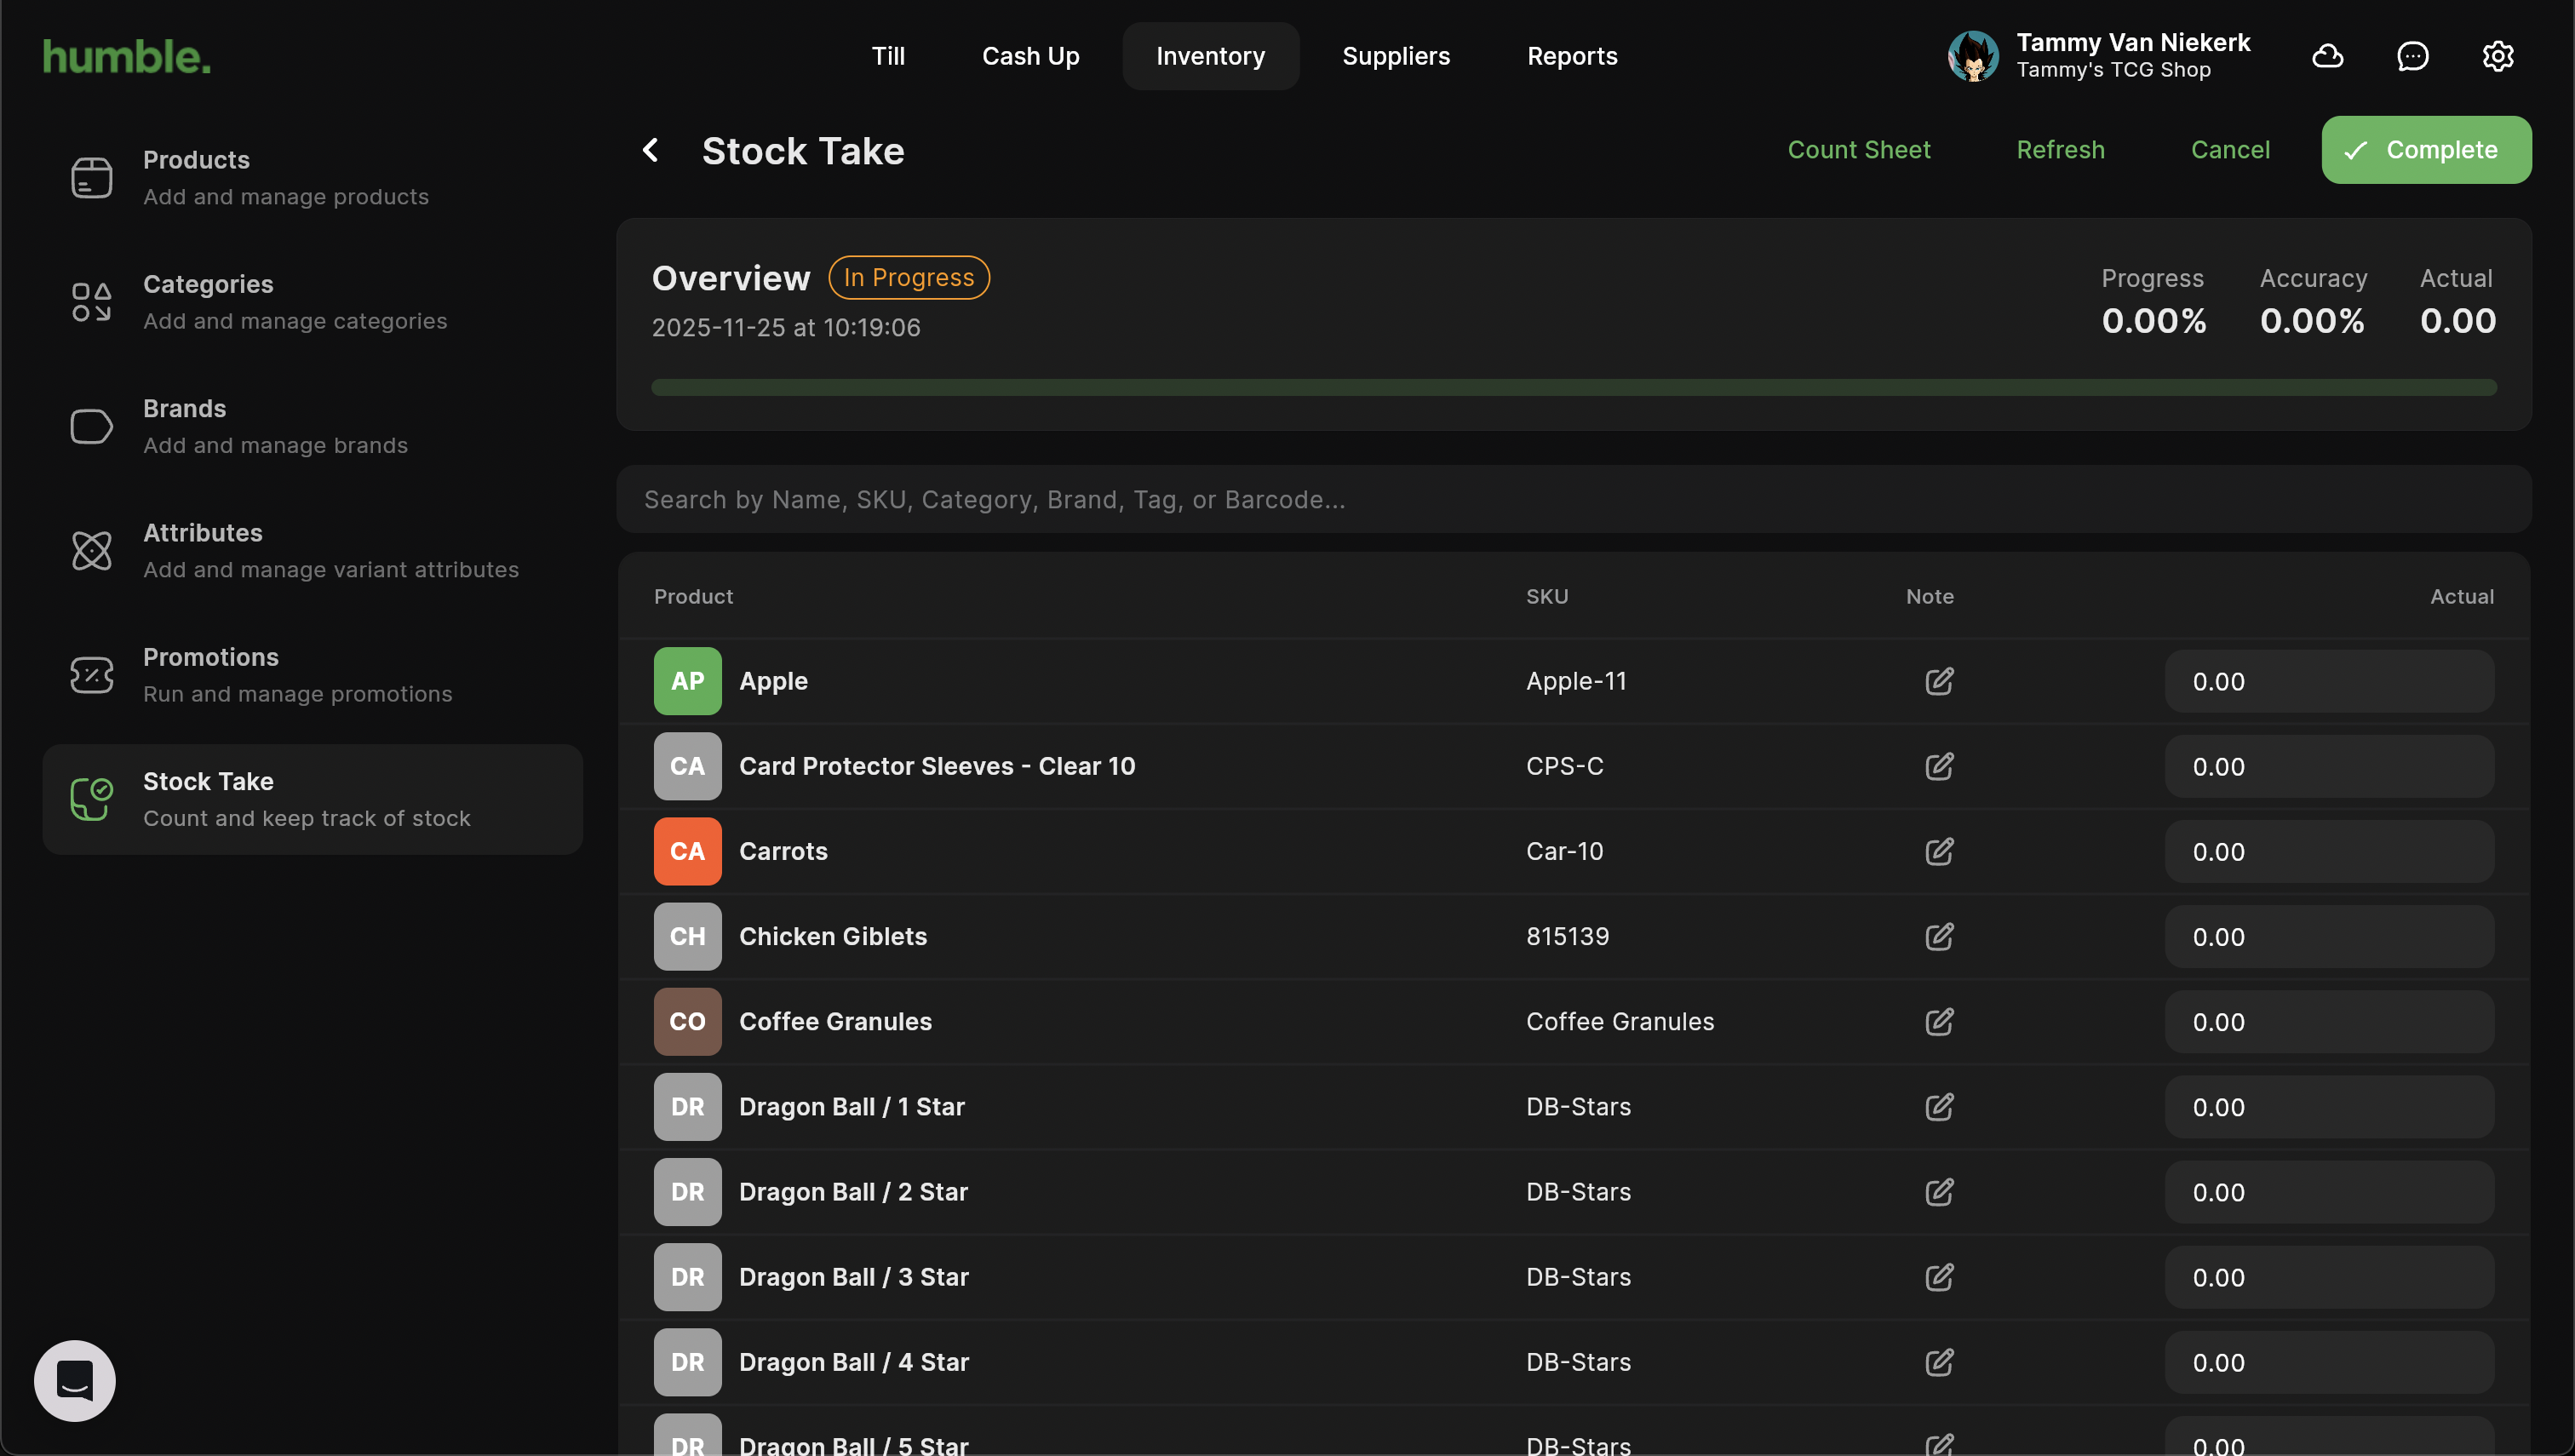
Blind Stock Take - The “Expected” column is hidden. The user can only see the “Actual” column to enter in the amounts that they have counted. This can be used to prevent fraud.
Show Account Balance on Tax Invoices - This will hide/show the customer's account balance before the sale and after the sale. The balances will show on the PDF and a printed receipt. Note: The balances will only show on a sale if it was completed with the Account tender.
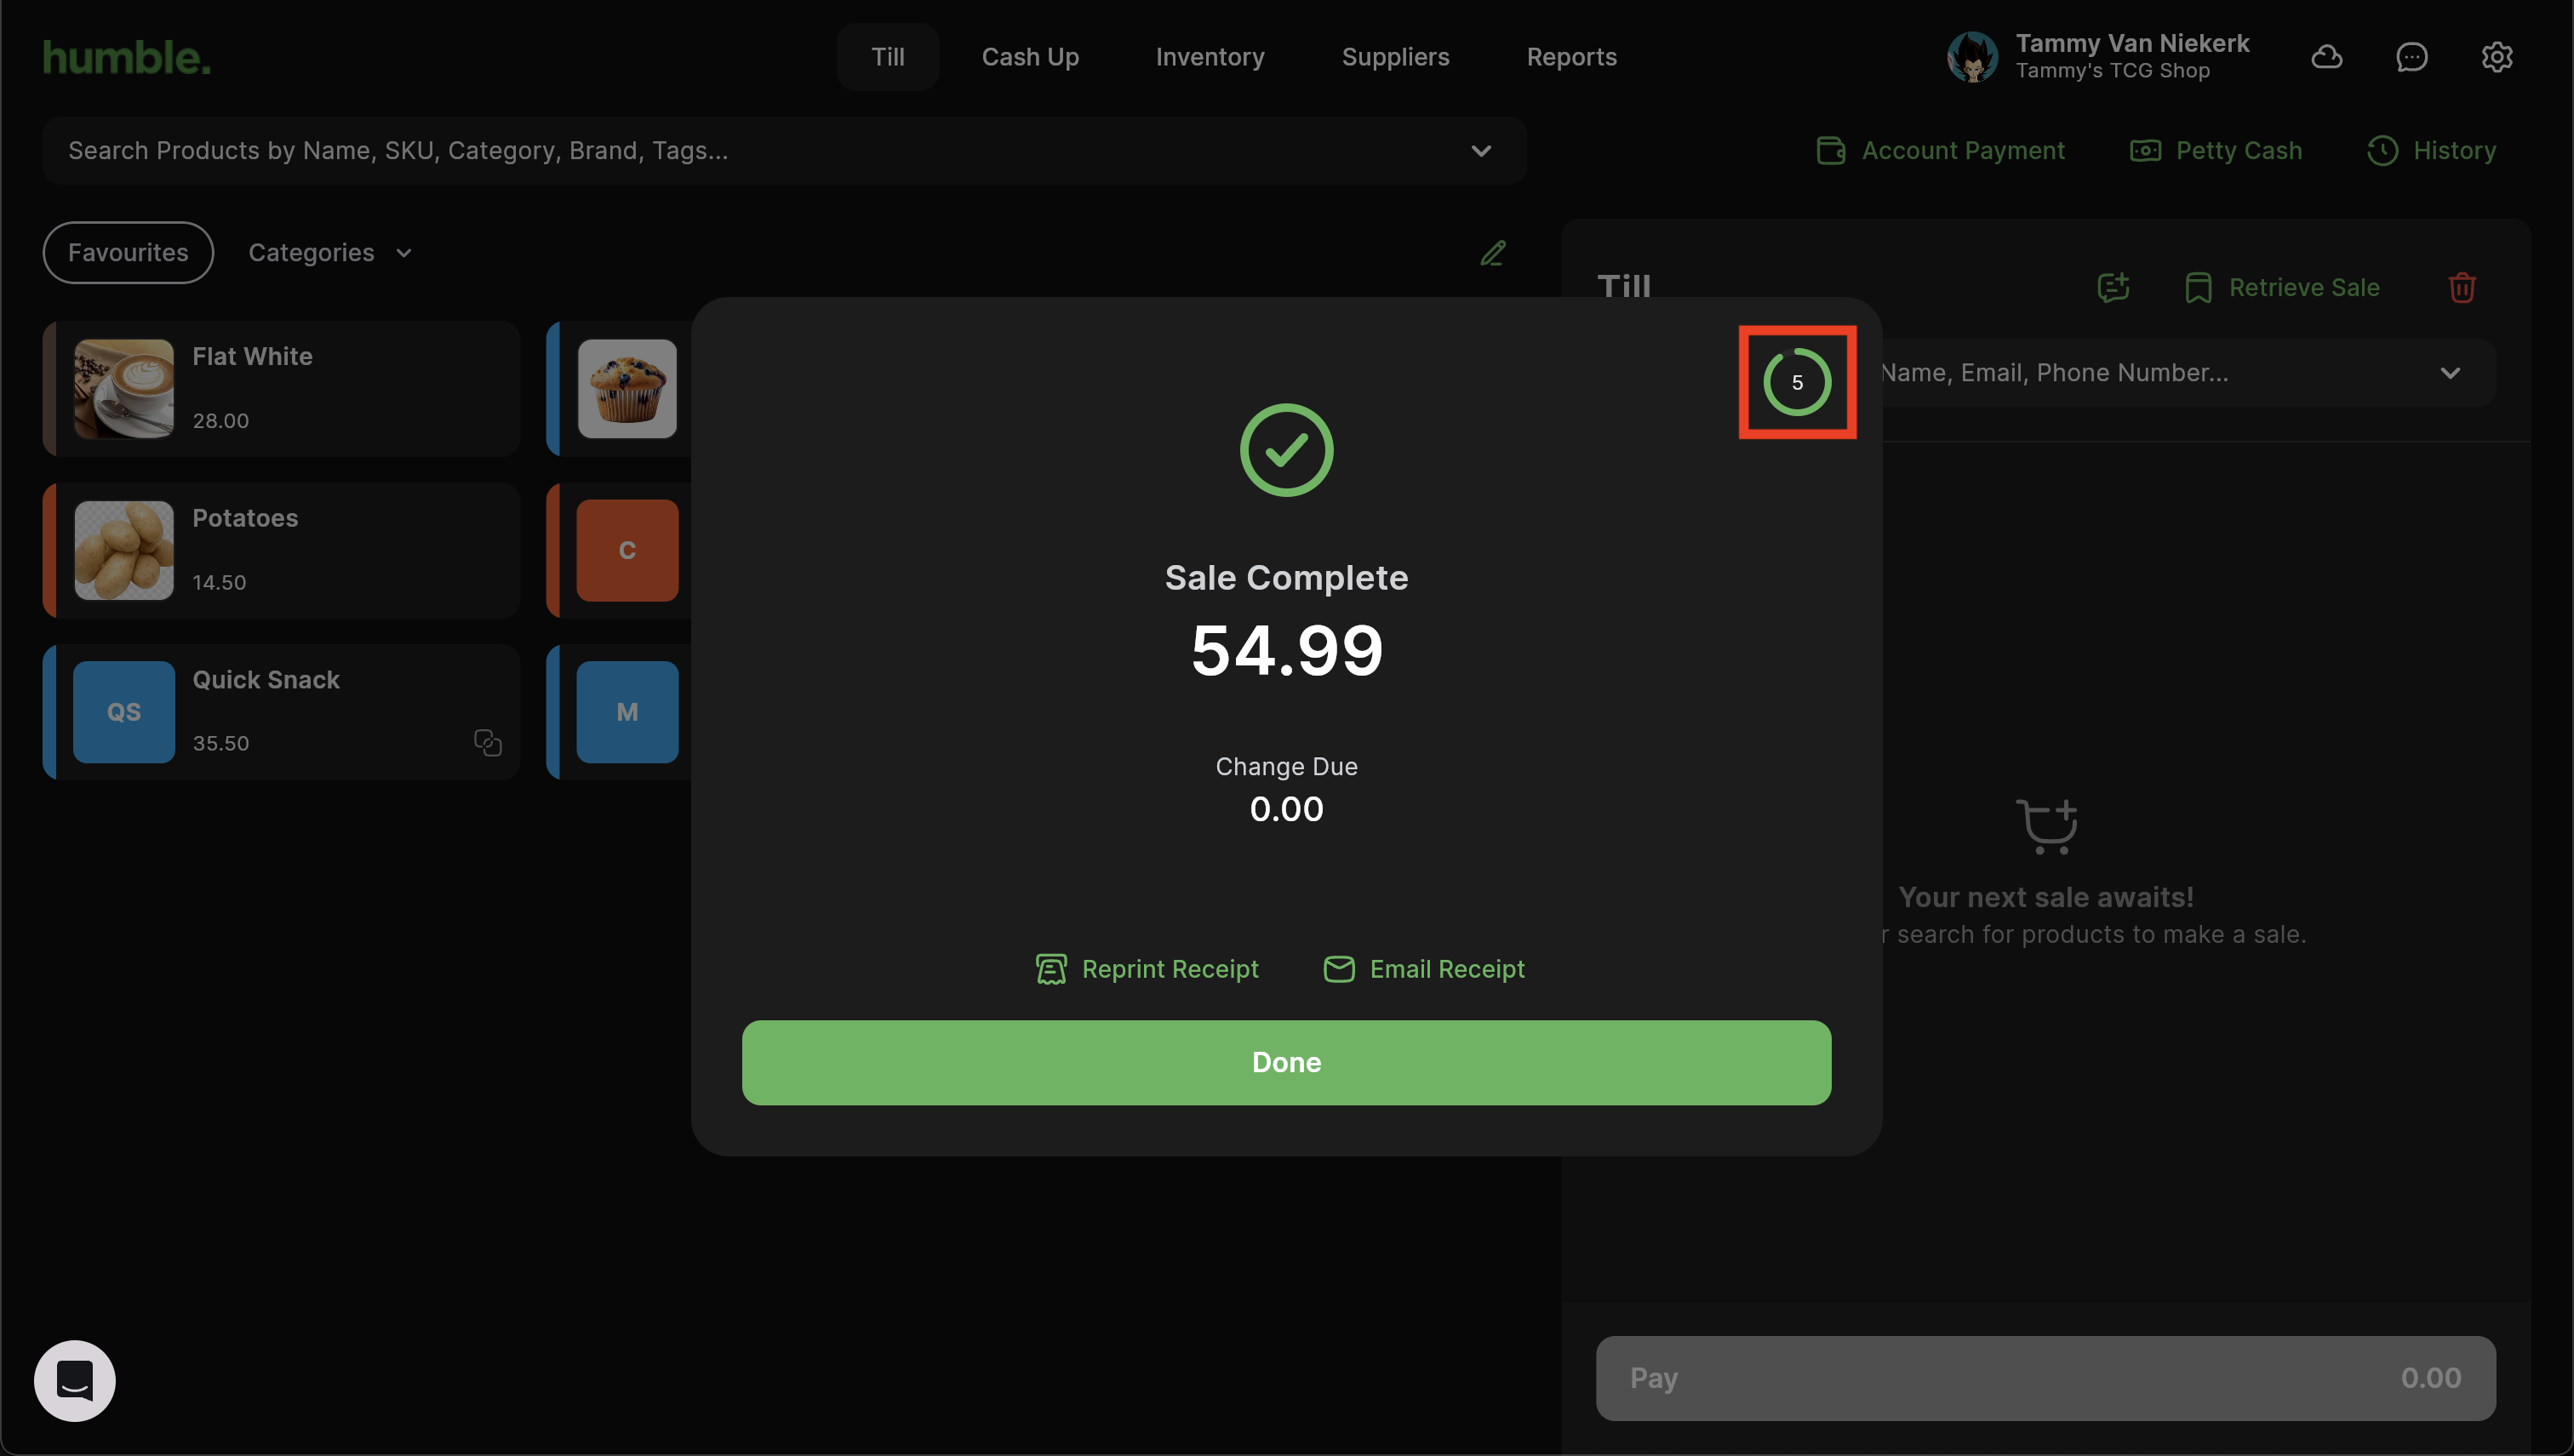
Sign Out After 5 Minutes On Payment Complete - After completing the sale, a timer will be visible on the top right hand side. It will count down from 300 seconds (5 minutes). Once the 5 minutes is up, the user will be automatically logged out. Note: Clicking Done will cancel the log out timer.

Sign Out After 5 Seconds On Payment Complete - After completing the sale, a timer will be visible on the top right hand side. It will count down from 5 seconds. Once the 5 seconds is up, the user will be automatically logged out. Note: Clicking Done will cancel the log out timer.
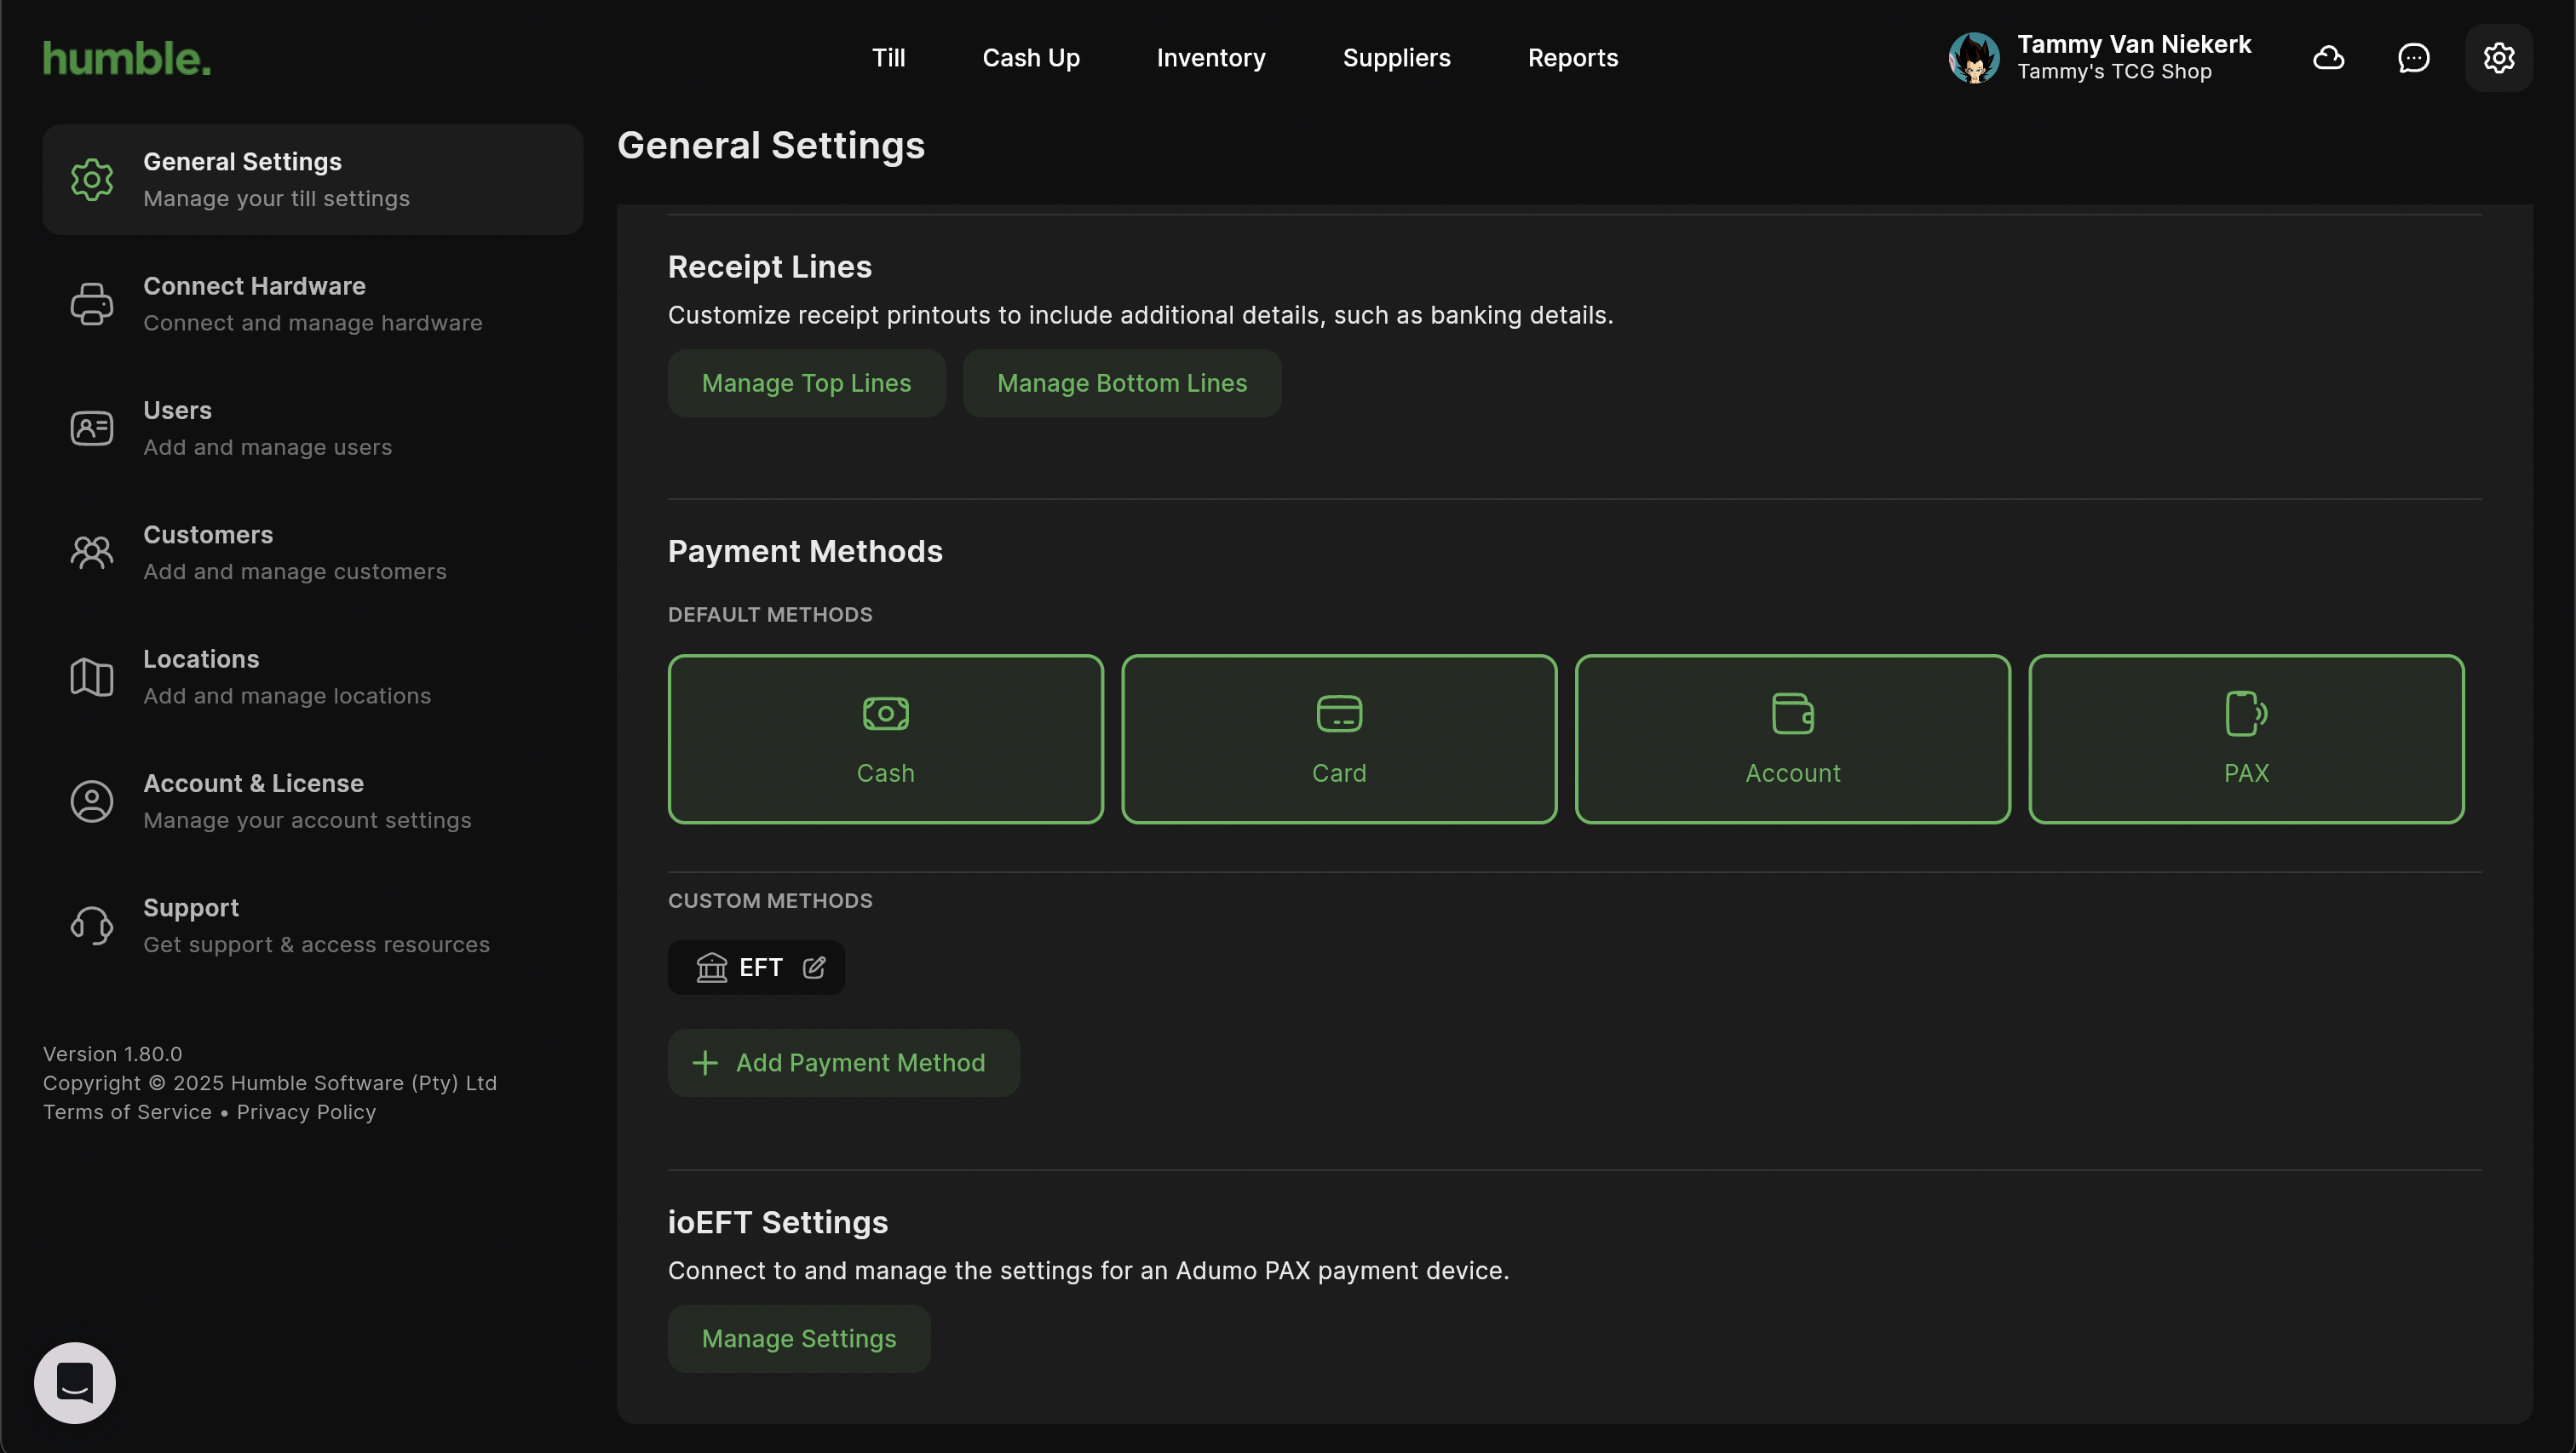
Payment Methods
Also known as Tender Types, your Payment Methods will be needed in order to complete a sale. These are the same as the ones created/selected during onboarding (link to getting Started page).
The three main tenders are visible, making selection super easy and quick:
Cash
Card
Account
Clicking them toggles their availability on your till. If you deselect any and find in future that you will need them, you will be able to add them back in this screen. “Add Payment Method” allows you to add additional tenders.
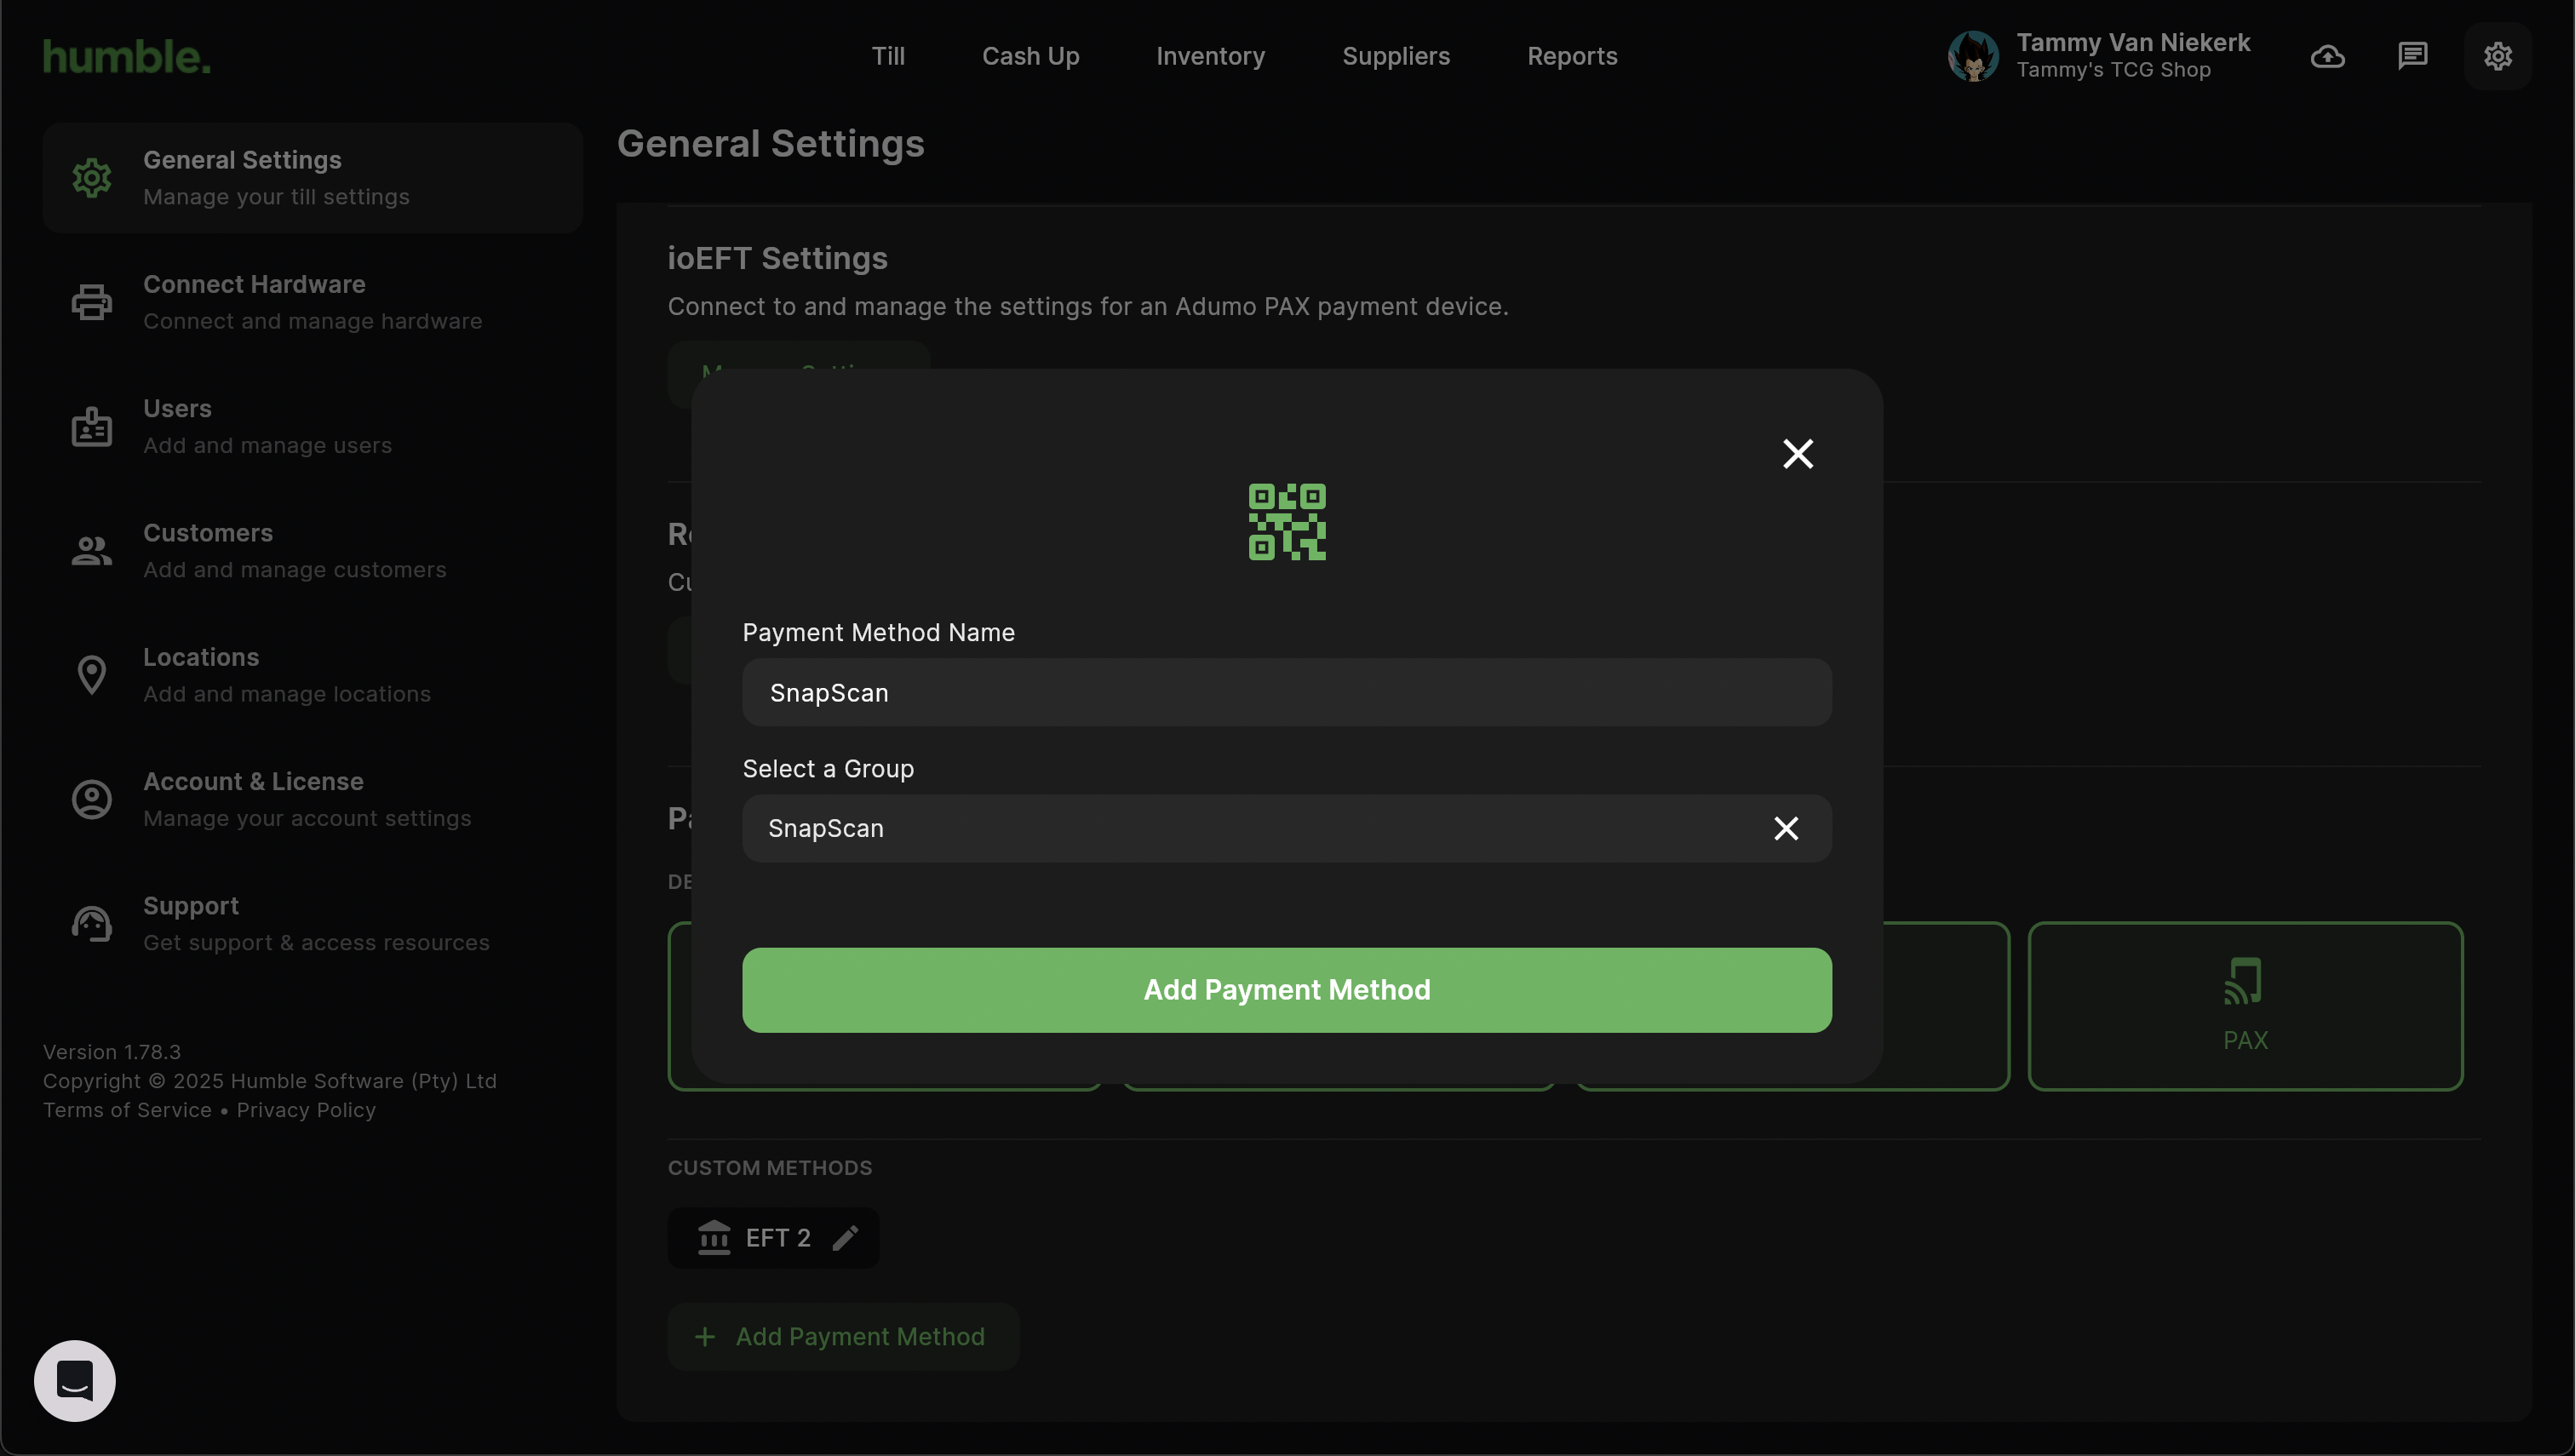
Please ensure that you have added a Payment Method Name as well as selected a group e.g. SnapScan, EFT before clicking “Add Payment Method”. Once the payment method has been added, you will be able to complete sales with this new payment method.
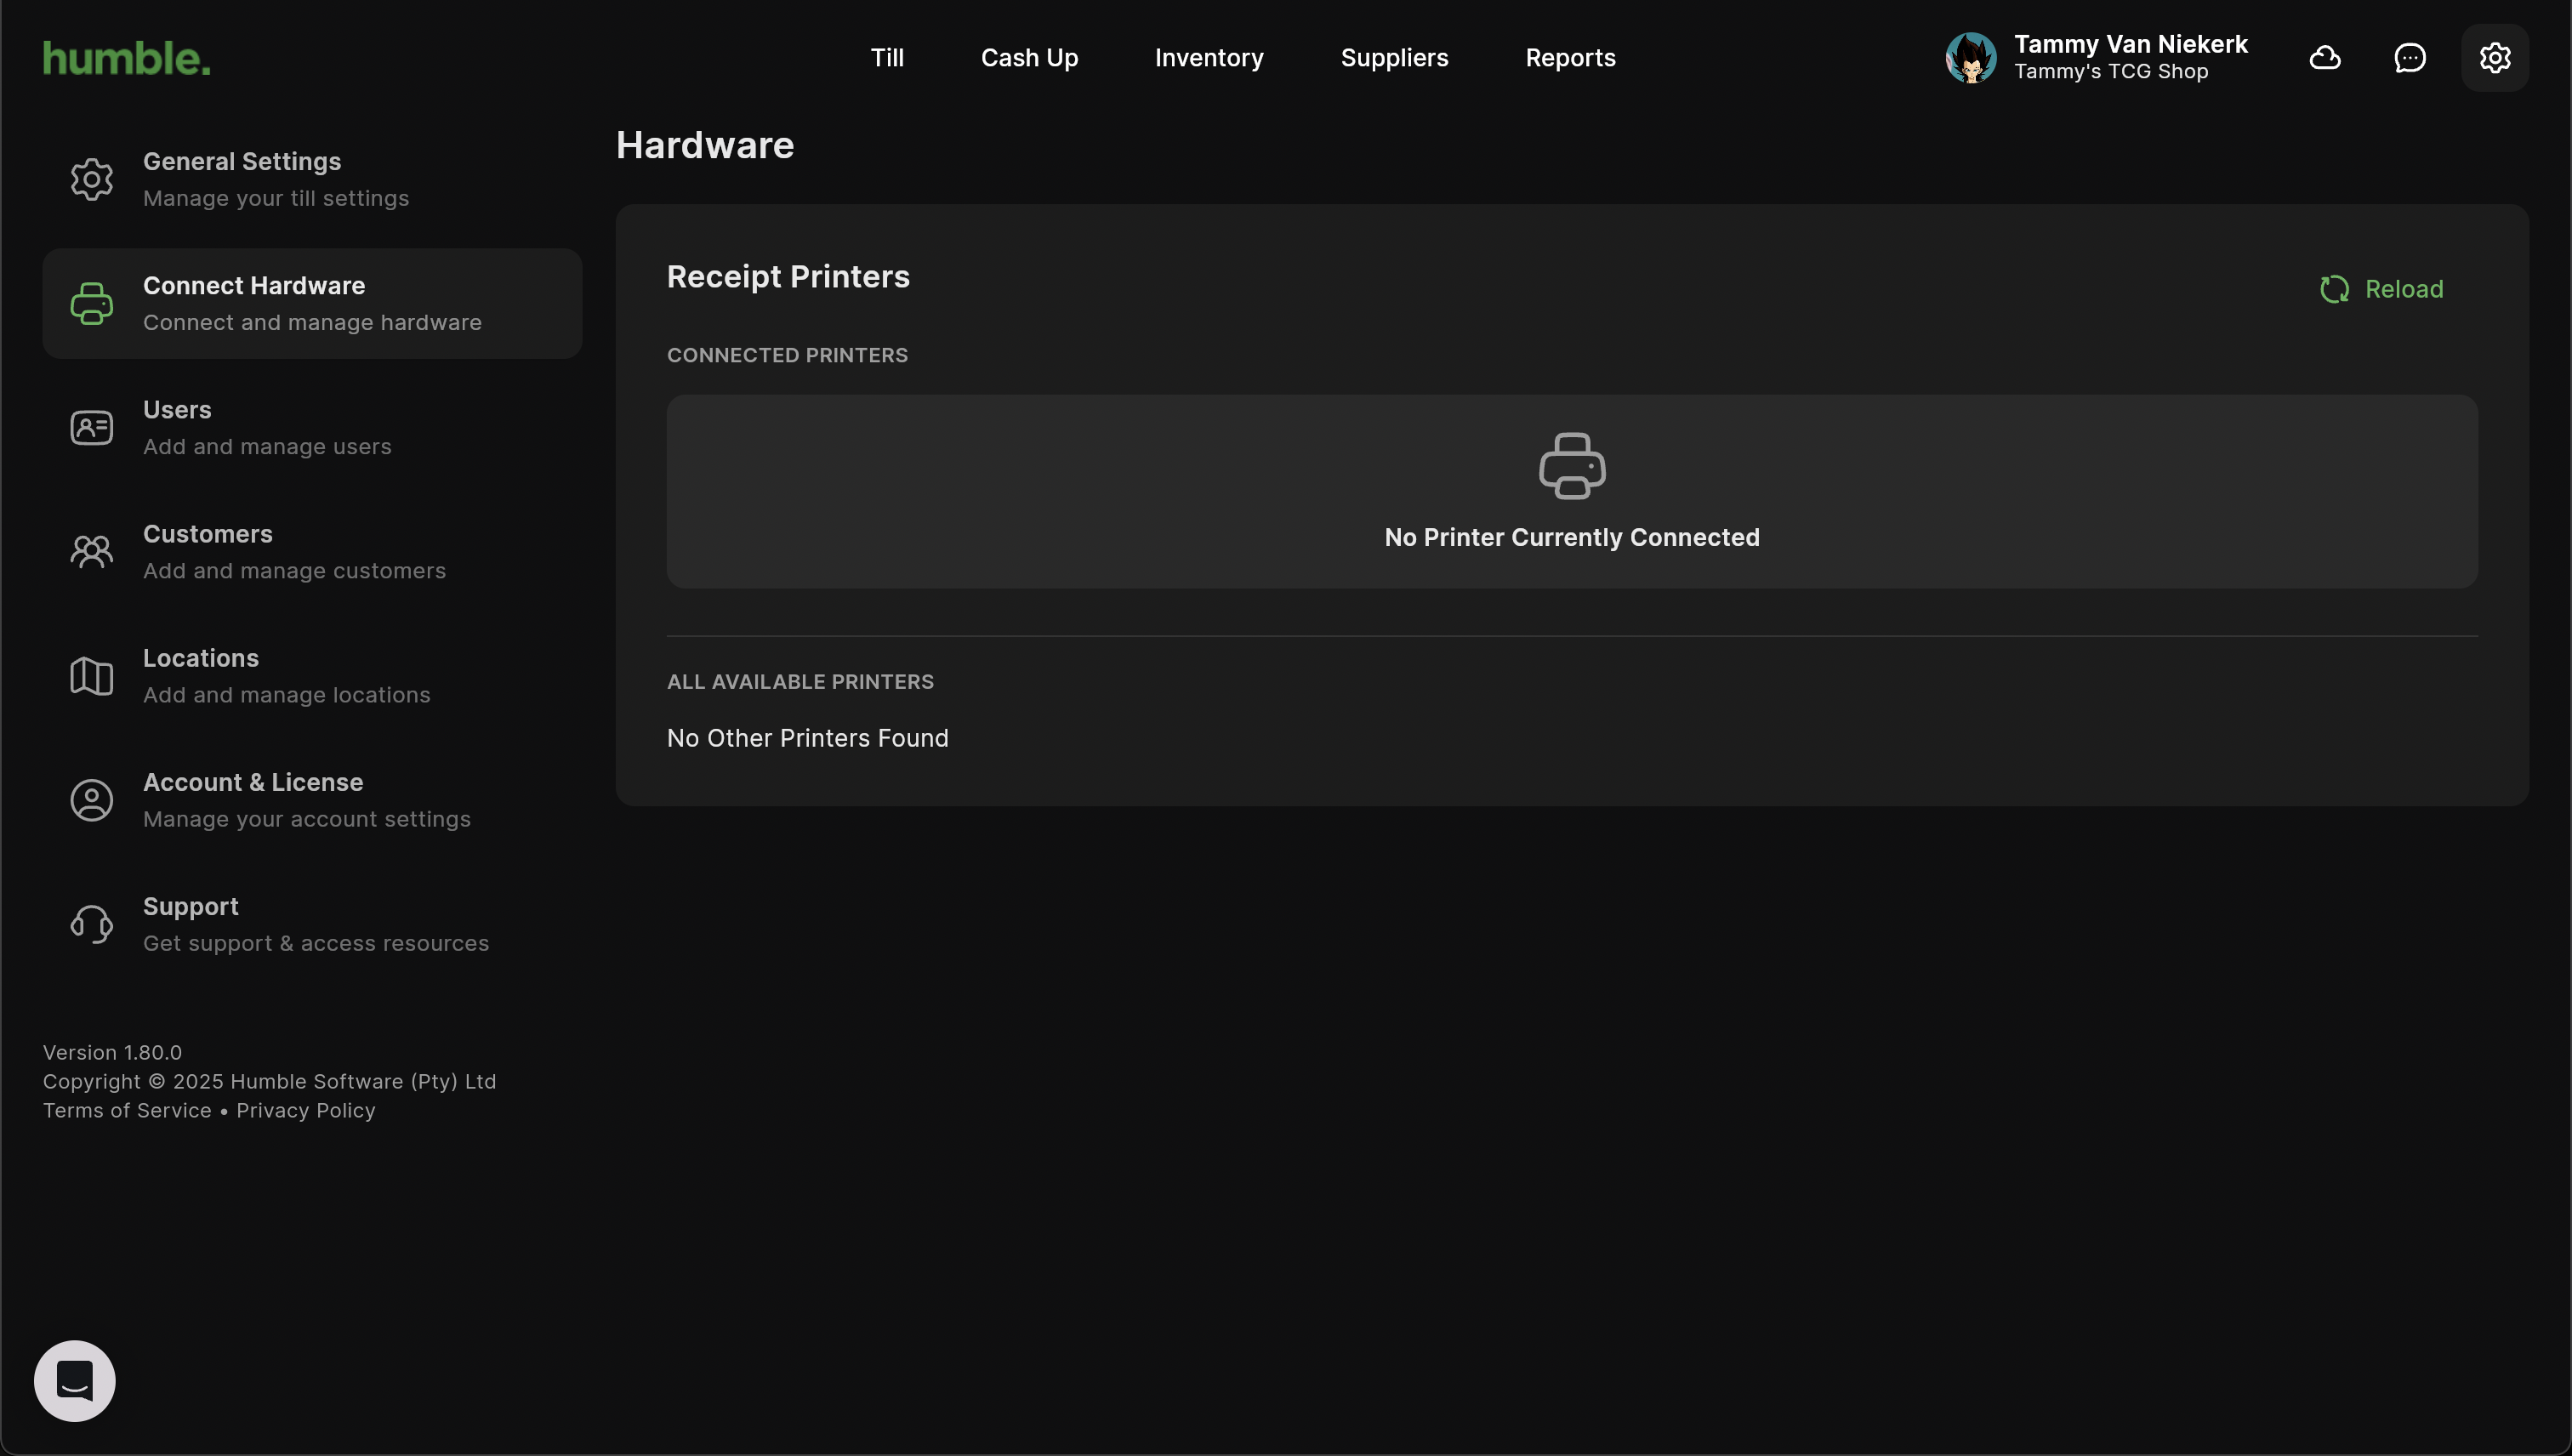
Connect Hardware
Receipt Printers
If you have not set up a printer yet, the system will first search for a printer.
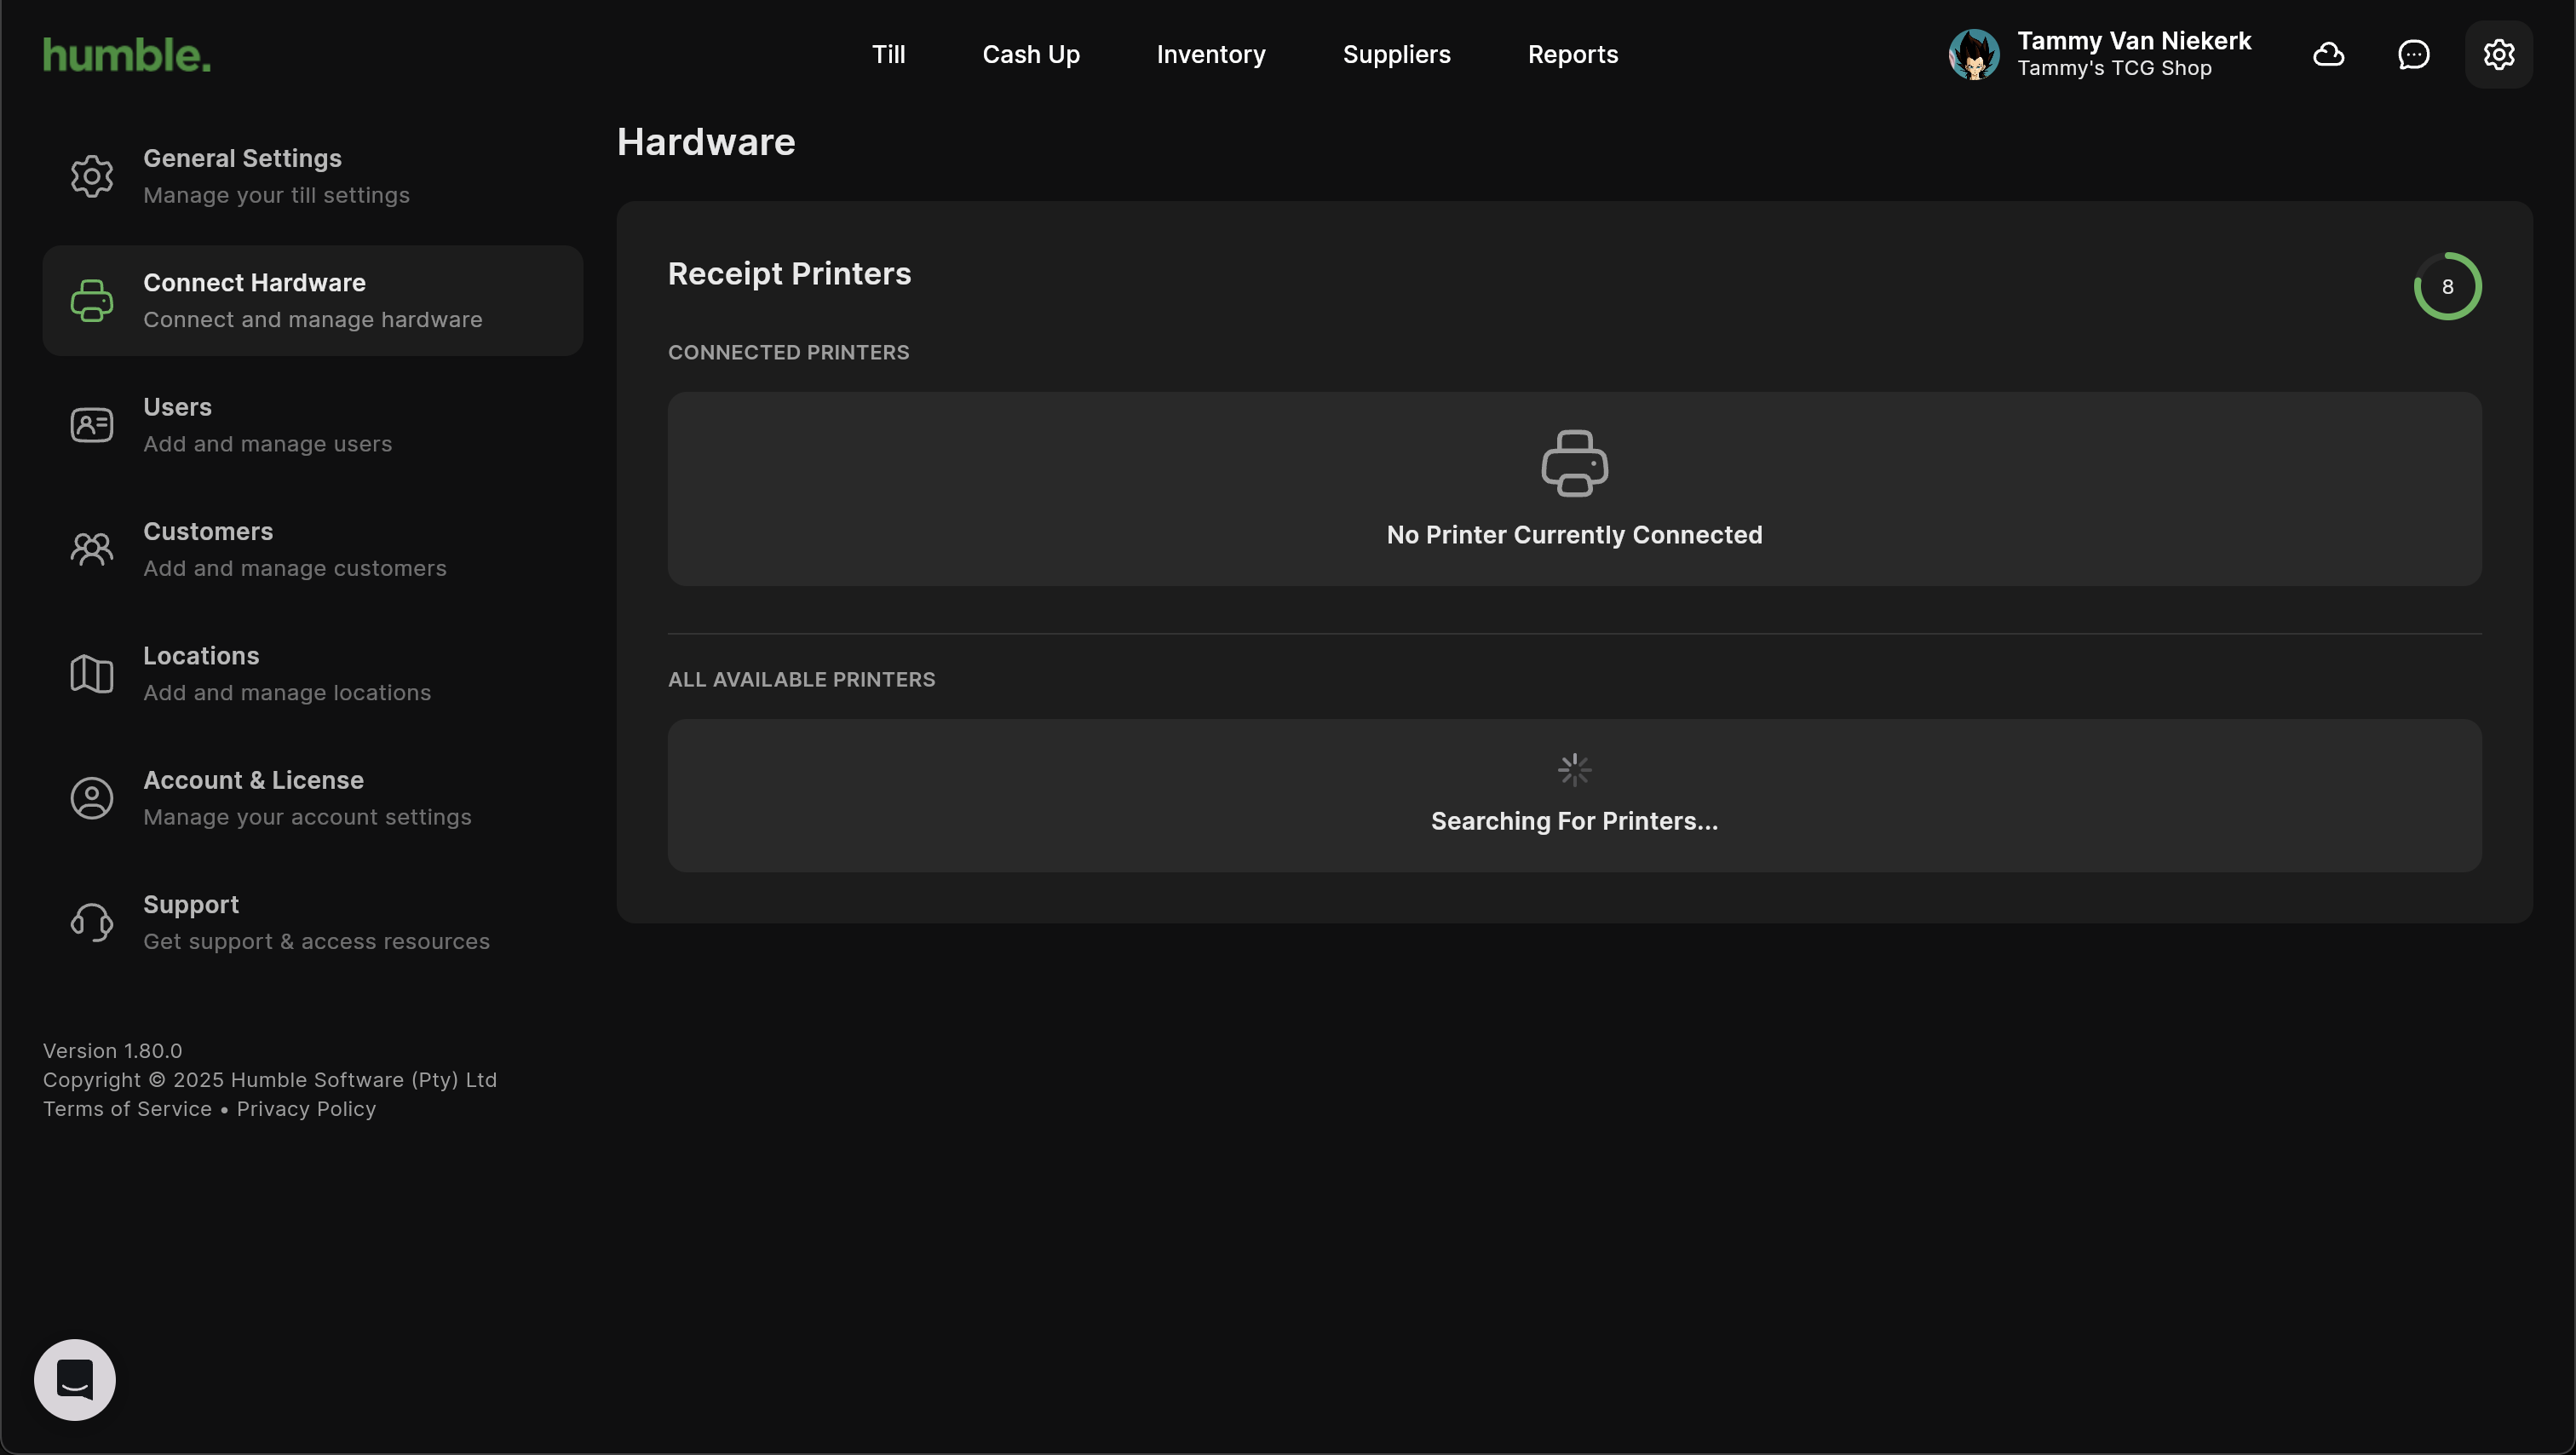
If you do not have a printer connected or in range, you will see the following:
Once your printer is connected you can click Reload. Your printer will then show in the All Available Printers list.
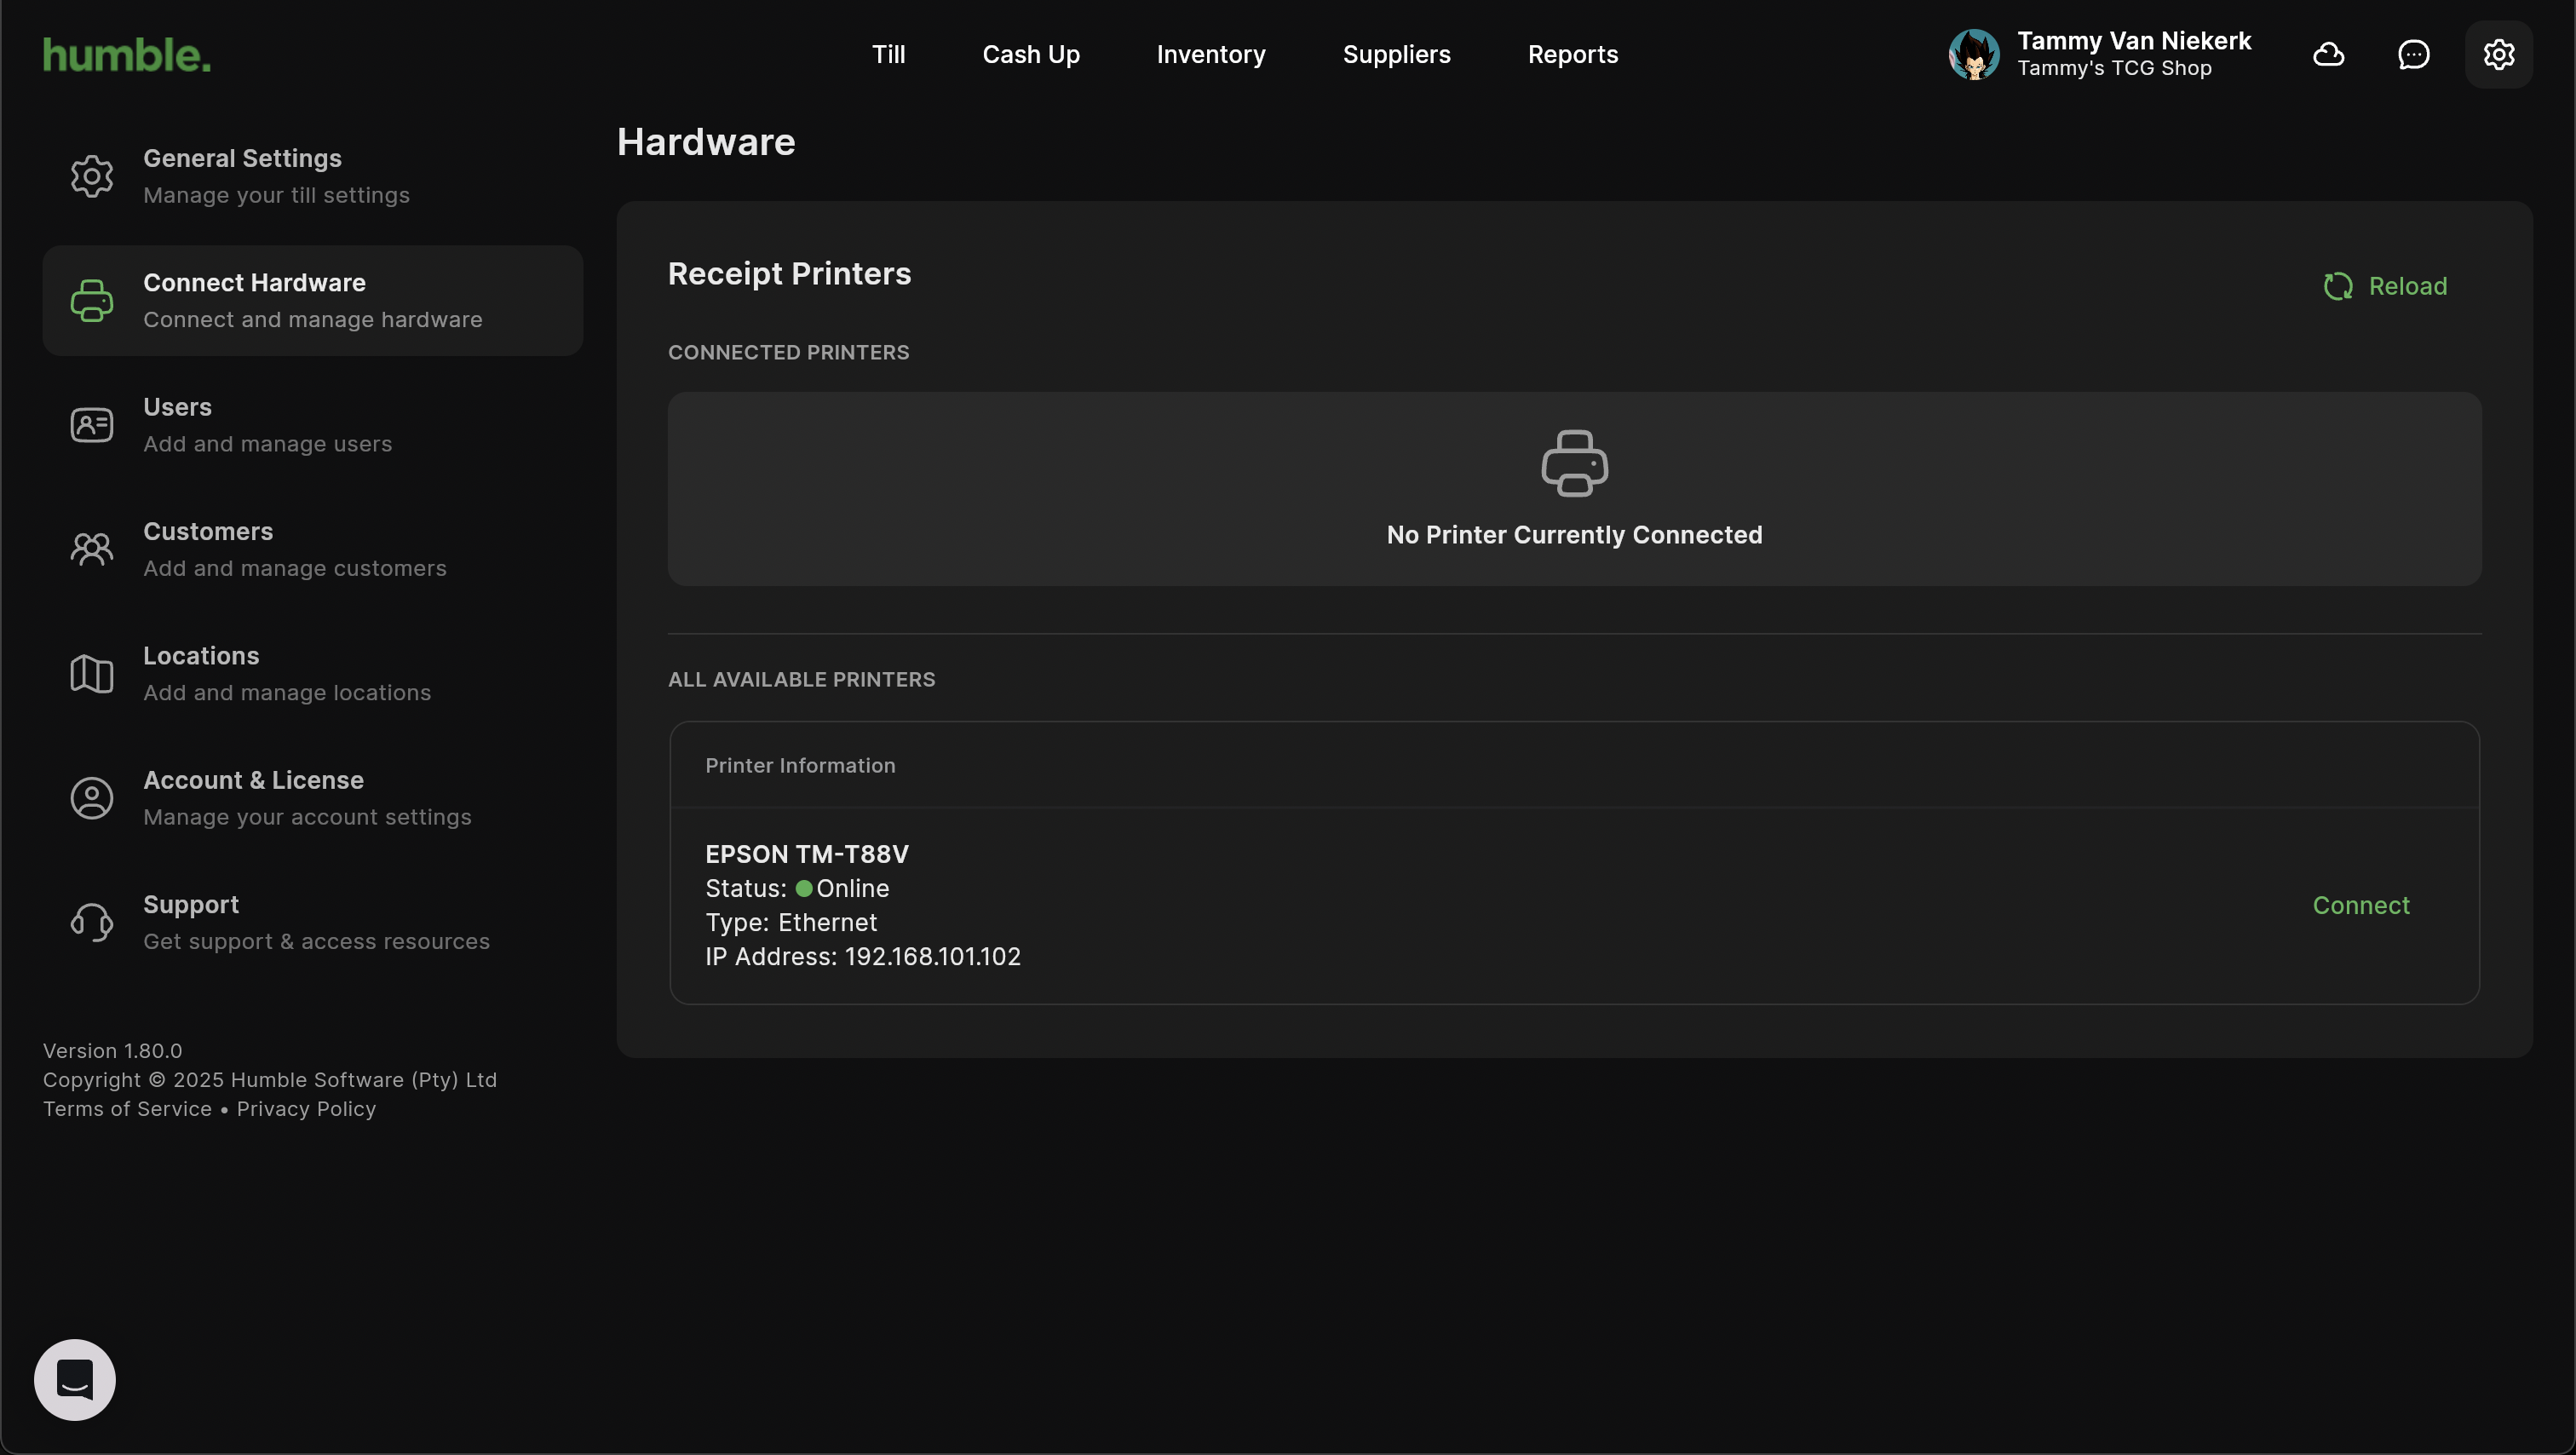
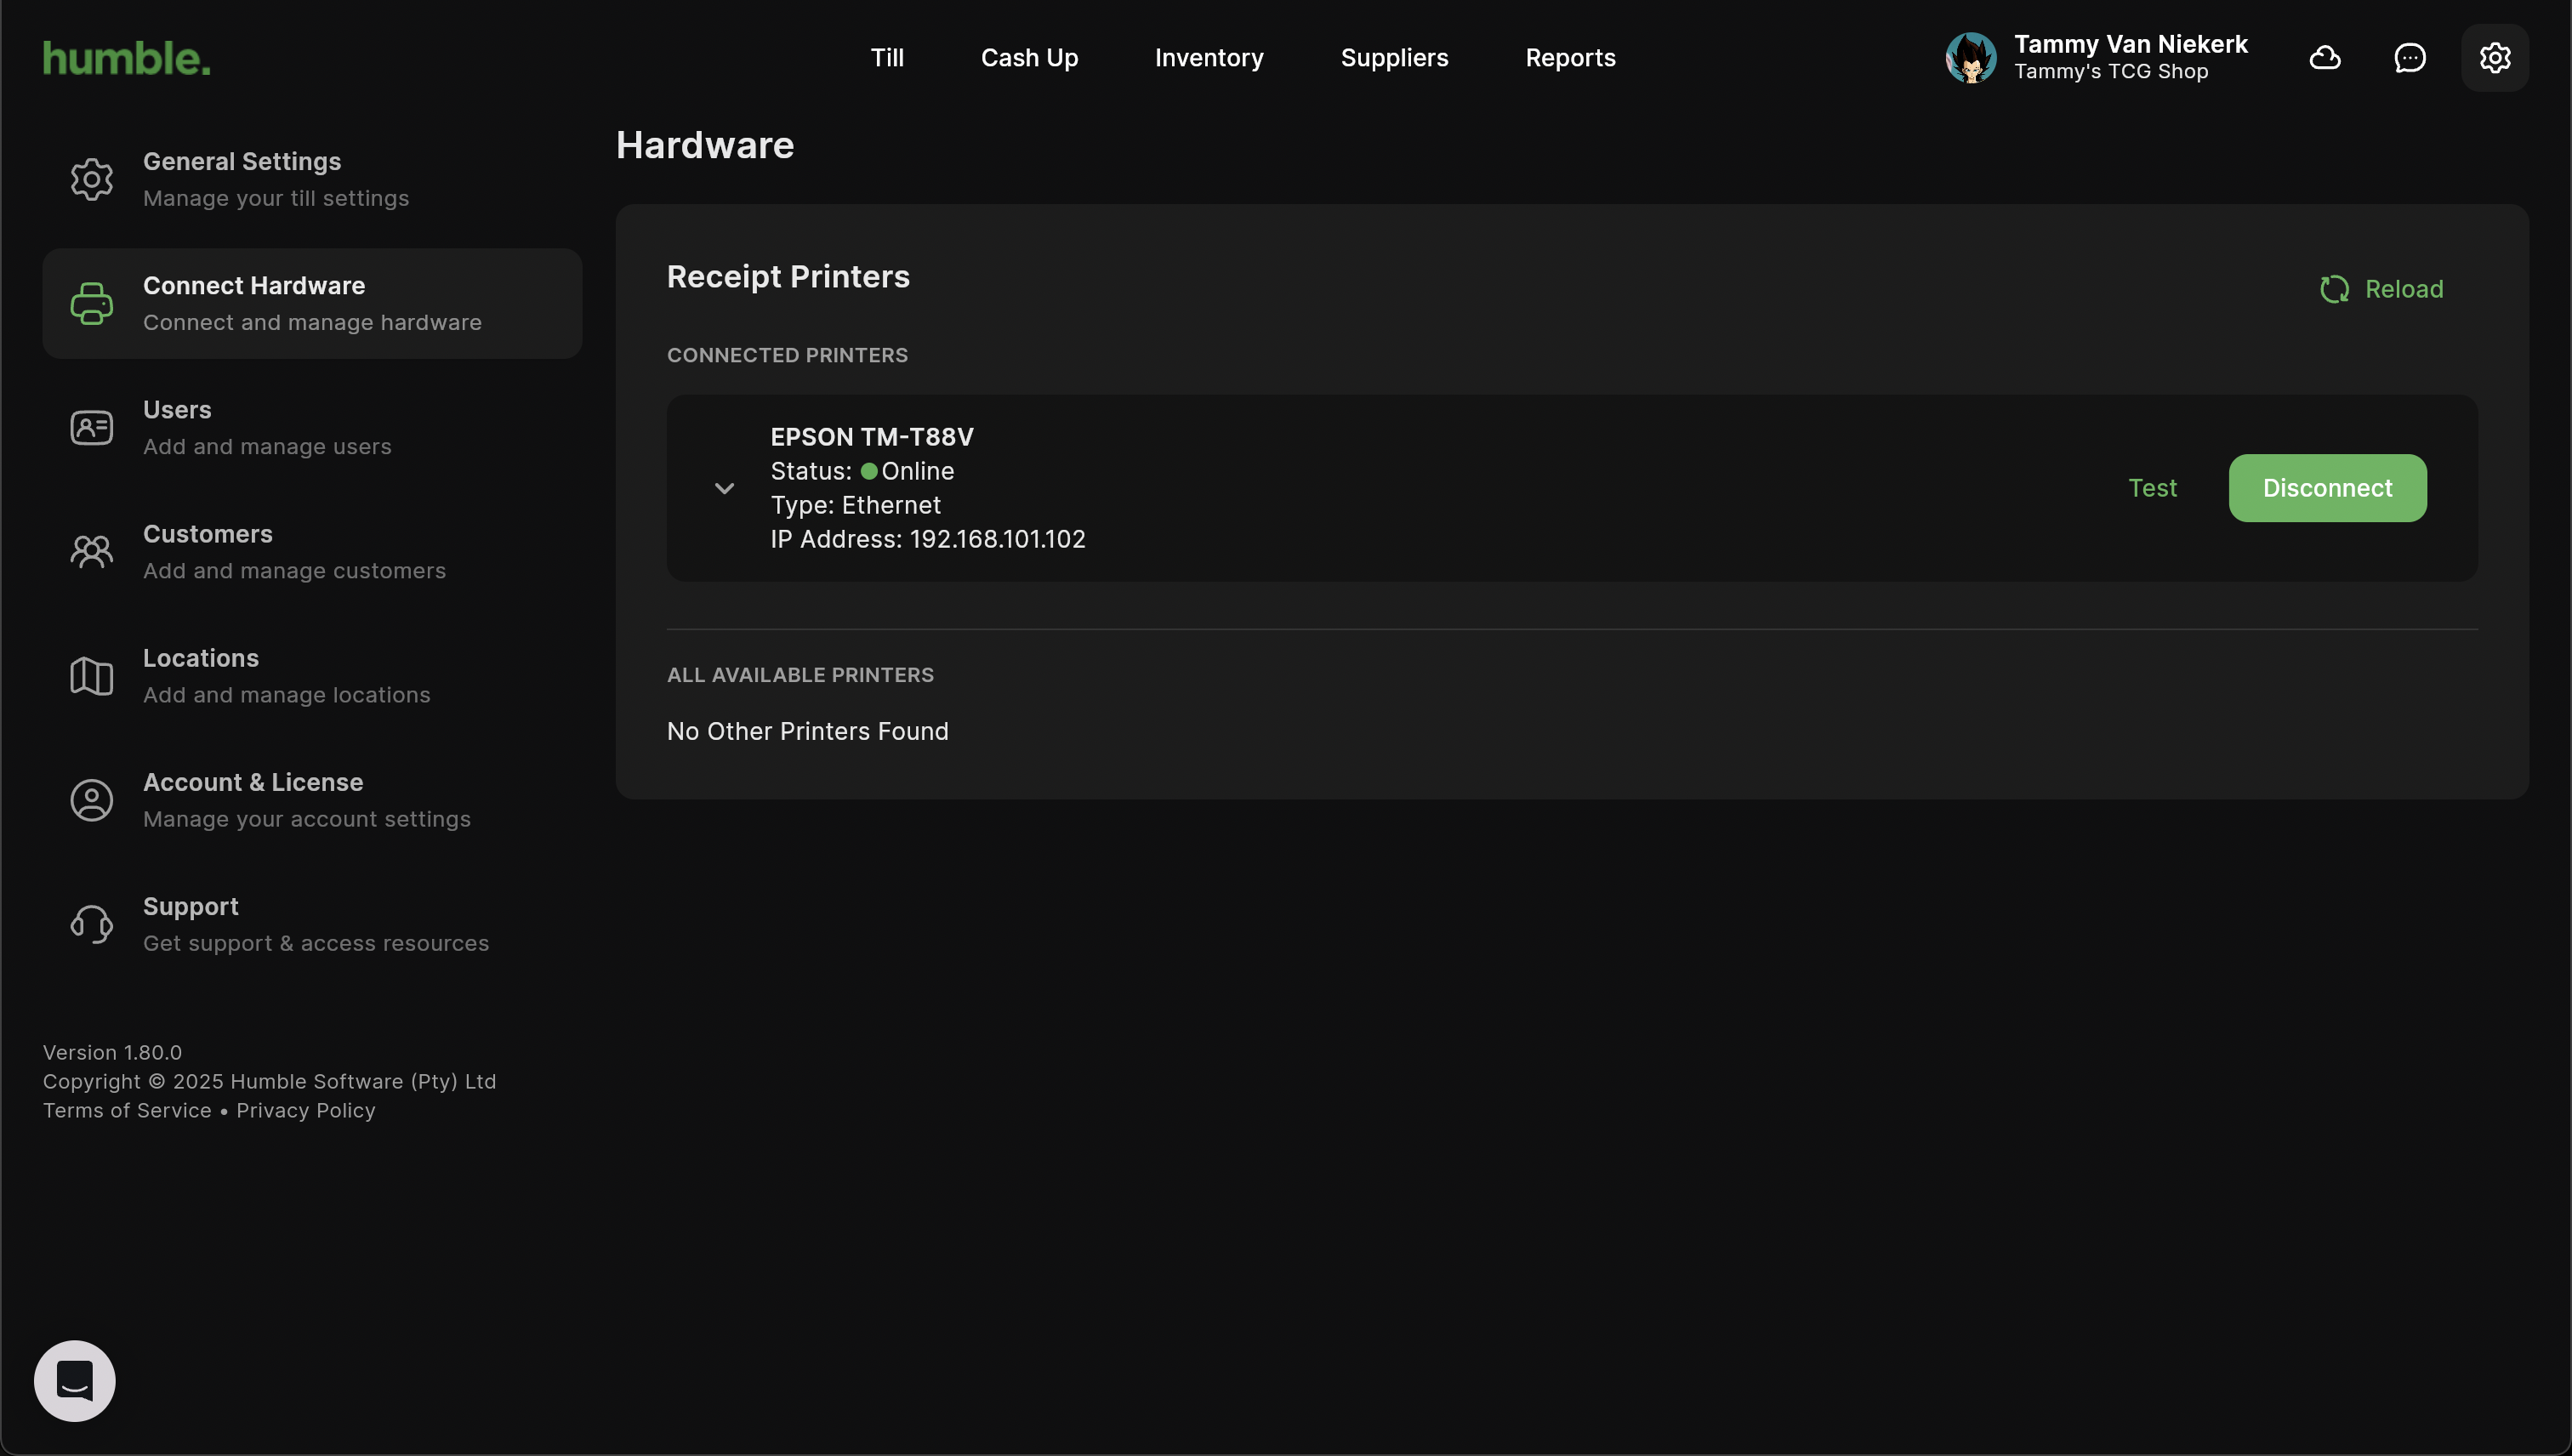
Click Connect to connect your printer. Once connected, you can select the Width, print a Test page or Disconnect your current printer to connect another printer.
Once connected, you will be able to print receipts to your receipt printer.
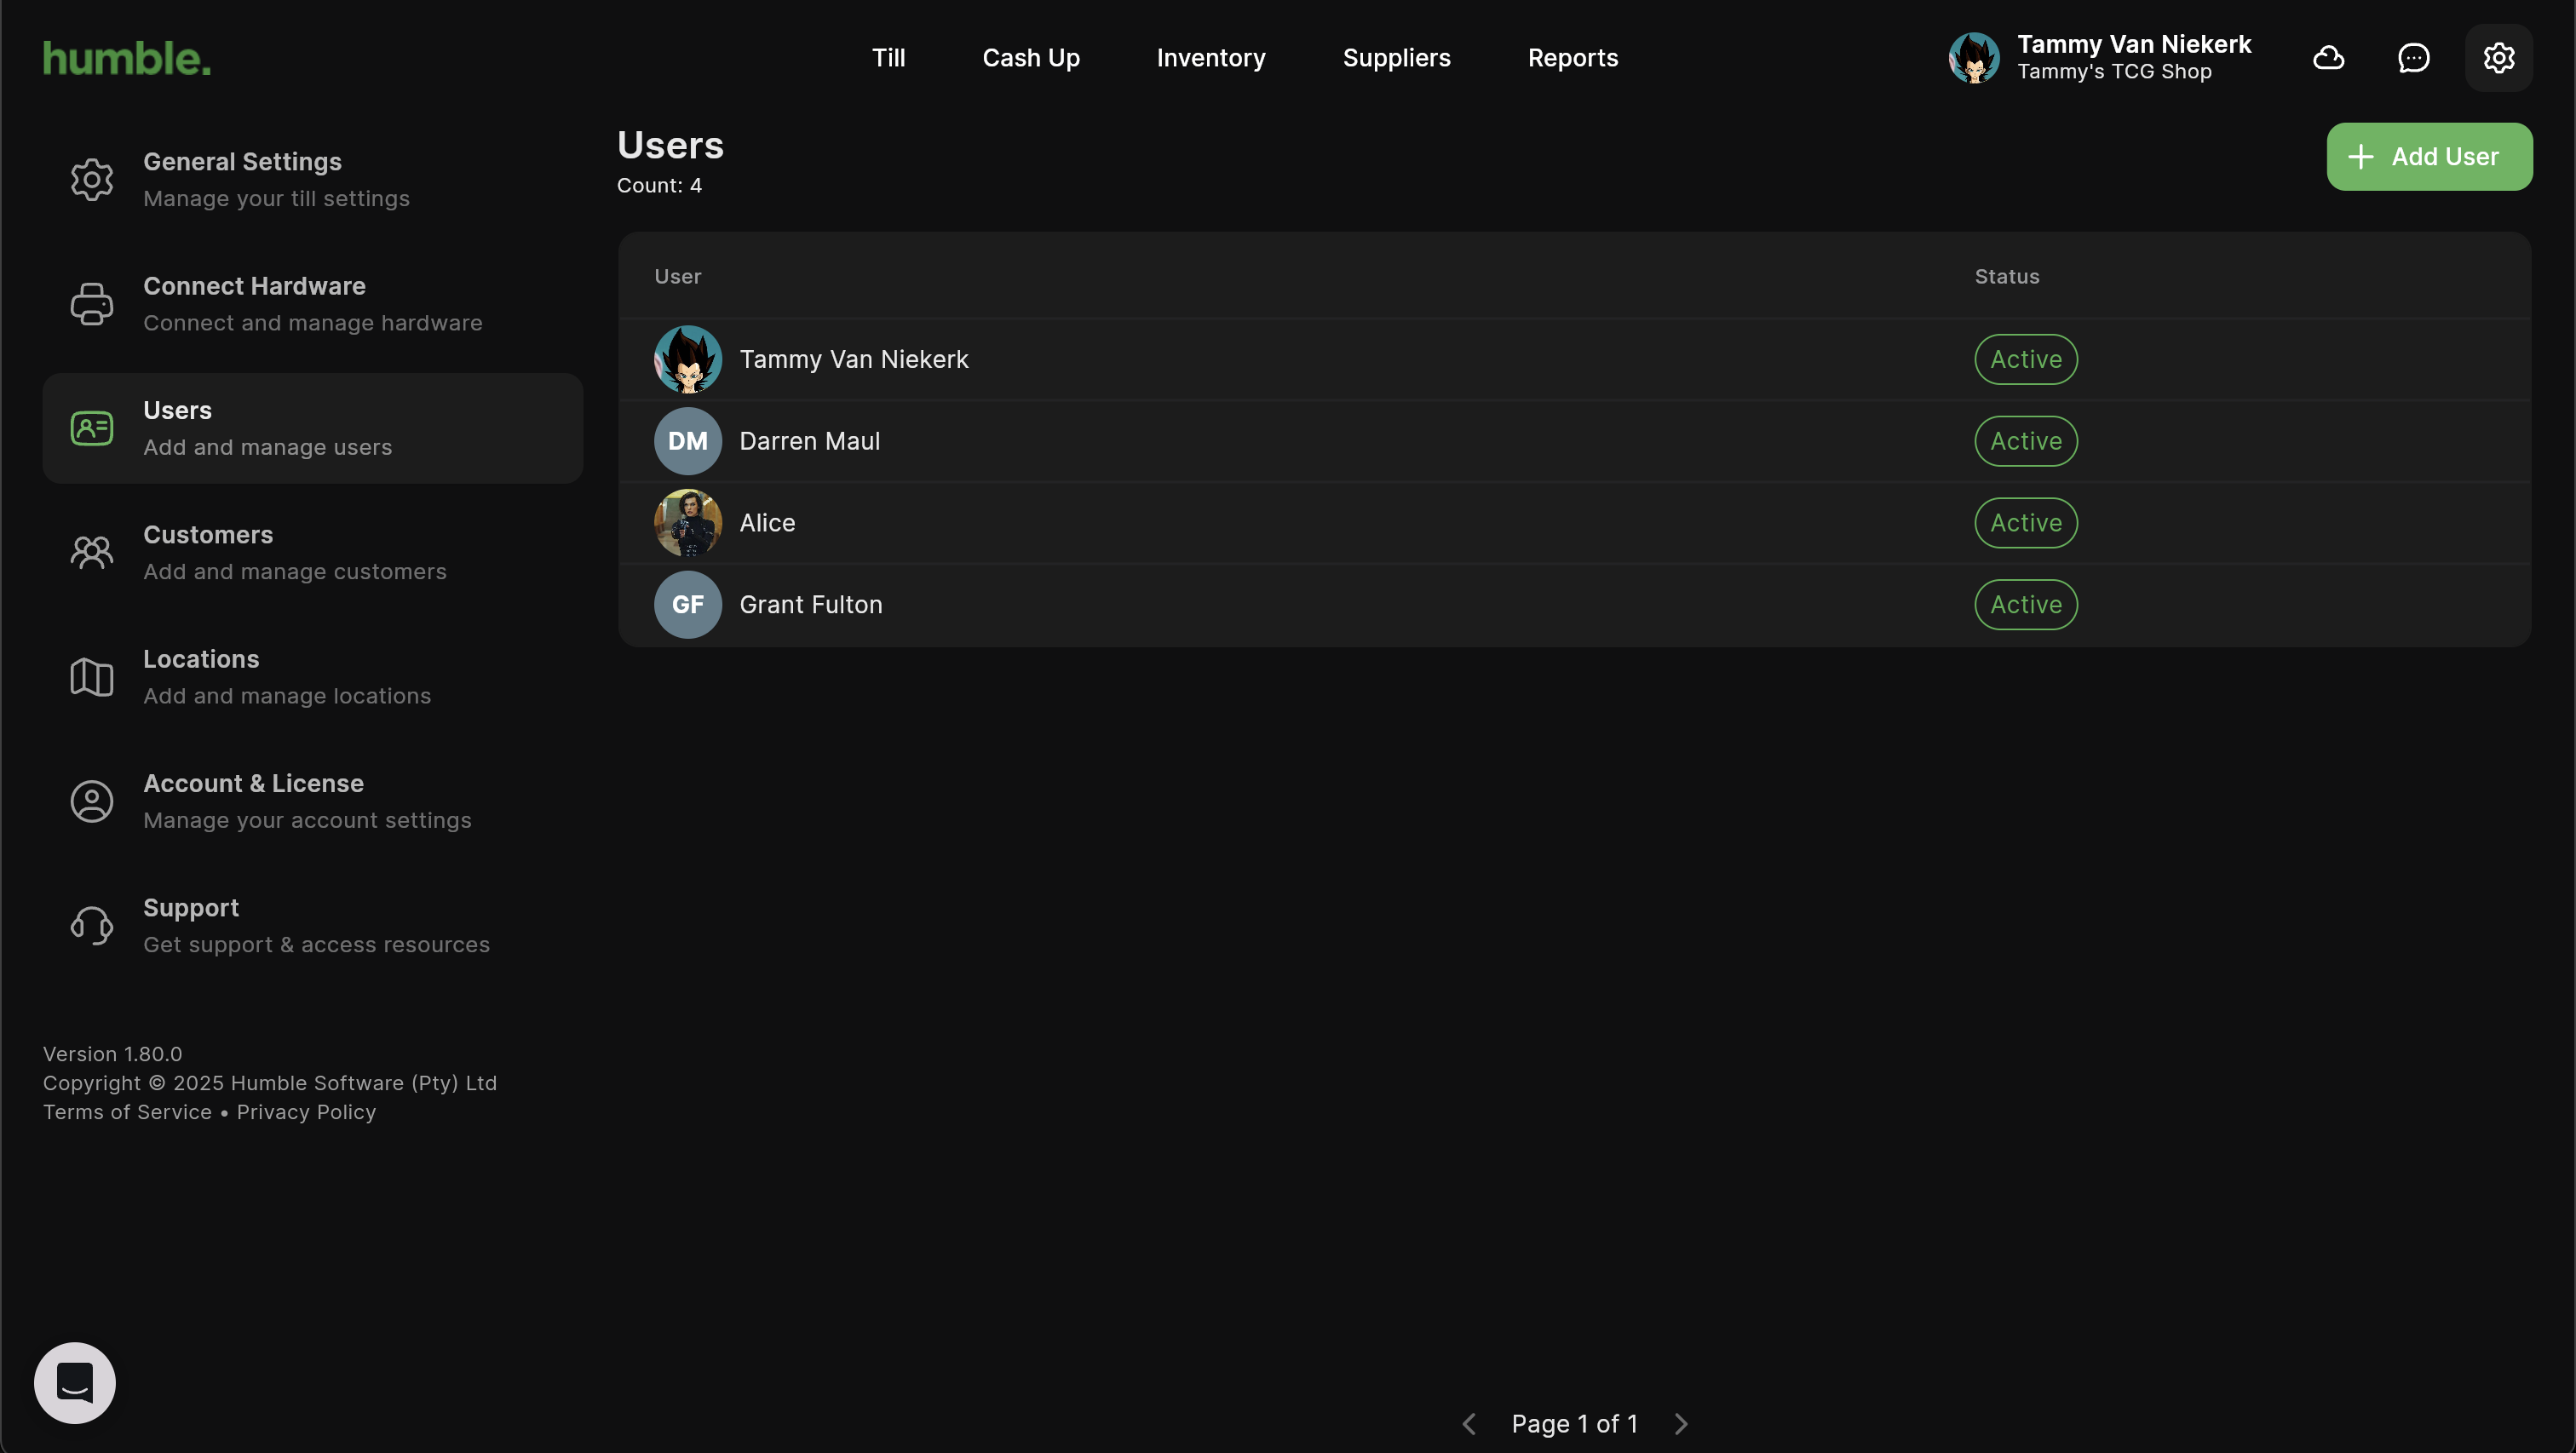
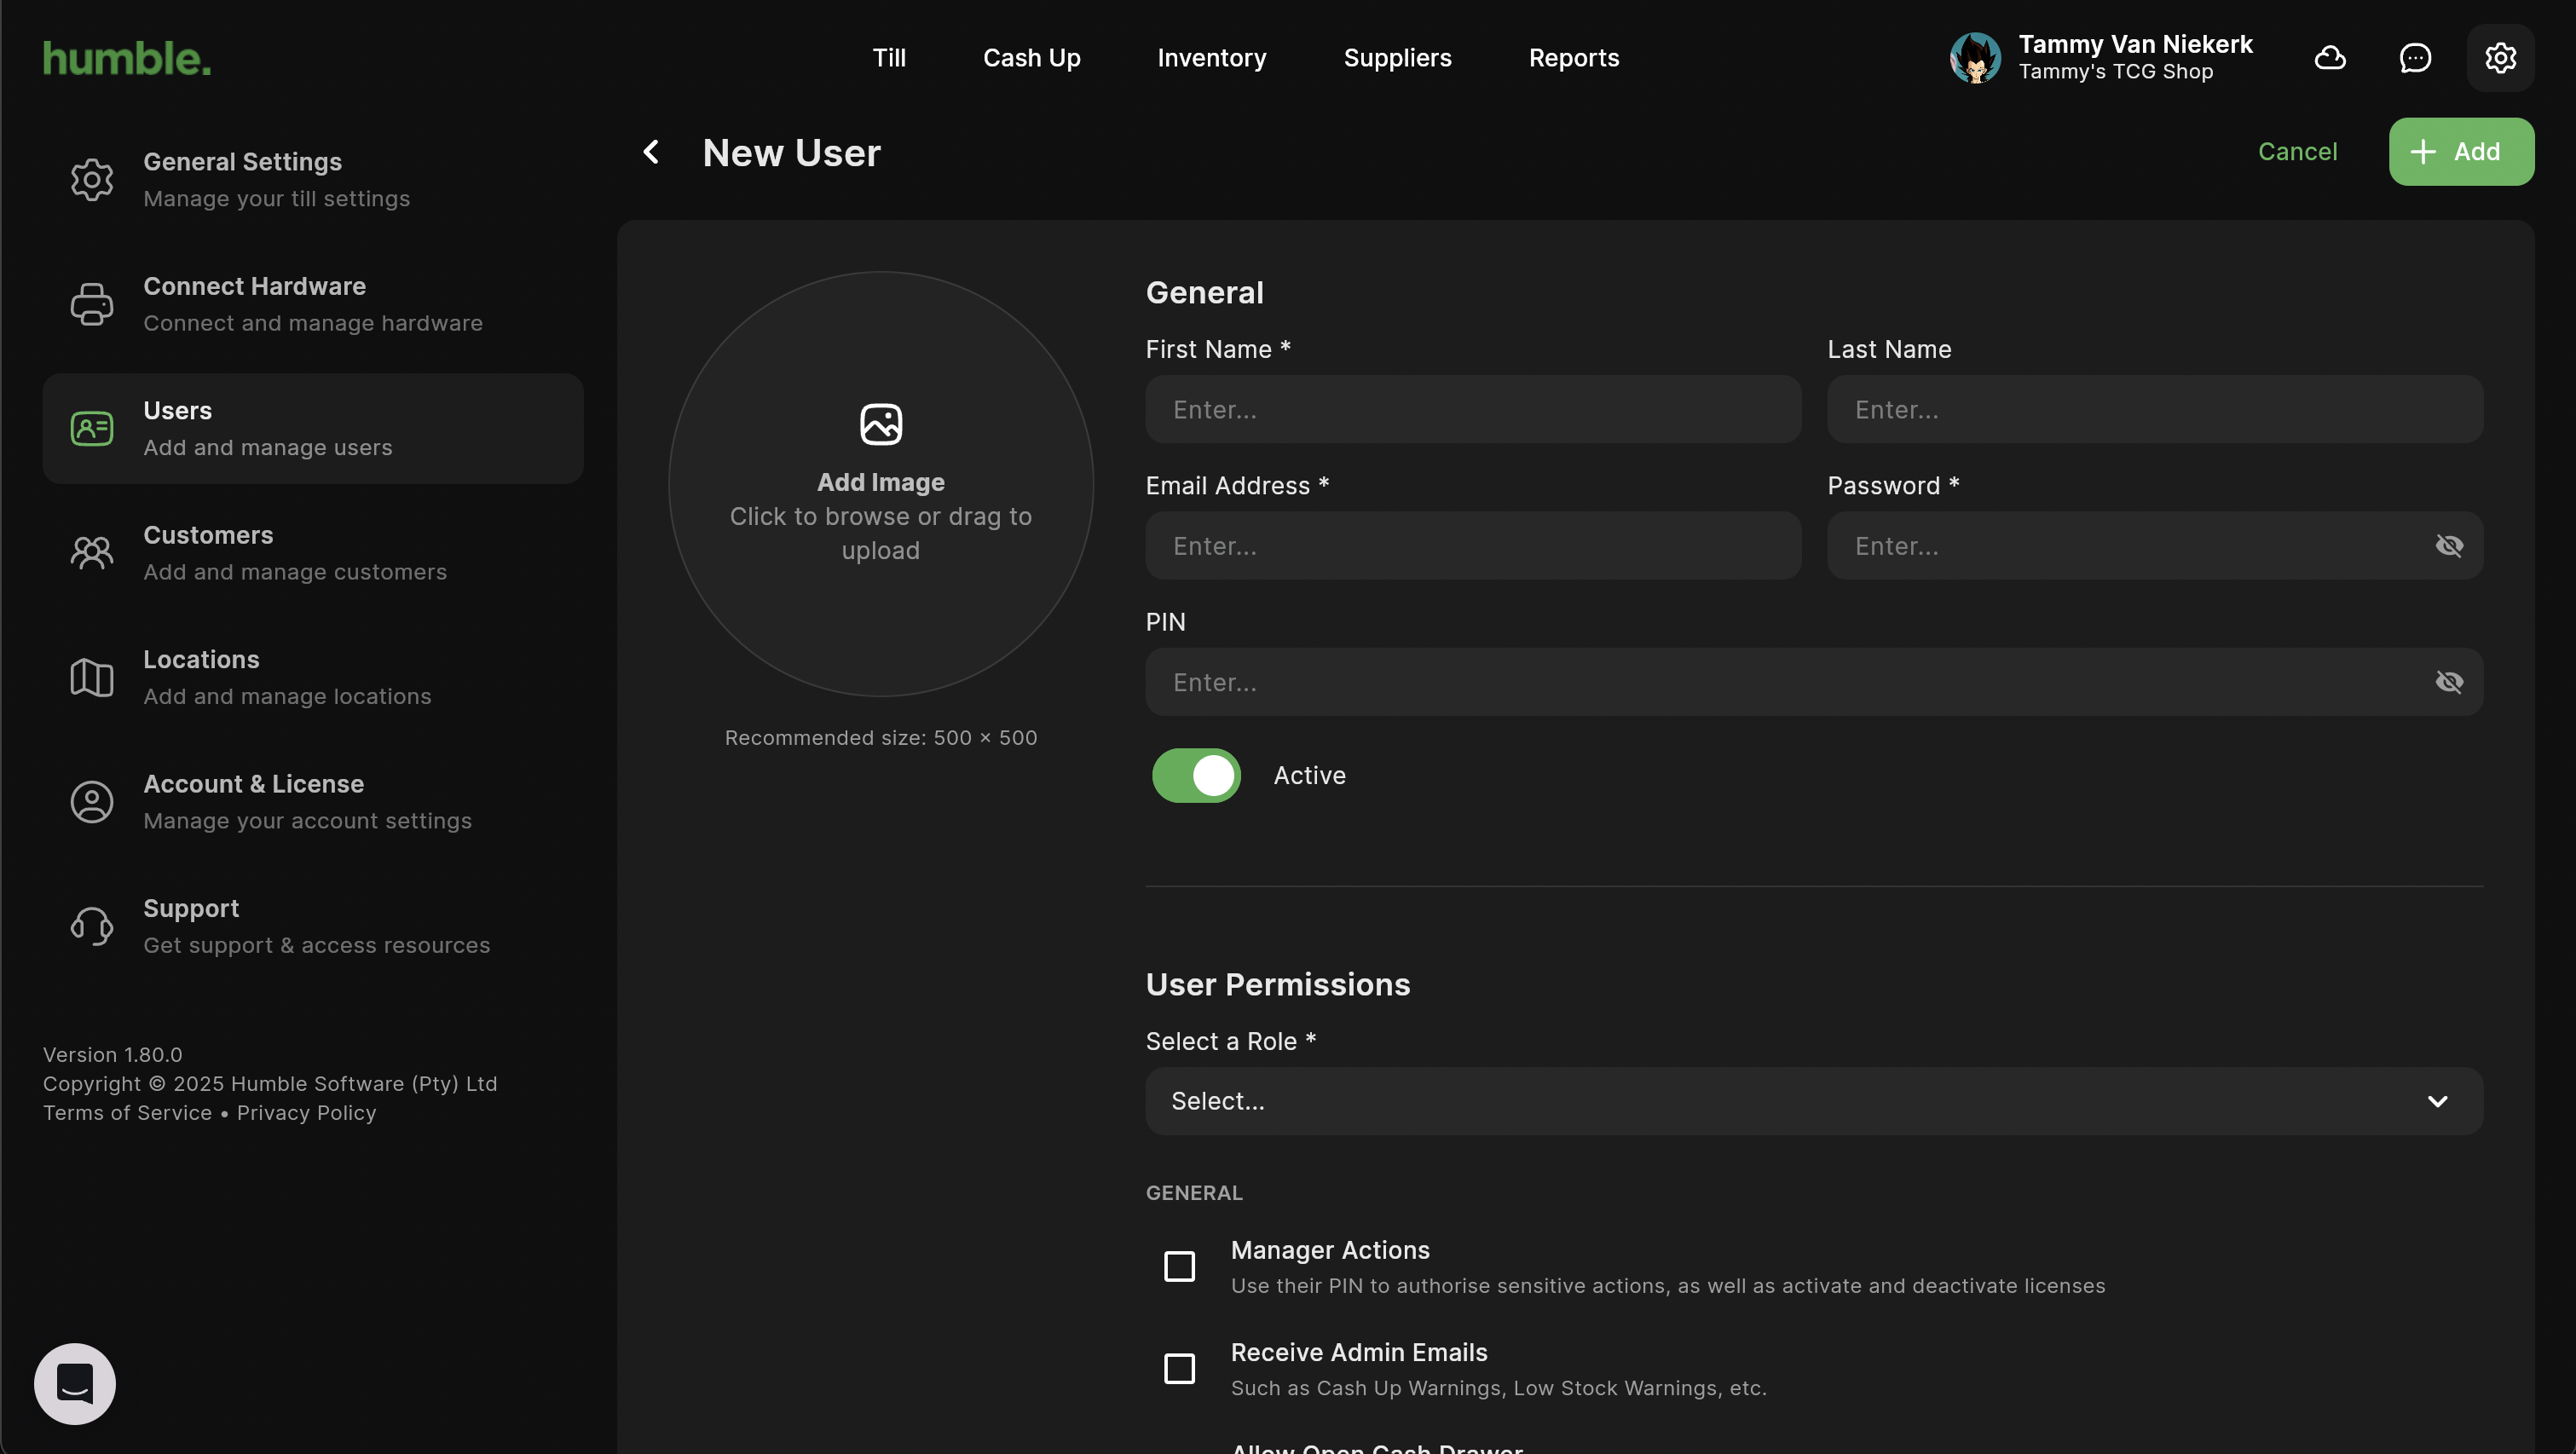
Users
After signing up, your user will show here by default. Once you have added more users, they will be visible here too.
If you wish to add more users, click “Add User”. You will be able to add the following information for your users:
Image
First Name
Last Name
Email Address
Password
As well as being able to create a new user, you will also be able to set up their permissions. There are preset Roles that are available:
Admin
Manager
Cashier
Based on which role you select, the permissions will automatically become selected. If you wish to have custom permissions, you may set those up according to your preferences.
Logging in as a New User
As a first time user, when logging in for the first time, you will have to set up MFA (Multi-Factor Authentication) or 2FA (Two-Factor Authentication).
After clicking Sign In, you will presented with the following screen.
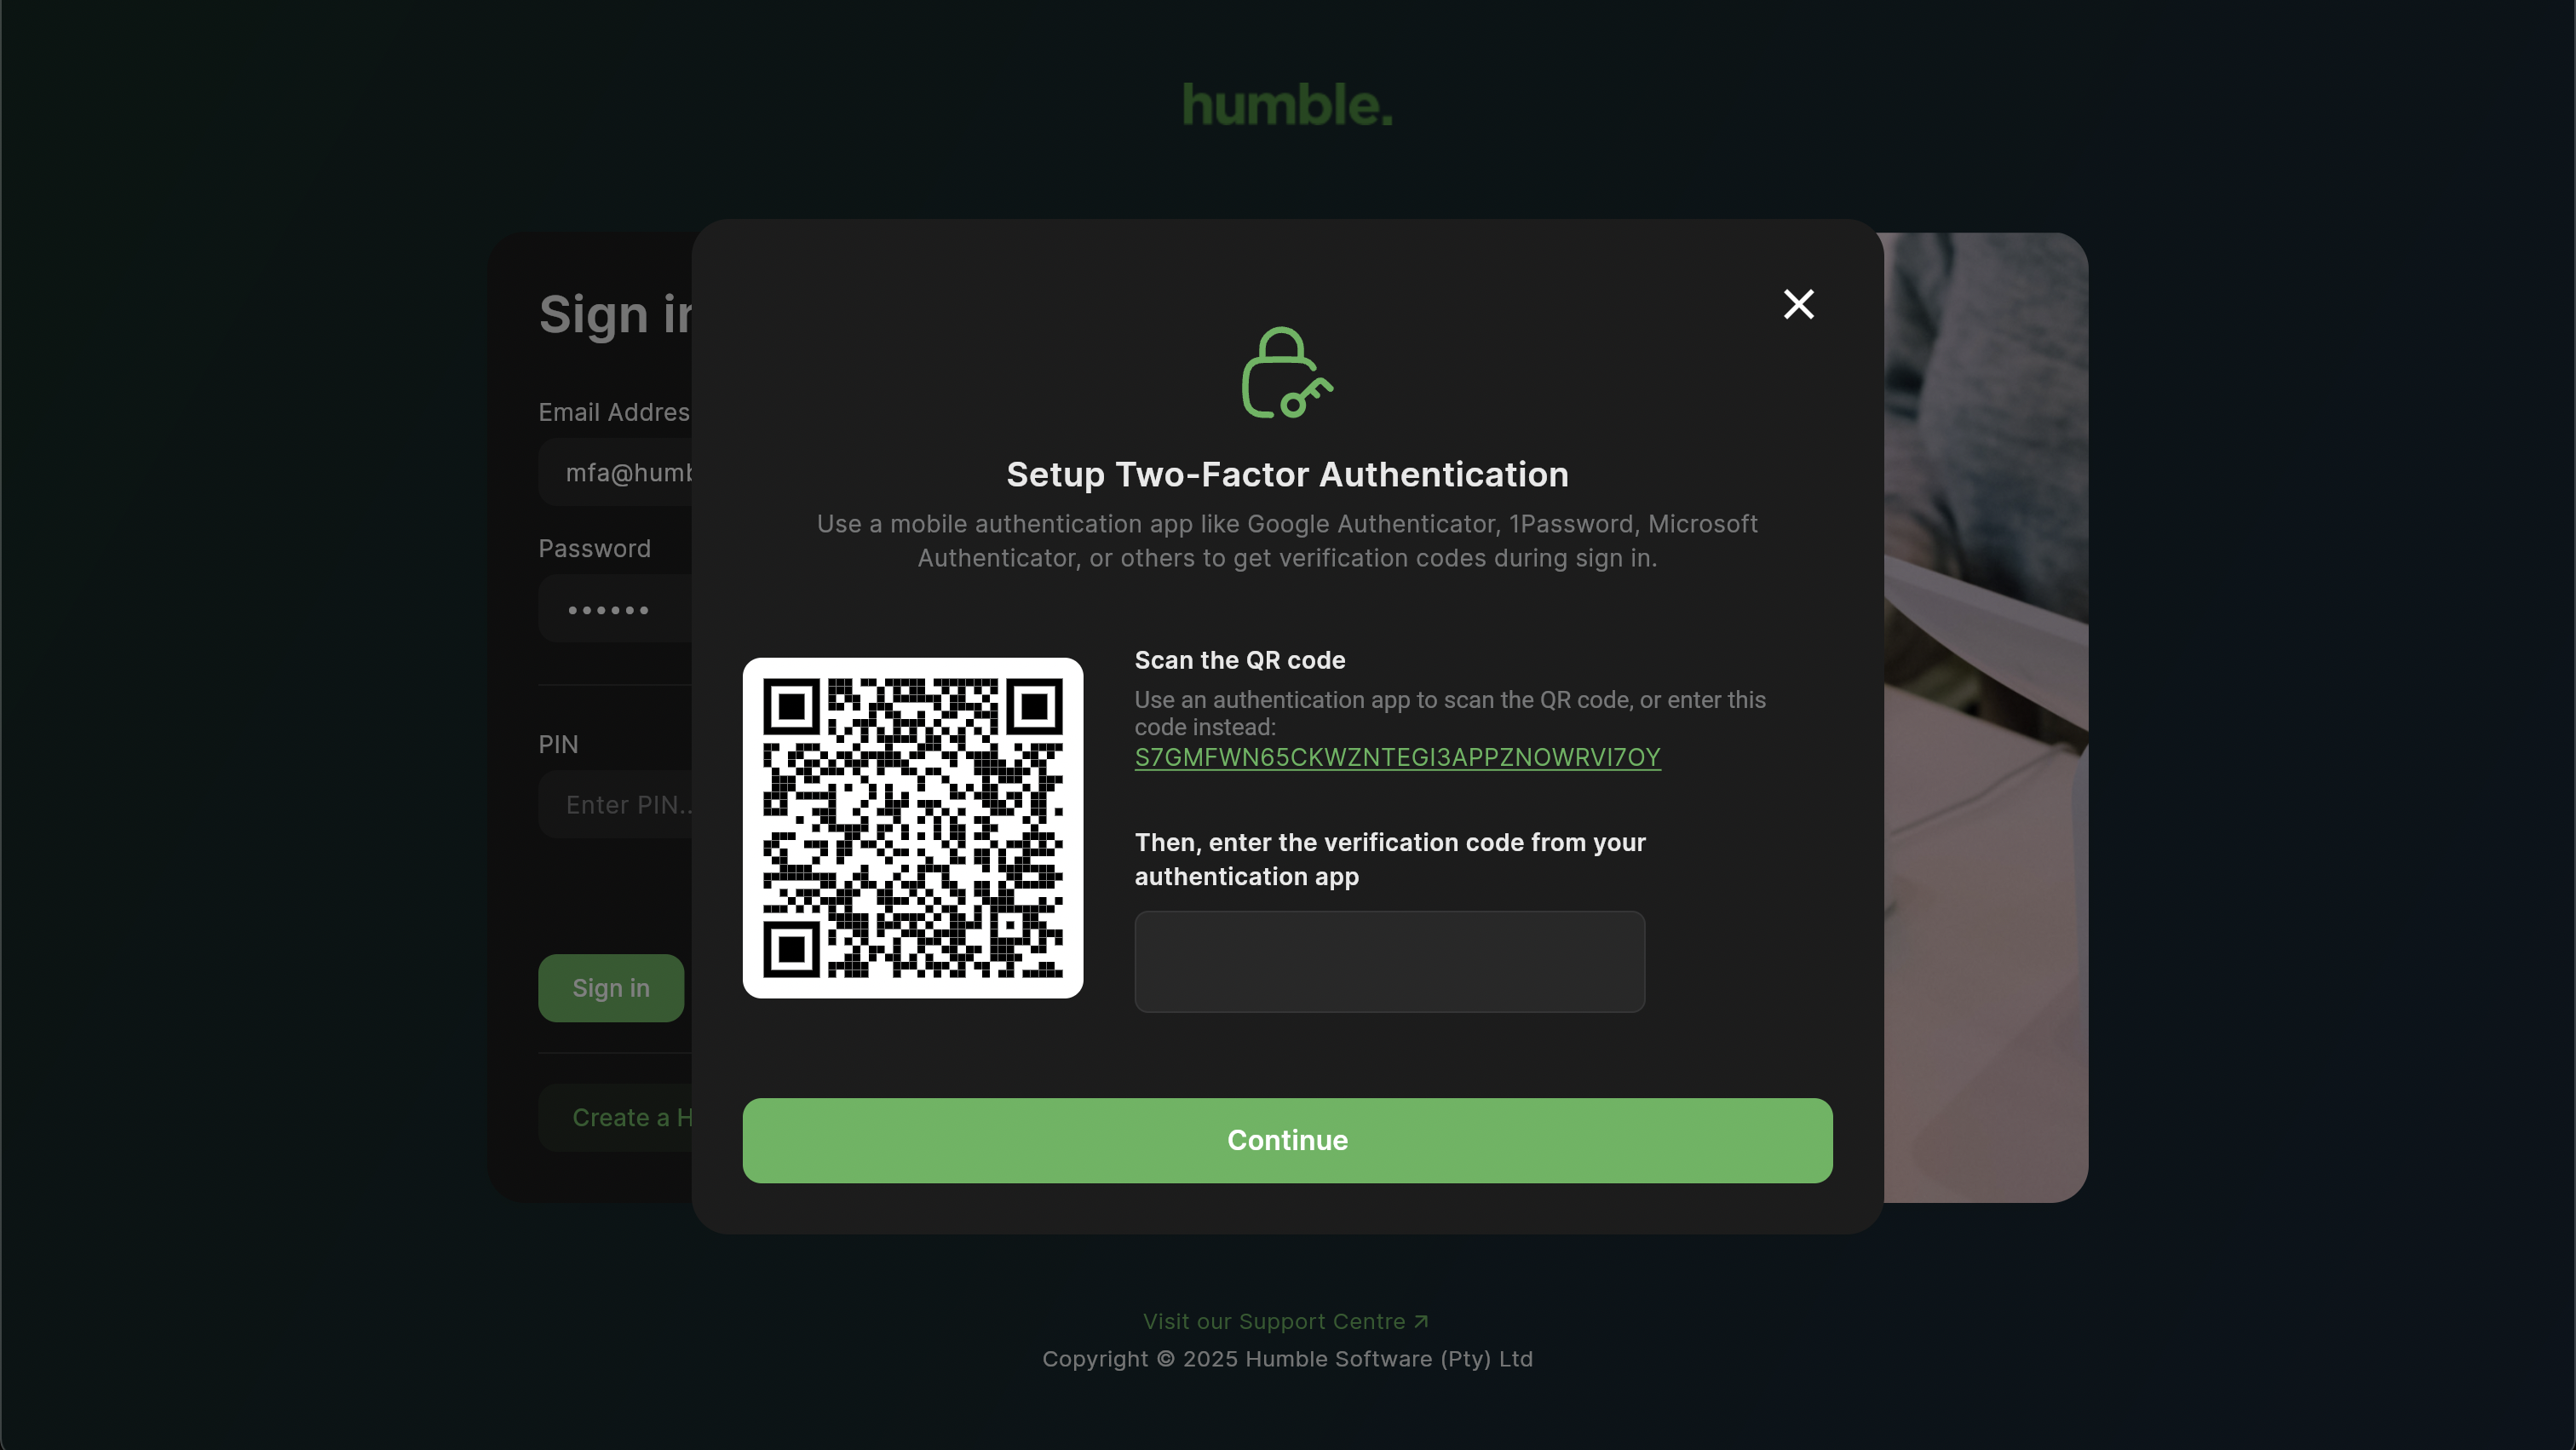
You will need to have an authenticator app installed on your phone. Google Authenticator is normally installed by default.
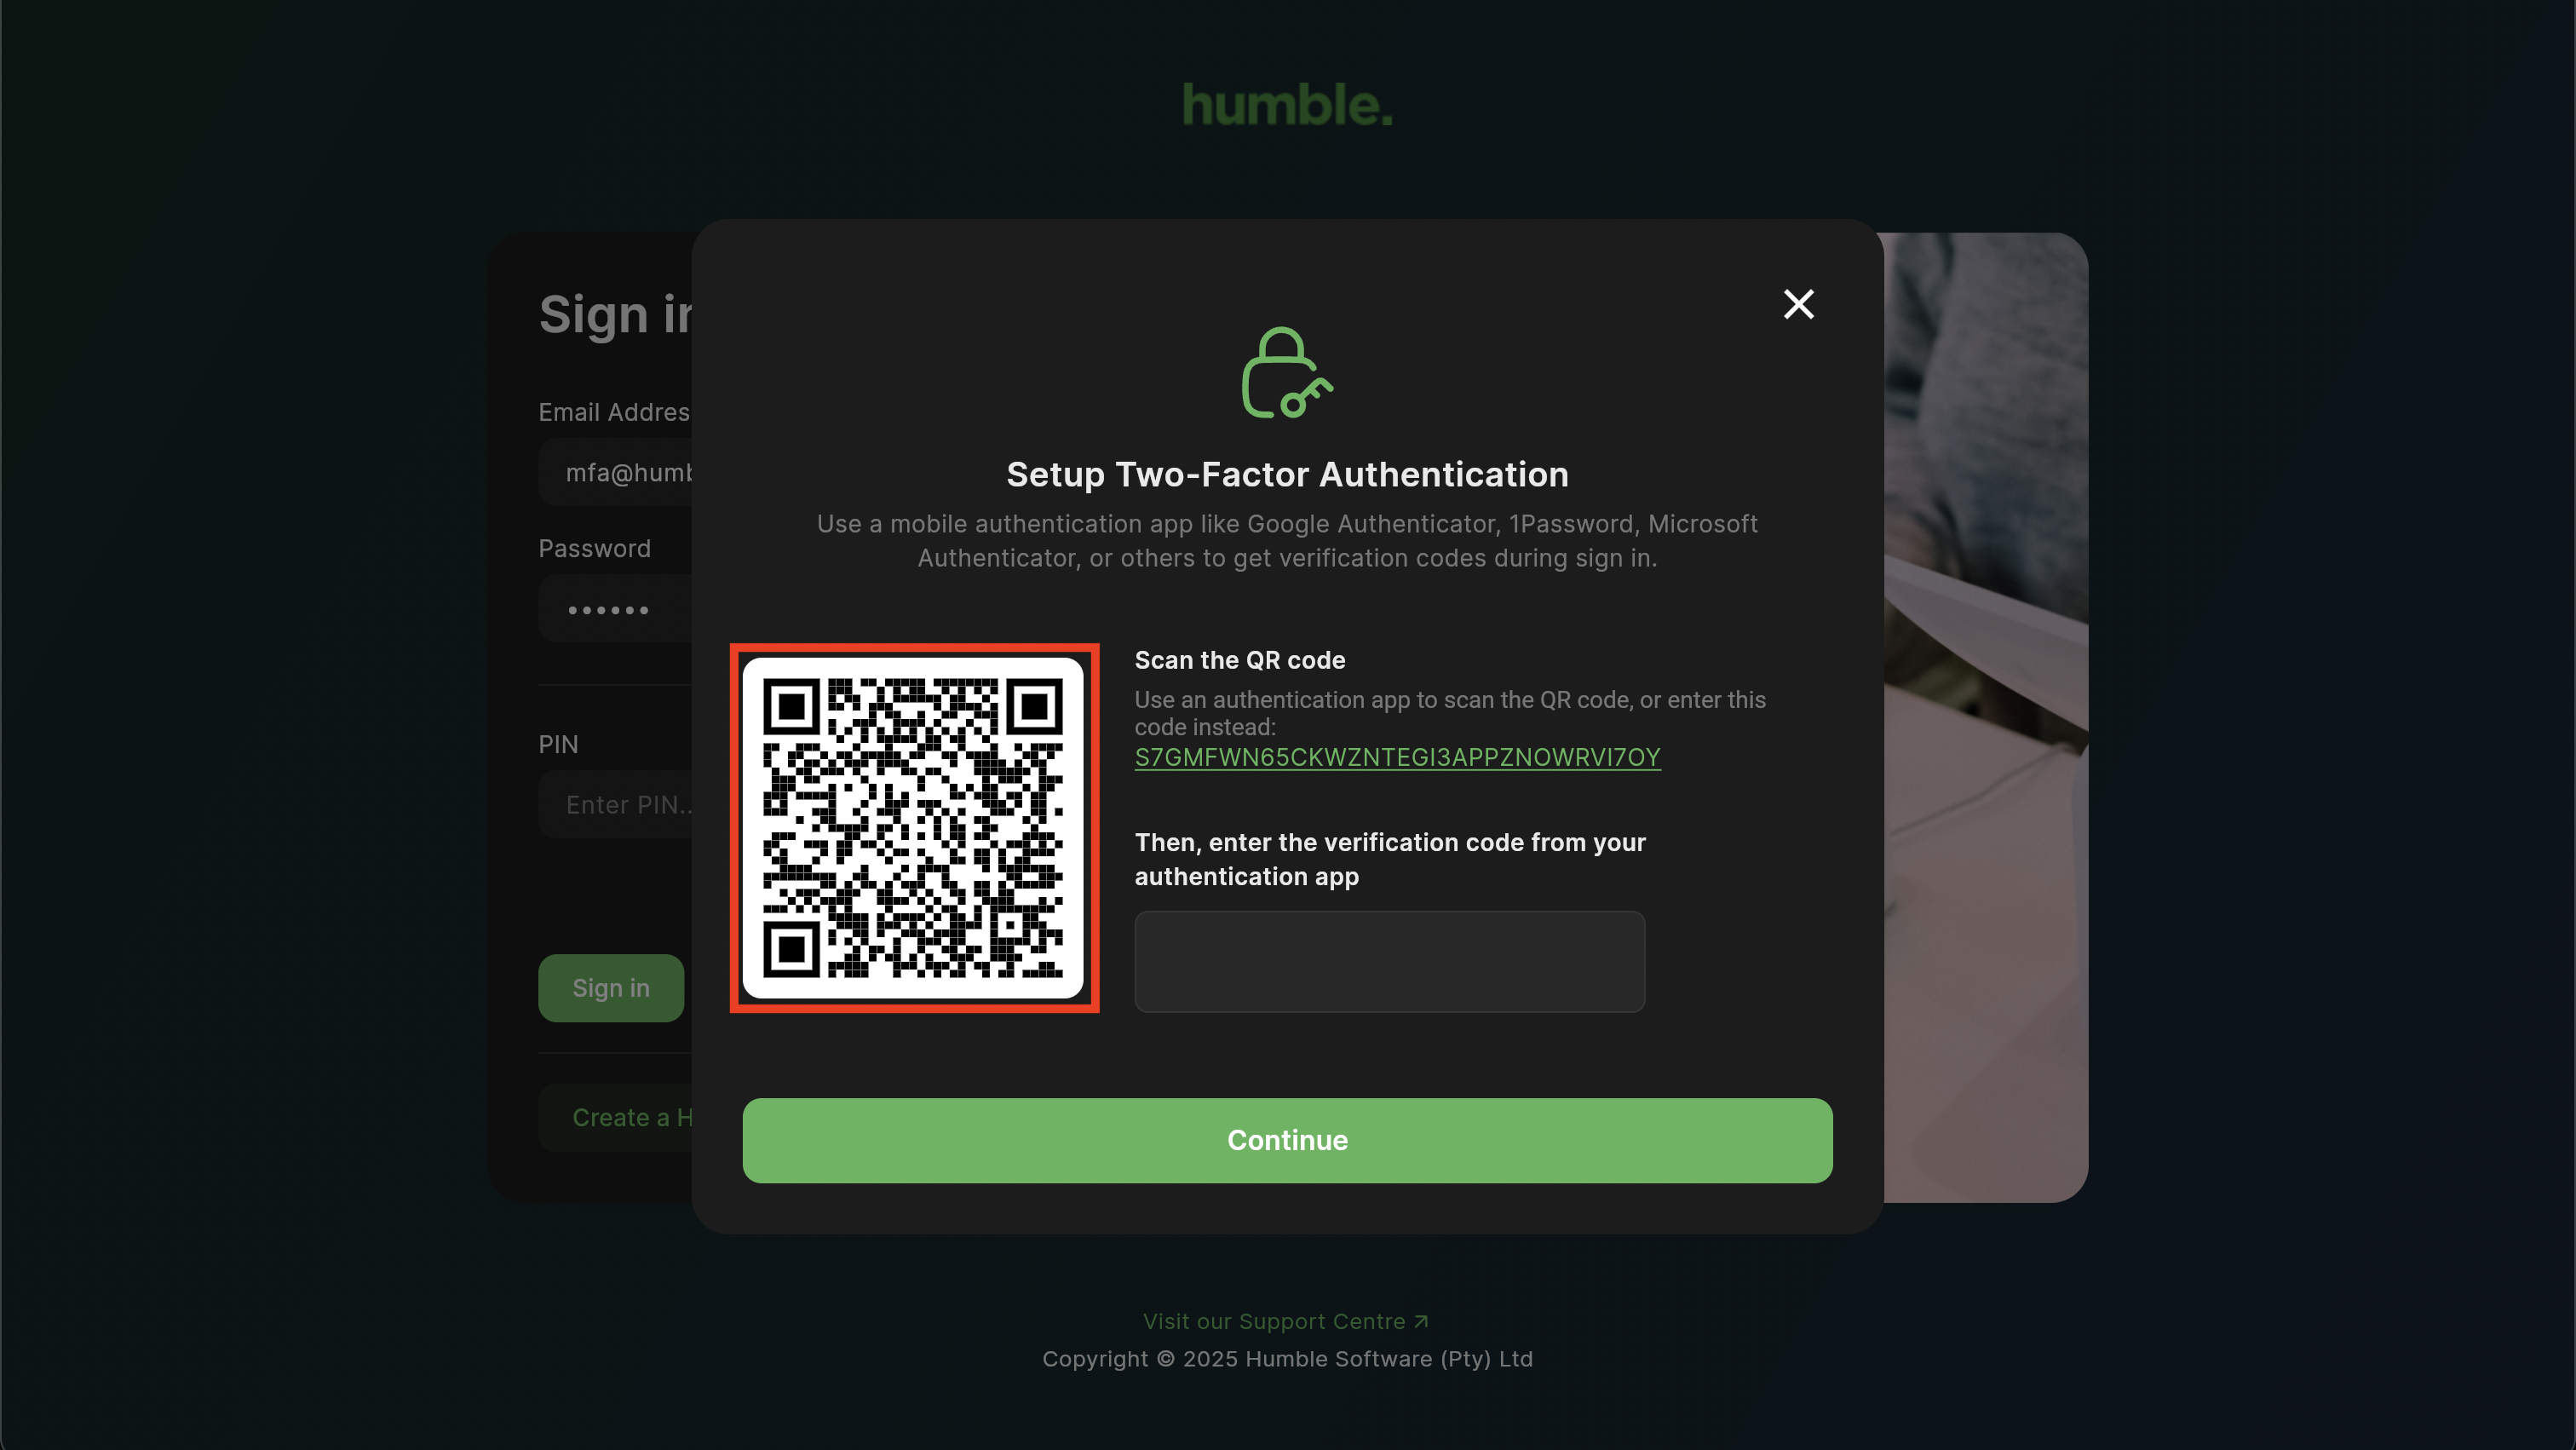
Please open your authenticator app. Click on the “+” on the bottom right and select either Scan a QR code or Enter a setup key.
Scan a QR code
Selecting Scan a QR code will open your phone’s camera. Line the borders on the camera up with the QR code on the screen. This will add an account and verification code to your authenticator app. Next, you will need to enter the verification code from your authenticator app into the blocks on the Setup Two-Factor Authentication modal, and click “Continue”. You will then be logged in to the till.
Enter a Setup Key
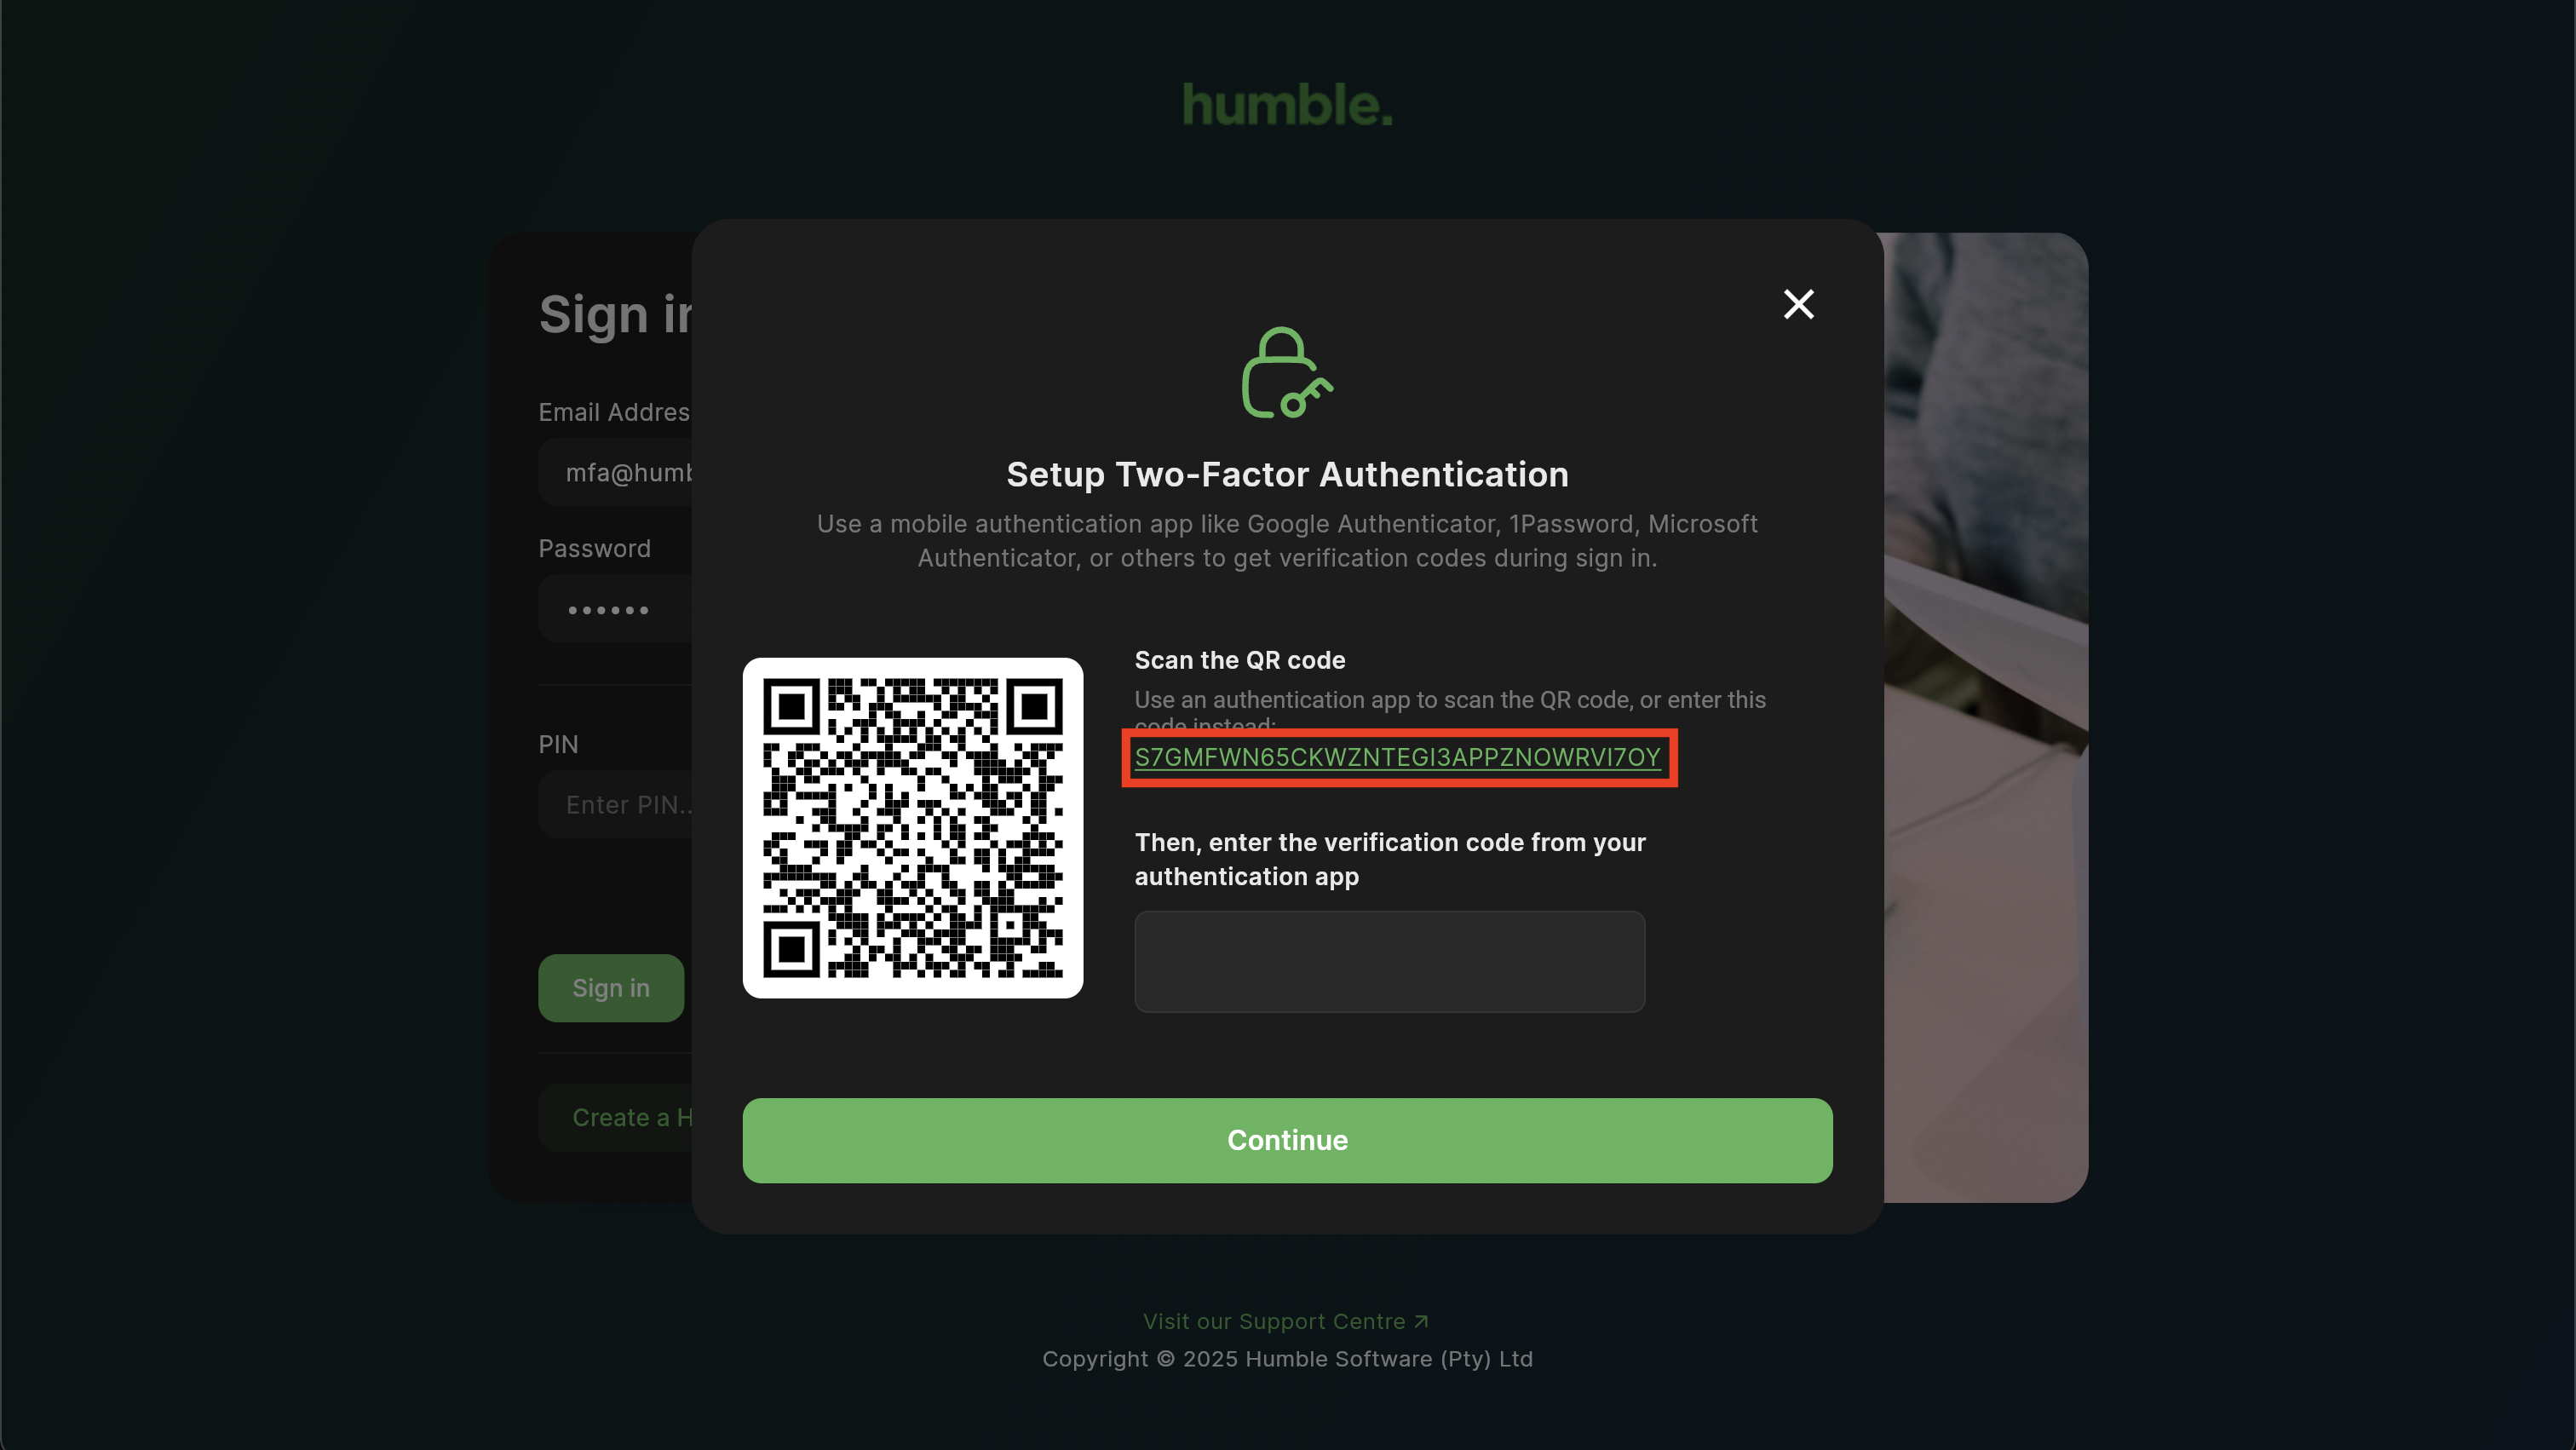
The above setup code is an example, your set up code will be different.
Selecting Enter a Setup Key will take you to a screen where you will add a Code Name e.g. Adumo Login and Your Key, which is the setup key above. You will have to manually type in the setup key that you see on your screen, and then tap “Add”. This will add an account and verification code to your authenticator app. Next, you will need to enter the verification code from your authenticator app into the blocks on the Setup Two-Factor Authentication modal, and click “Continue”. You will then be logged in to the till.
From now on, each time you log in, you will need to enter in a verification code.
Take note of the little blue circle to the right of your code. Each code has a time limit and will expire when the circle disappears. A new code will then generate and need to be used.
Customers
Here you’ll be able to see your current customers.
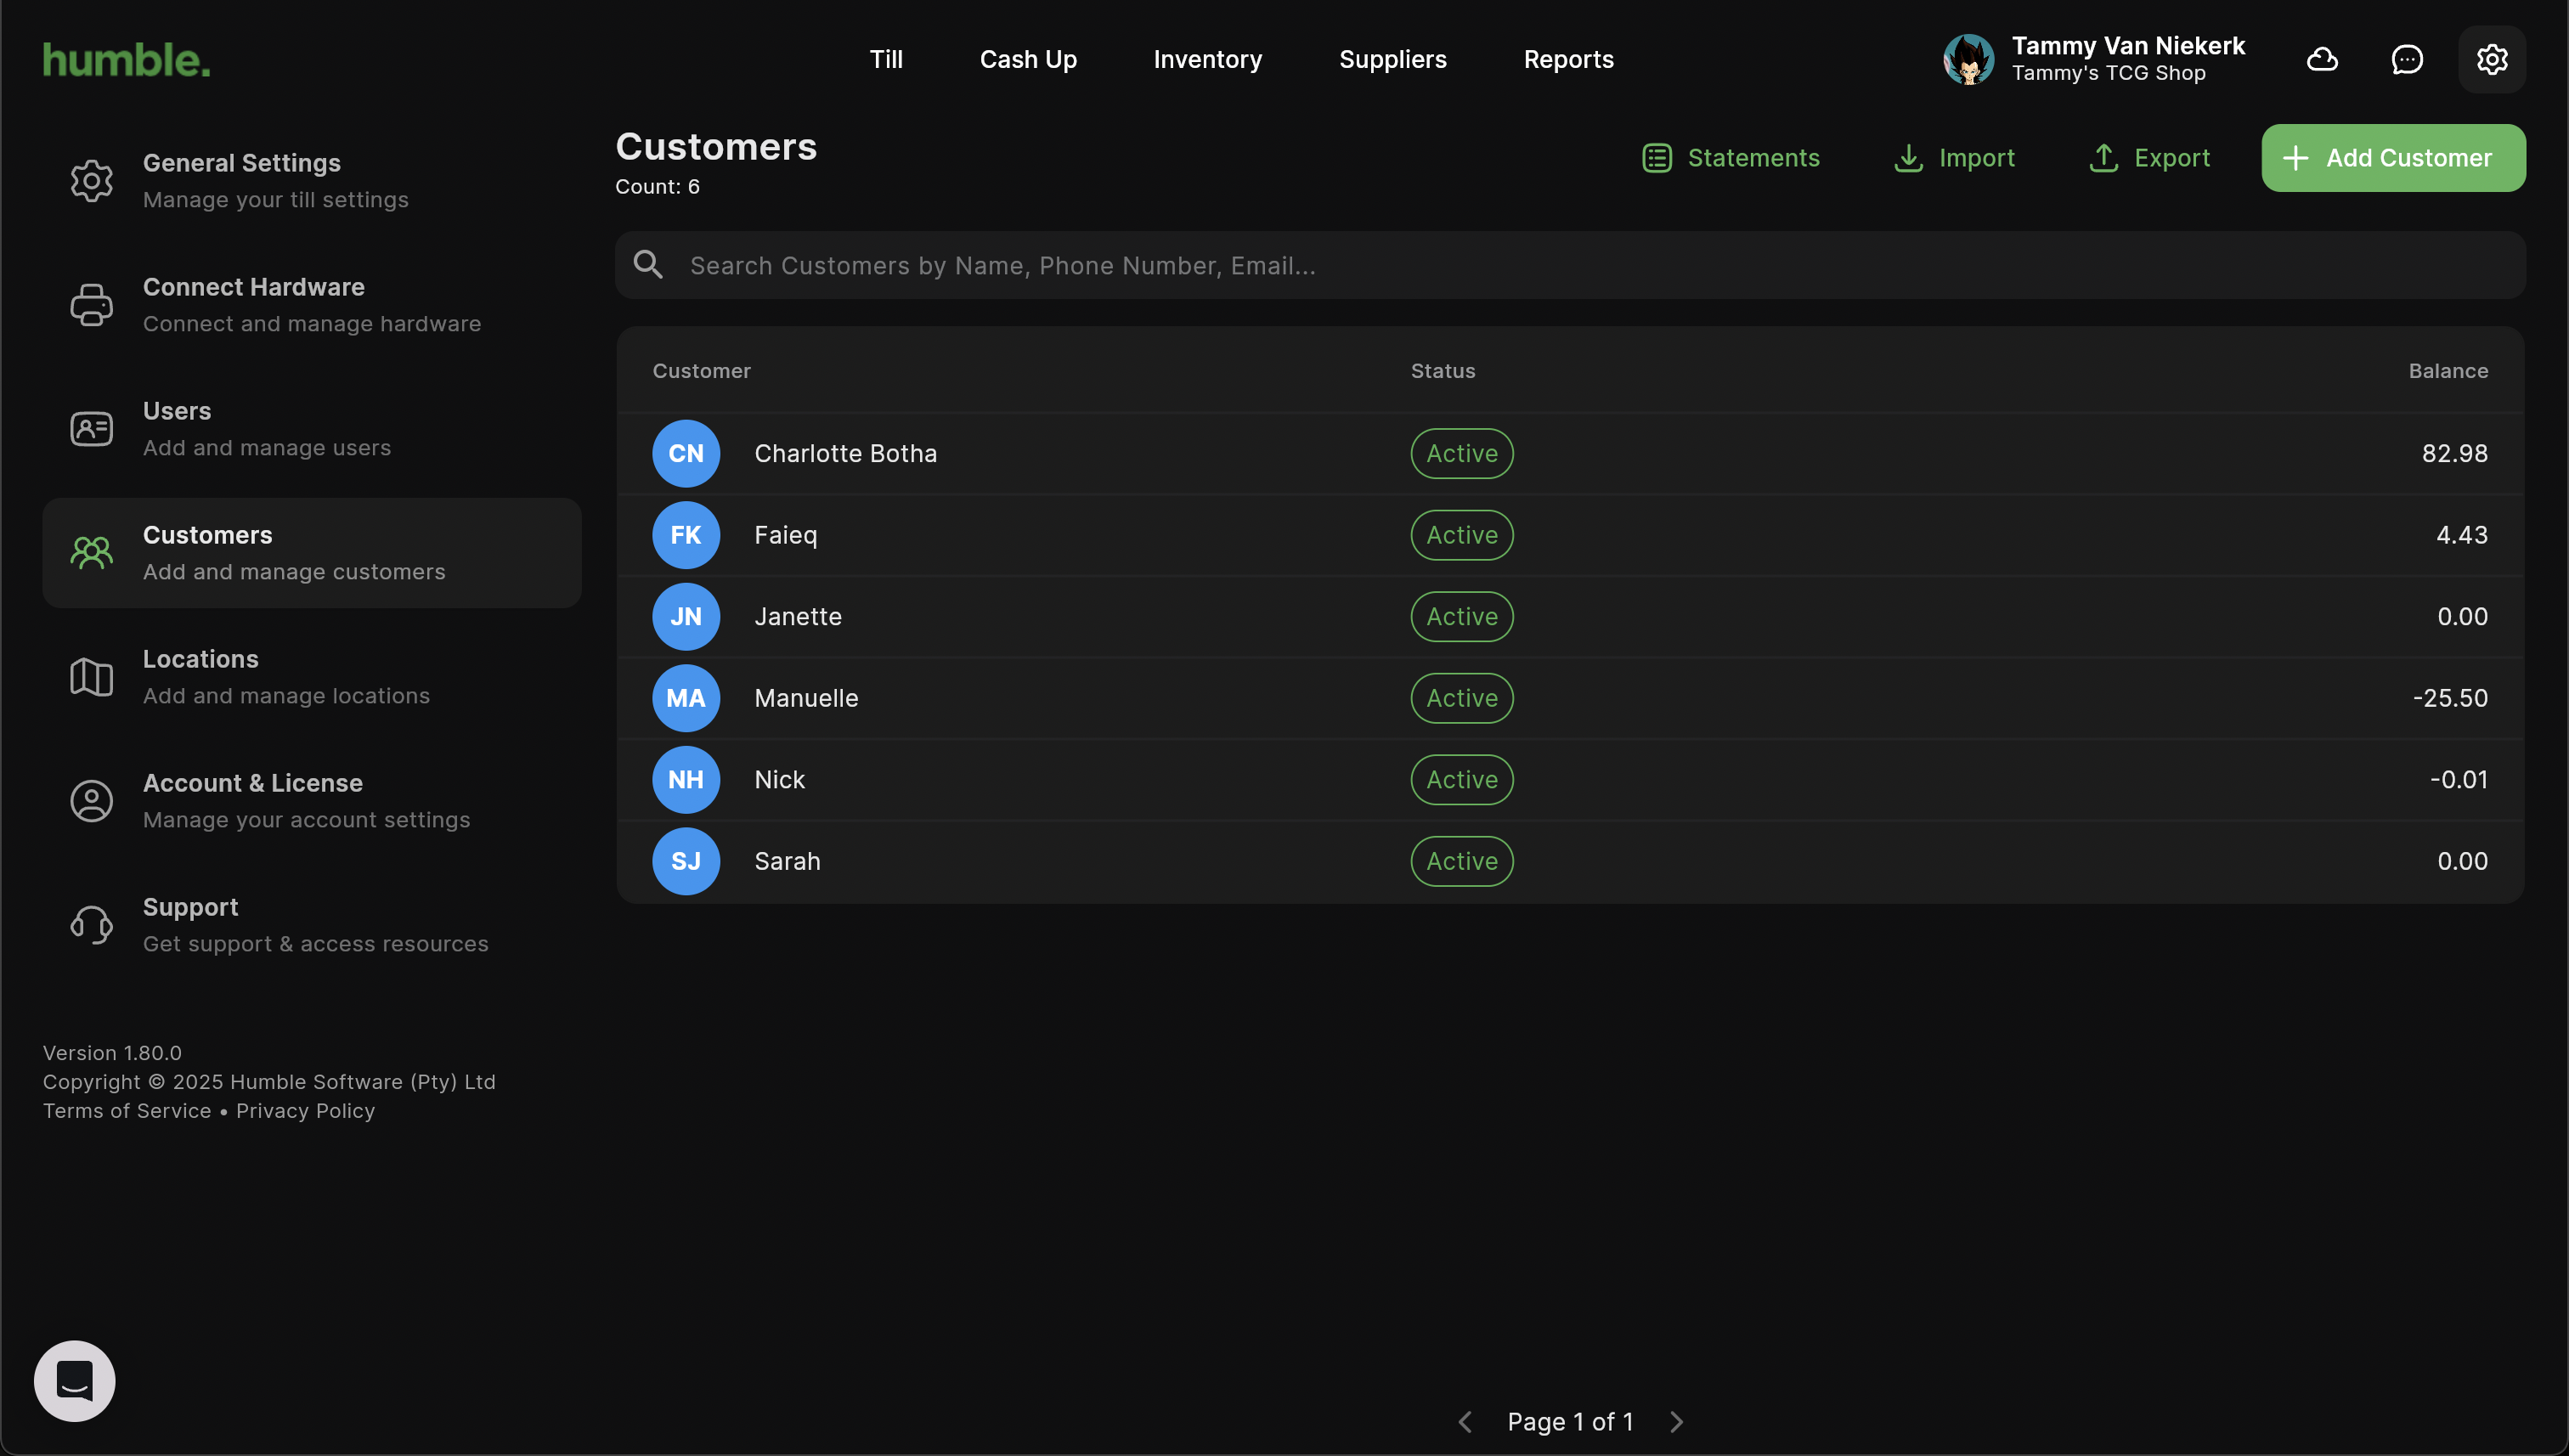
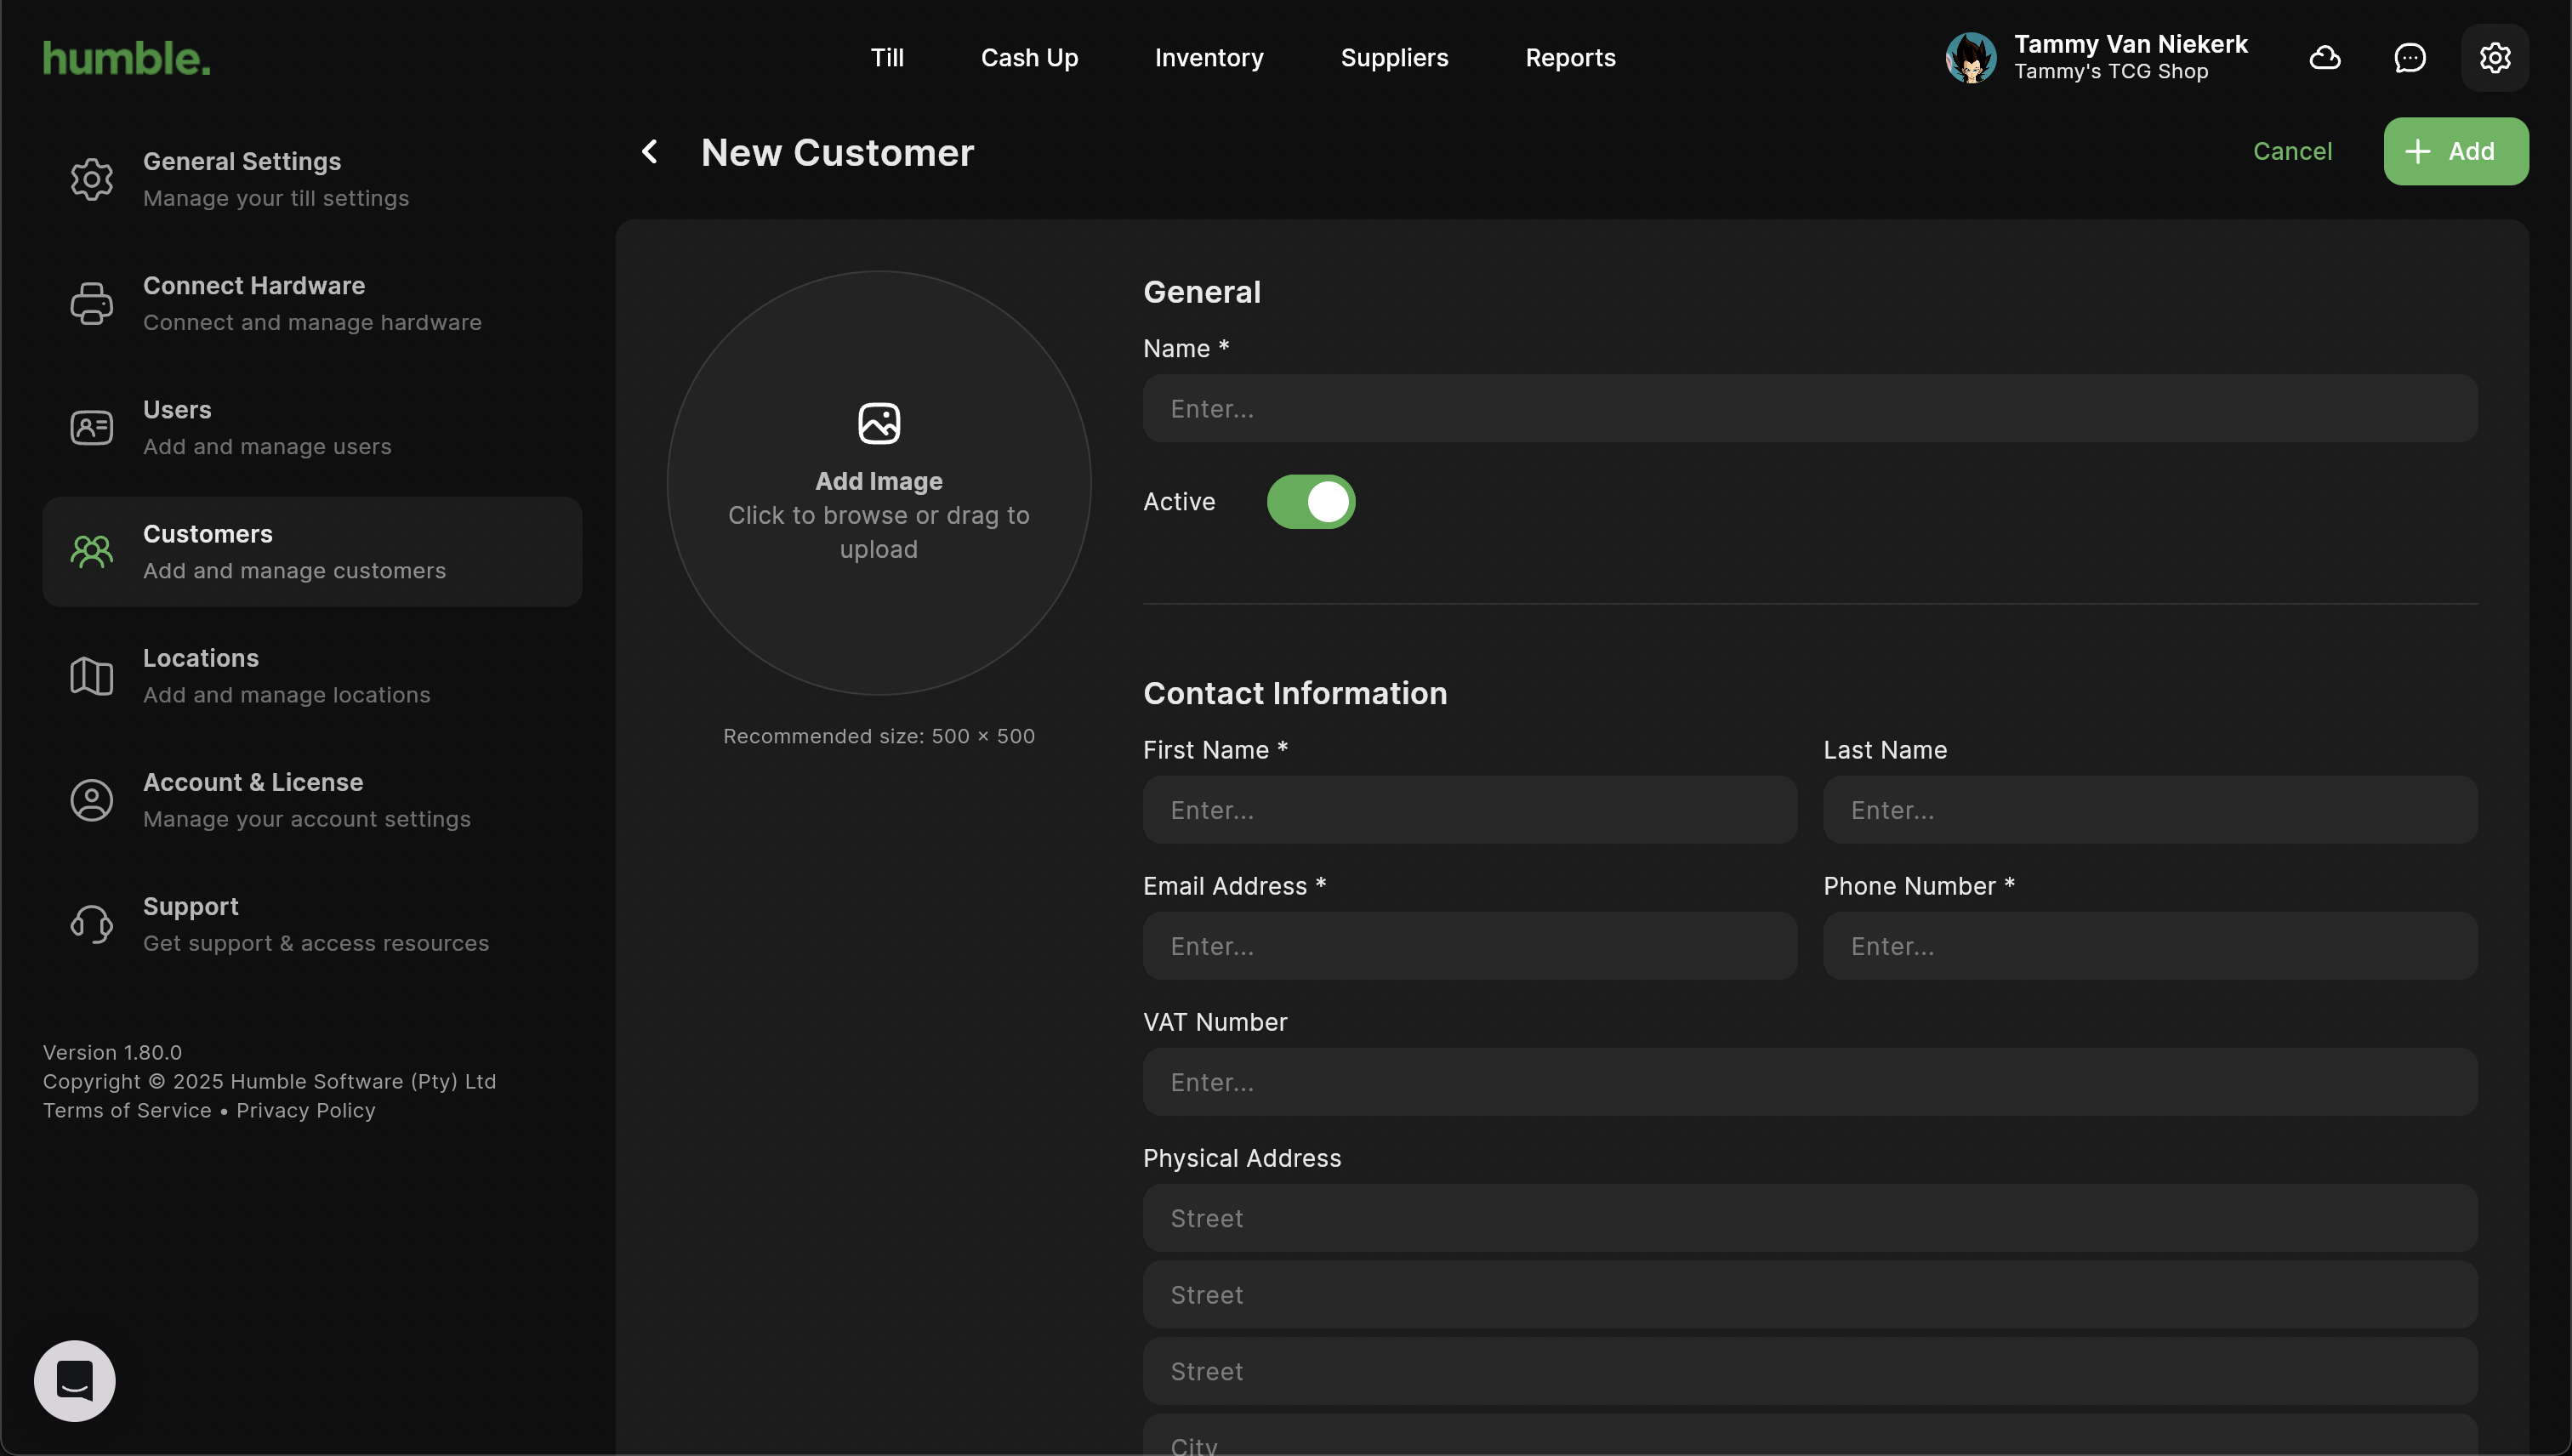
To add a new customer, click “Add Customer”.
You will be able to add the following information:
Image
Name **required**
Balance
First Name
Last Name
Email Address **required**
Phone Number **required**
Physical Address
Once you have added in the information, click “Add” and the customer will be added to the system.
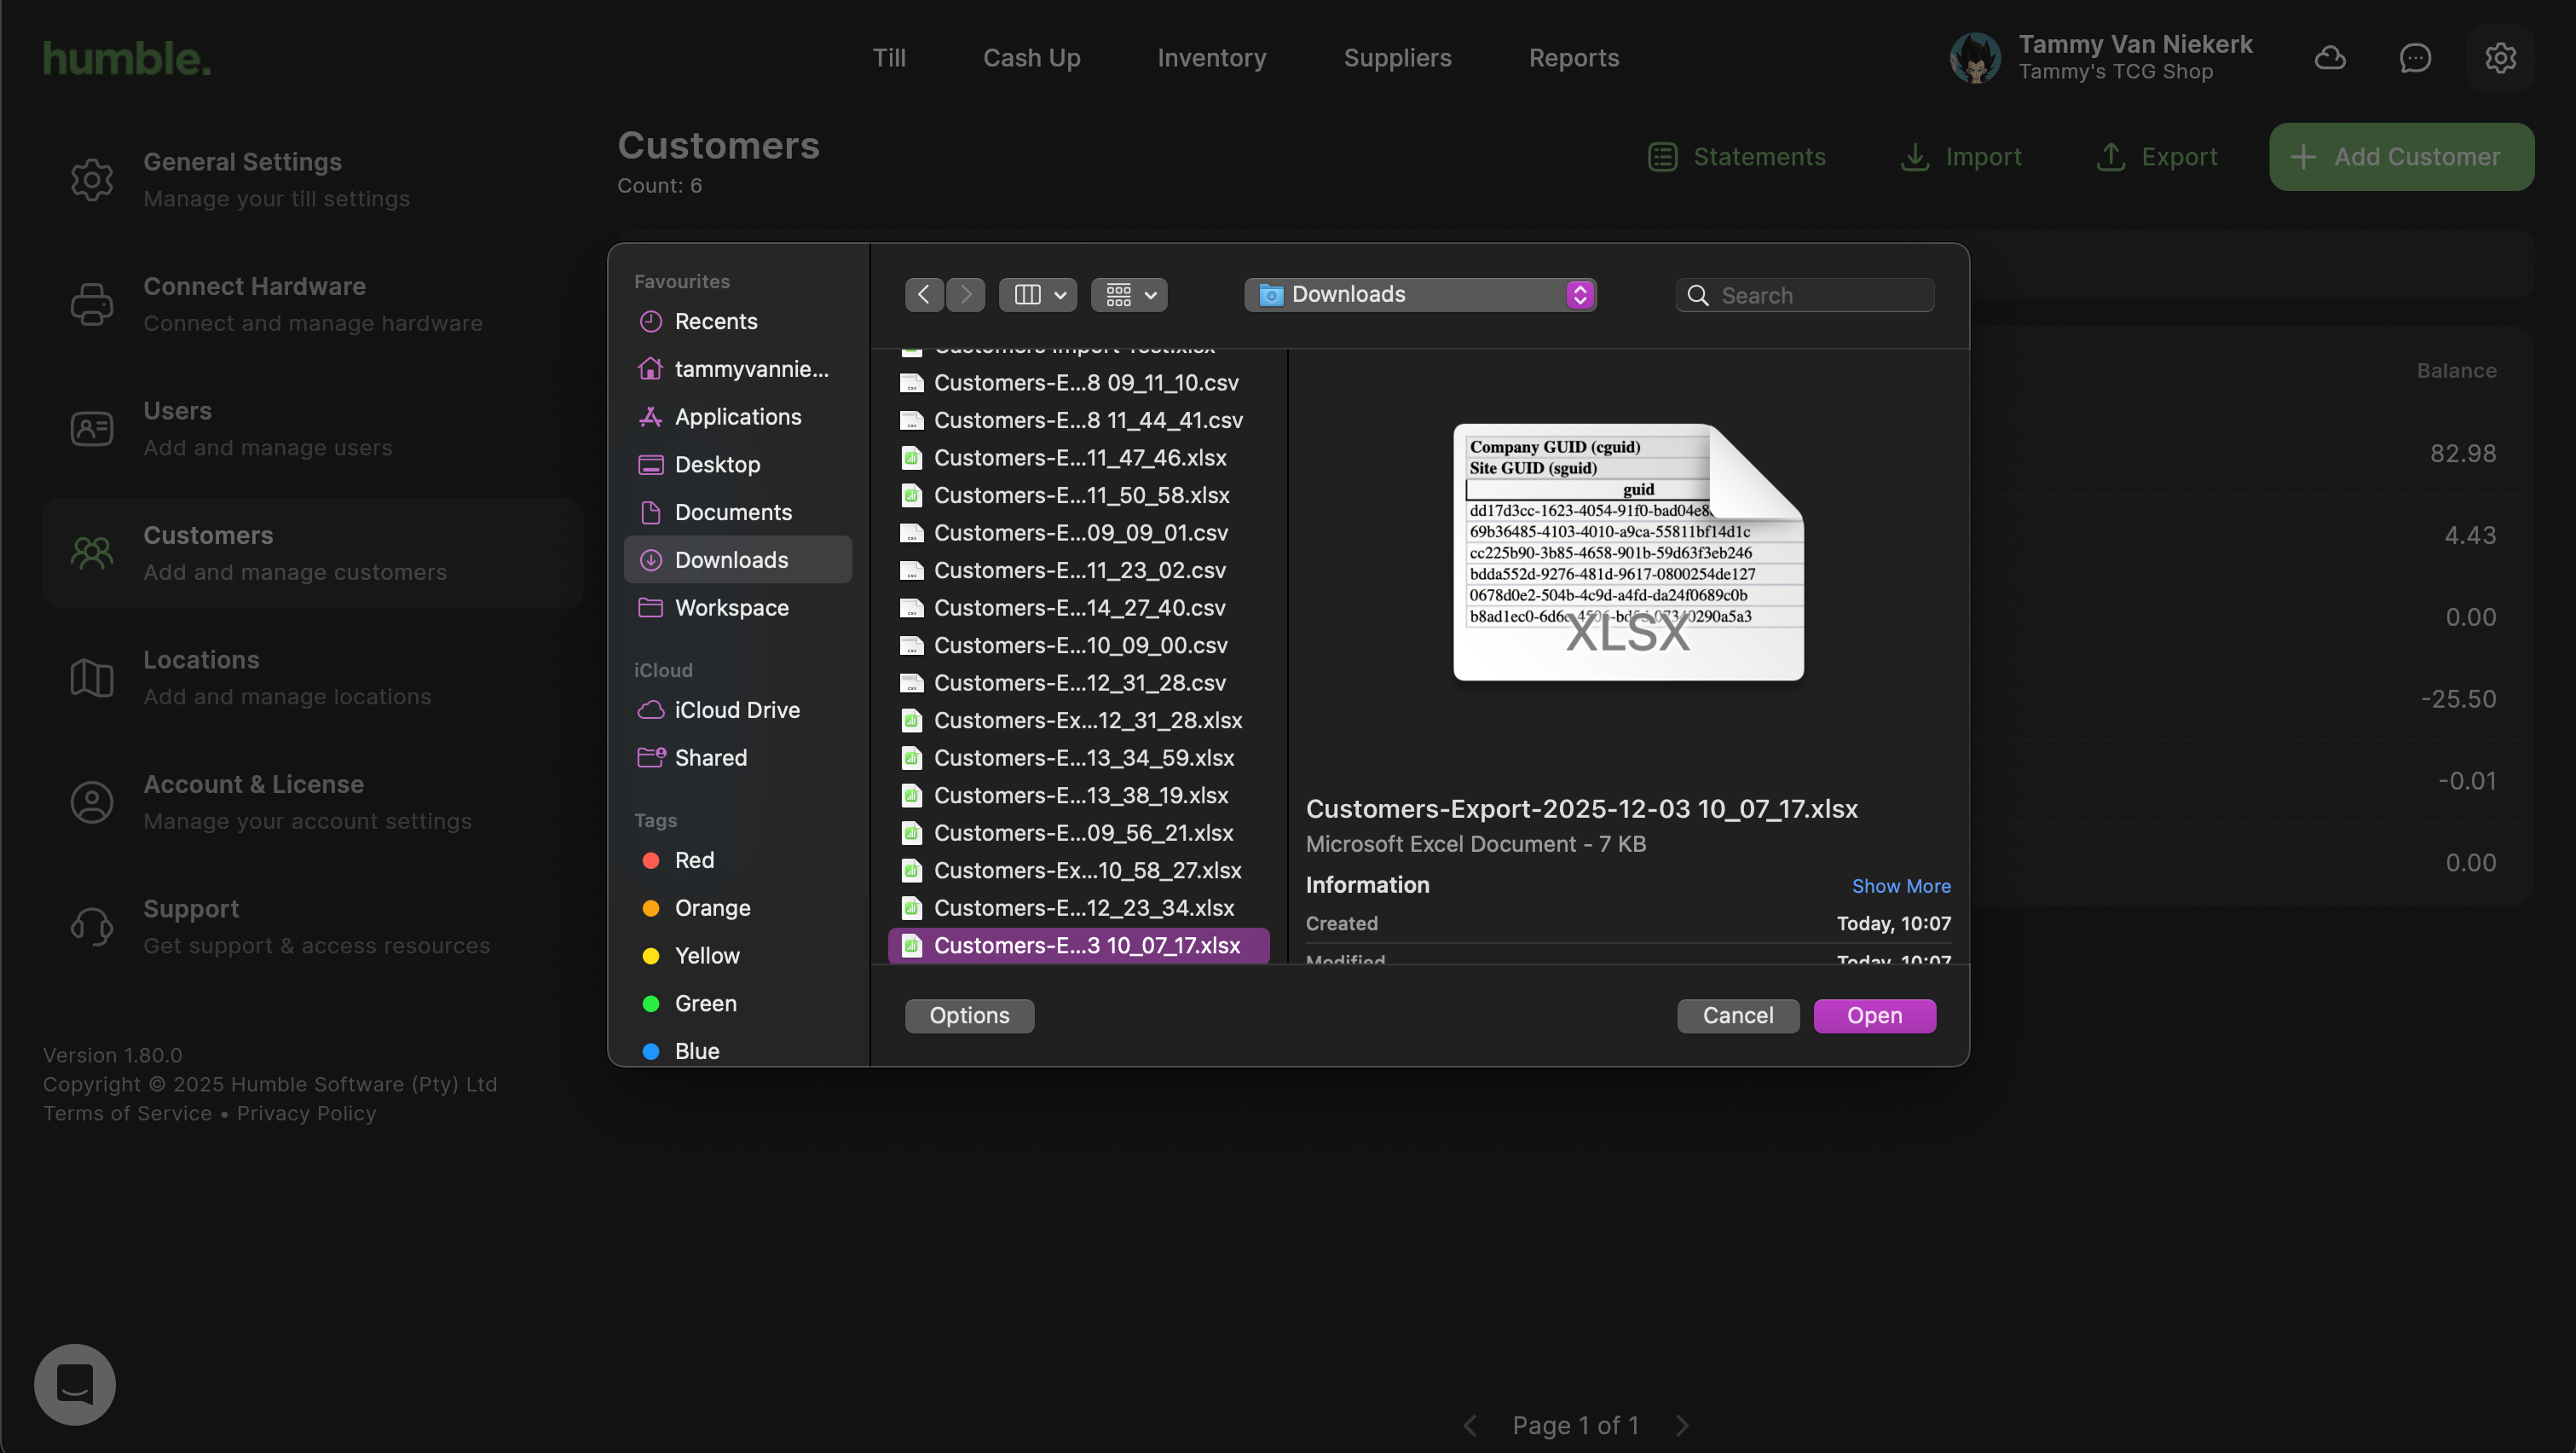
Export
Exporting your customer list downloads a .xlsx file to your Downloads folder. You can then open that and update your existing customers.
Please note that there are certain fields that should not be updated or deleted, these include:
guid
cguid
updated_at
created_at
When exporting your existing customer list, the guid field will be present.
Once you have updated your customers, you are then able to Import them back into the till.
Import
If you are editing an existing customer, you will leave guid field untouched. If you are adding a new customer, the guid field will be empty.
See attached customer import template
Once you have an import sheet ready, you can import your customers. These can be new customers to be added to the till or existing customers will be updated.
You can import a .csv or .xls or .xlsx file.
Click Import, this will open your file finder. Navigate to the Downloads folder and find your import file.
You will be notified on the bottom of the screen if the import was a success or if it failed.
To view your updated customer list with the newly imported customers, please navigate to e.g. Users on the left hand side, and then back to Customer. Your newly imported customers will now be visible and available to use throughout the system.
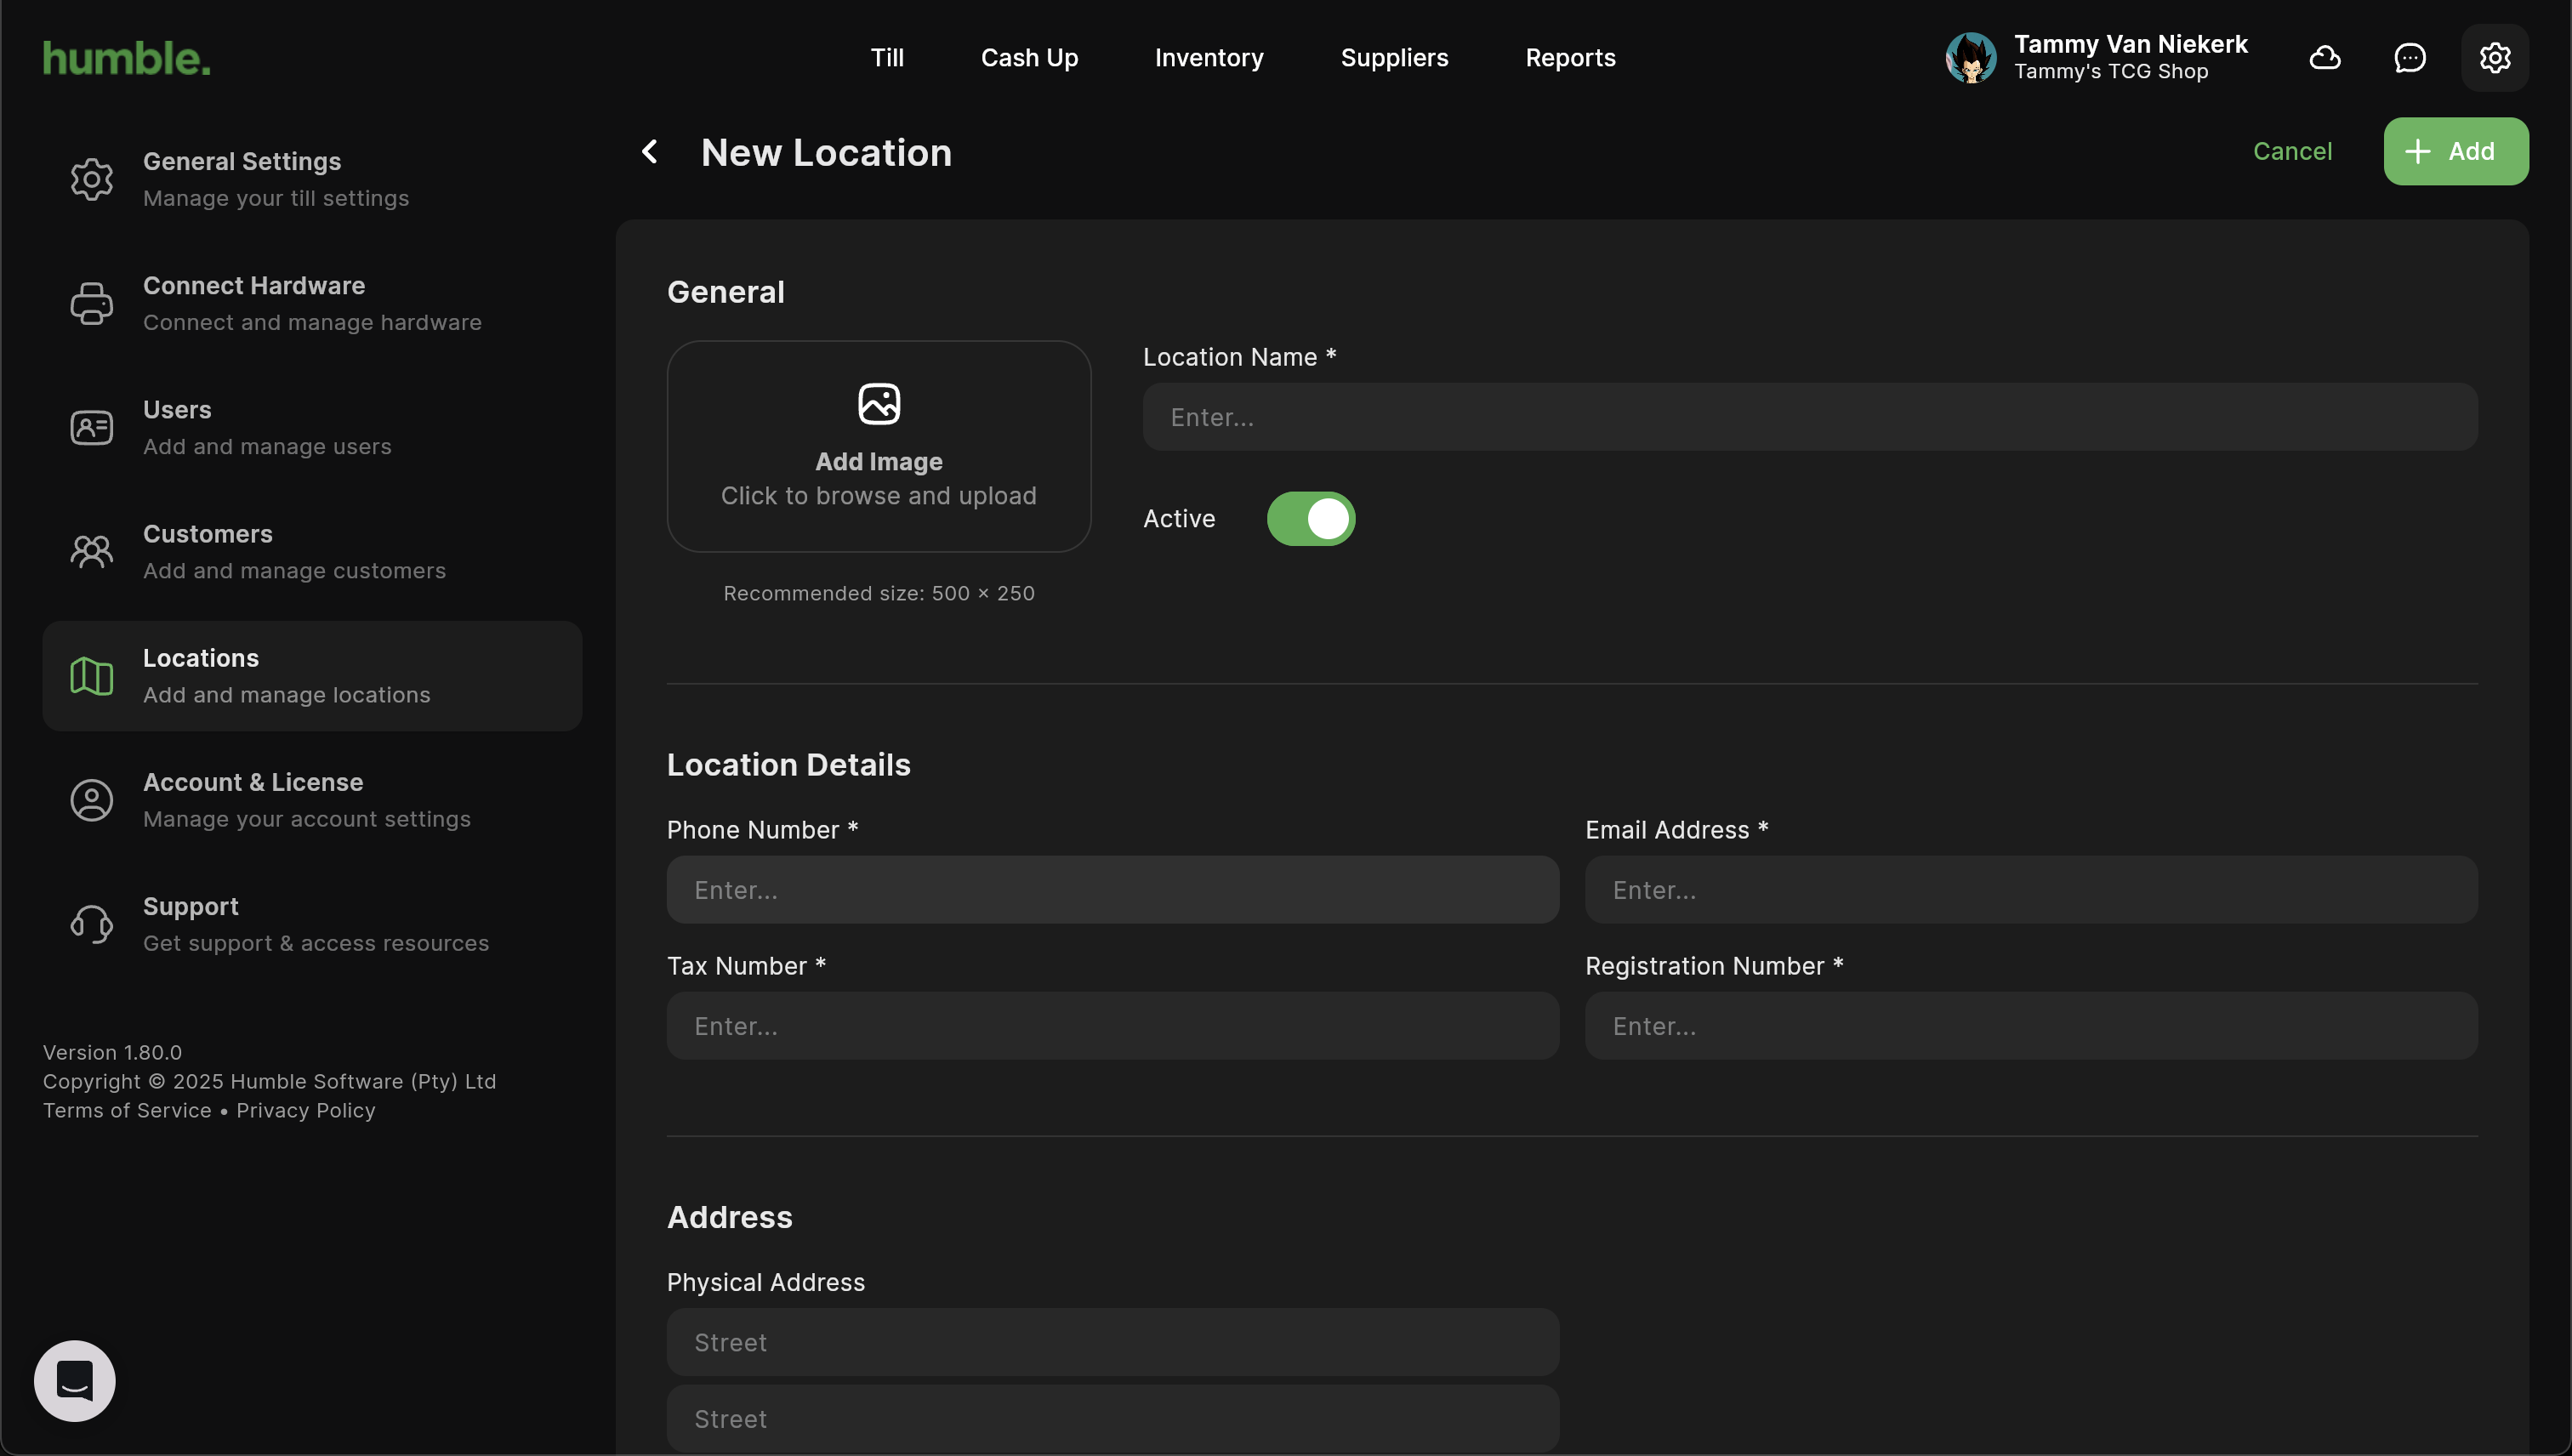
Locations
Here you will see your current location/store.
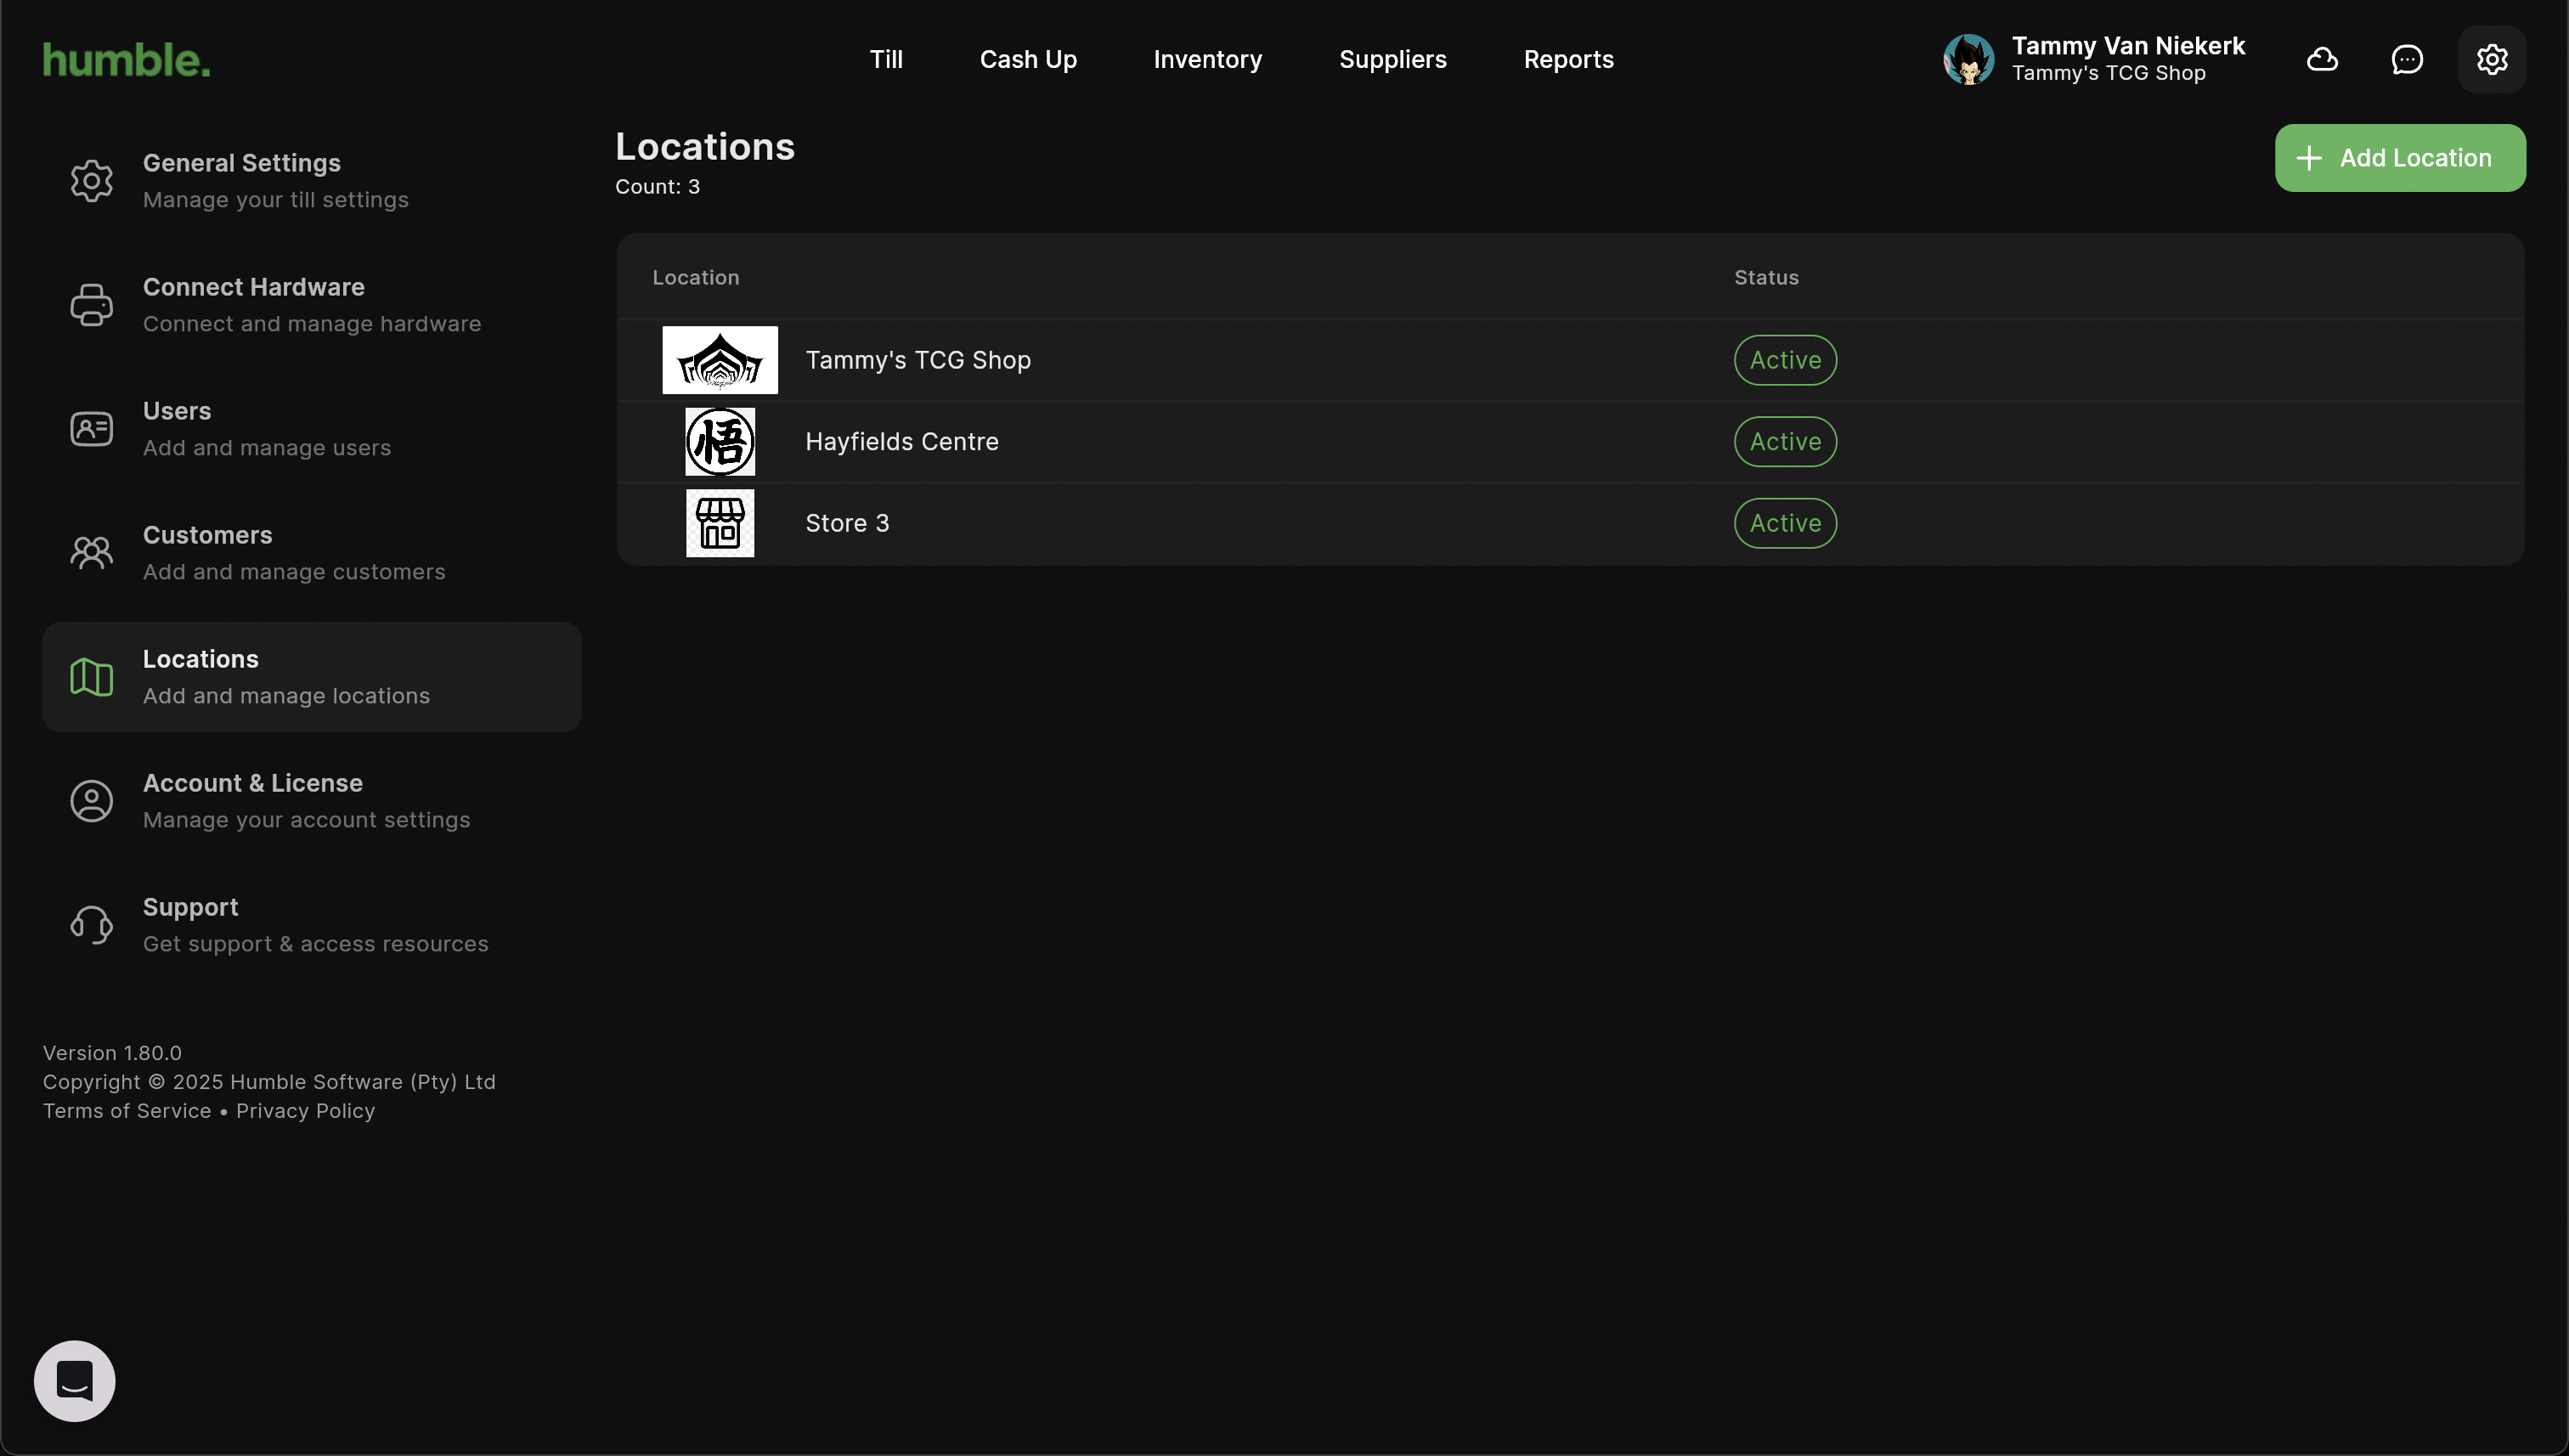
To add another store, click “Add Location”. The following information can be added in:
Image
Location Name
Physical Address
Once you are done, click “Add” for the store to be added.
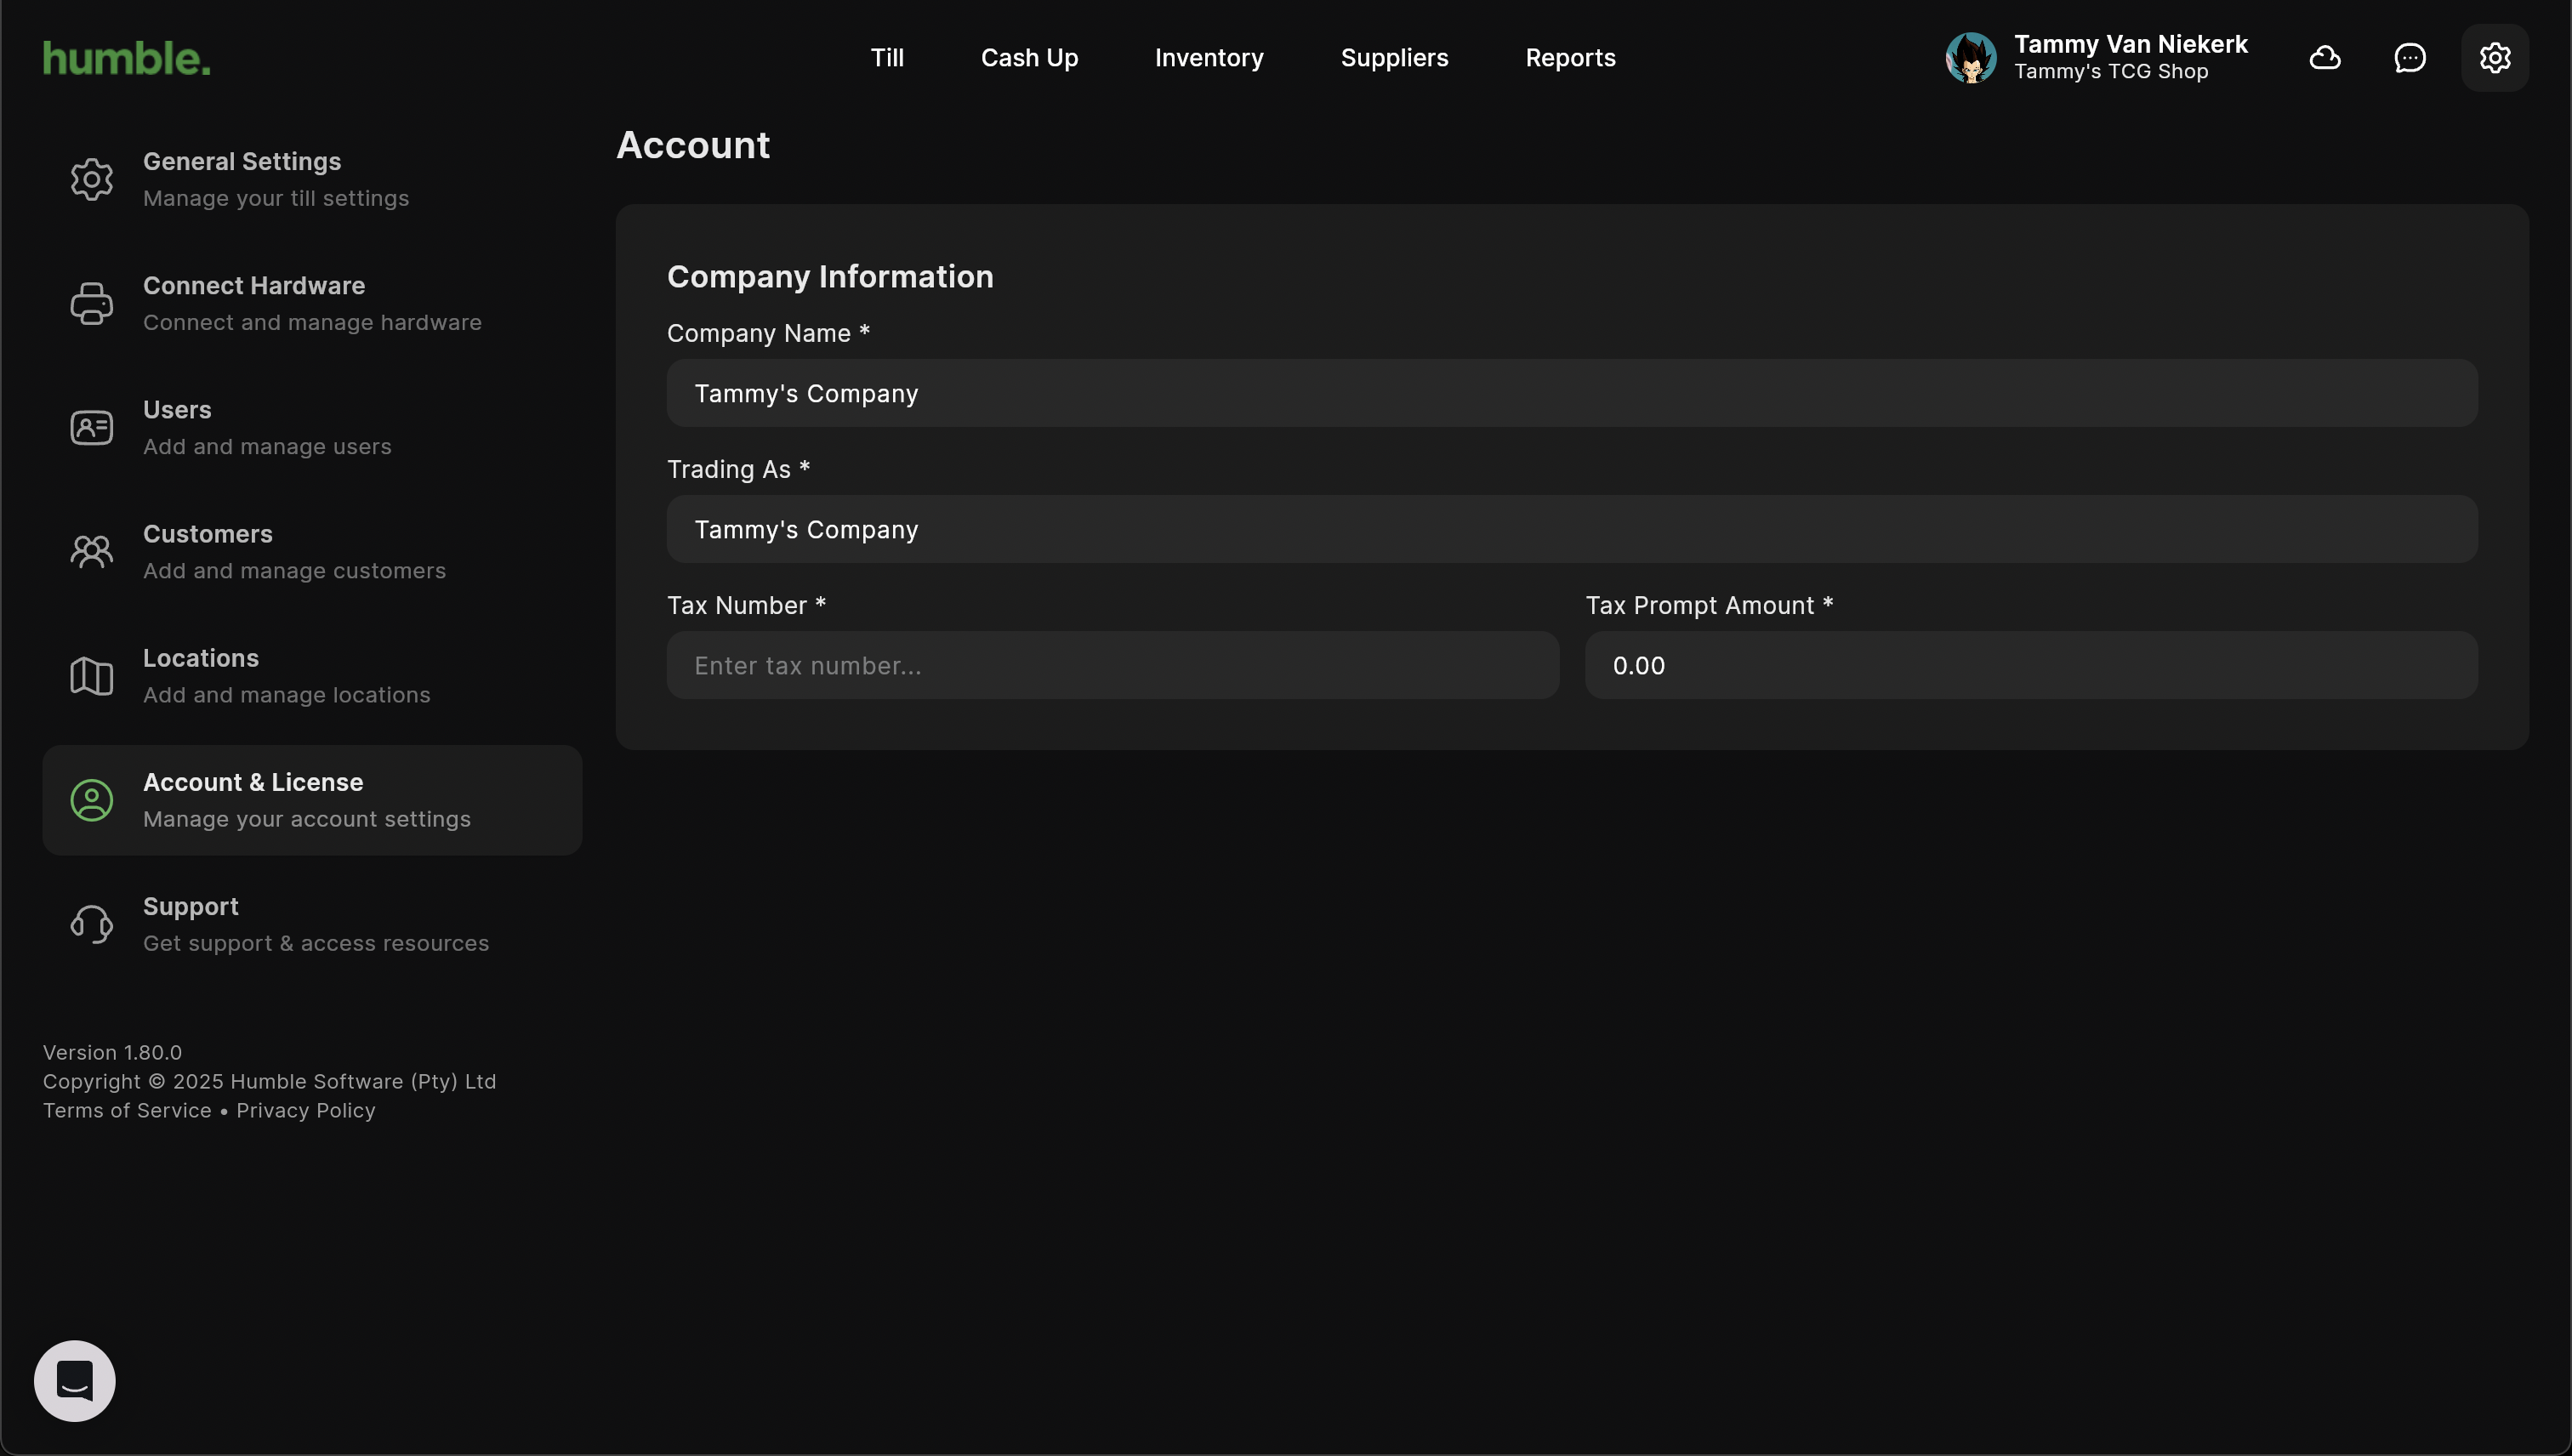
Account
Here you will see you company details. Once updated, they will save automatically.
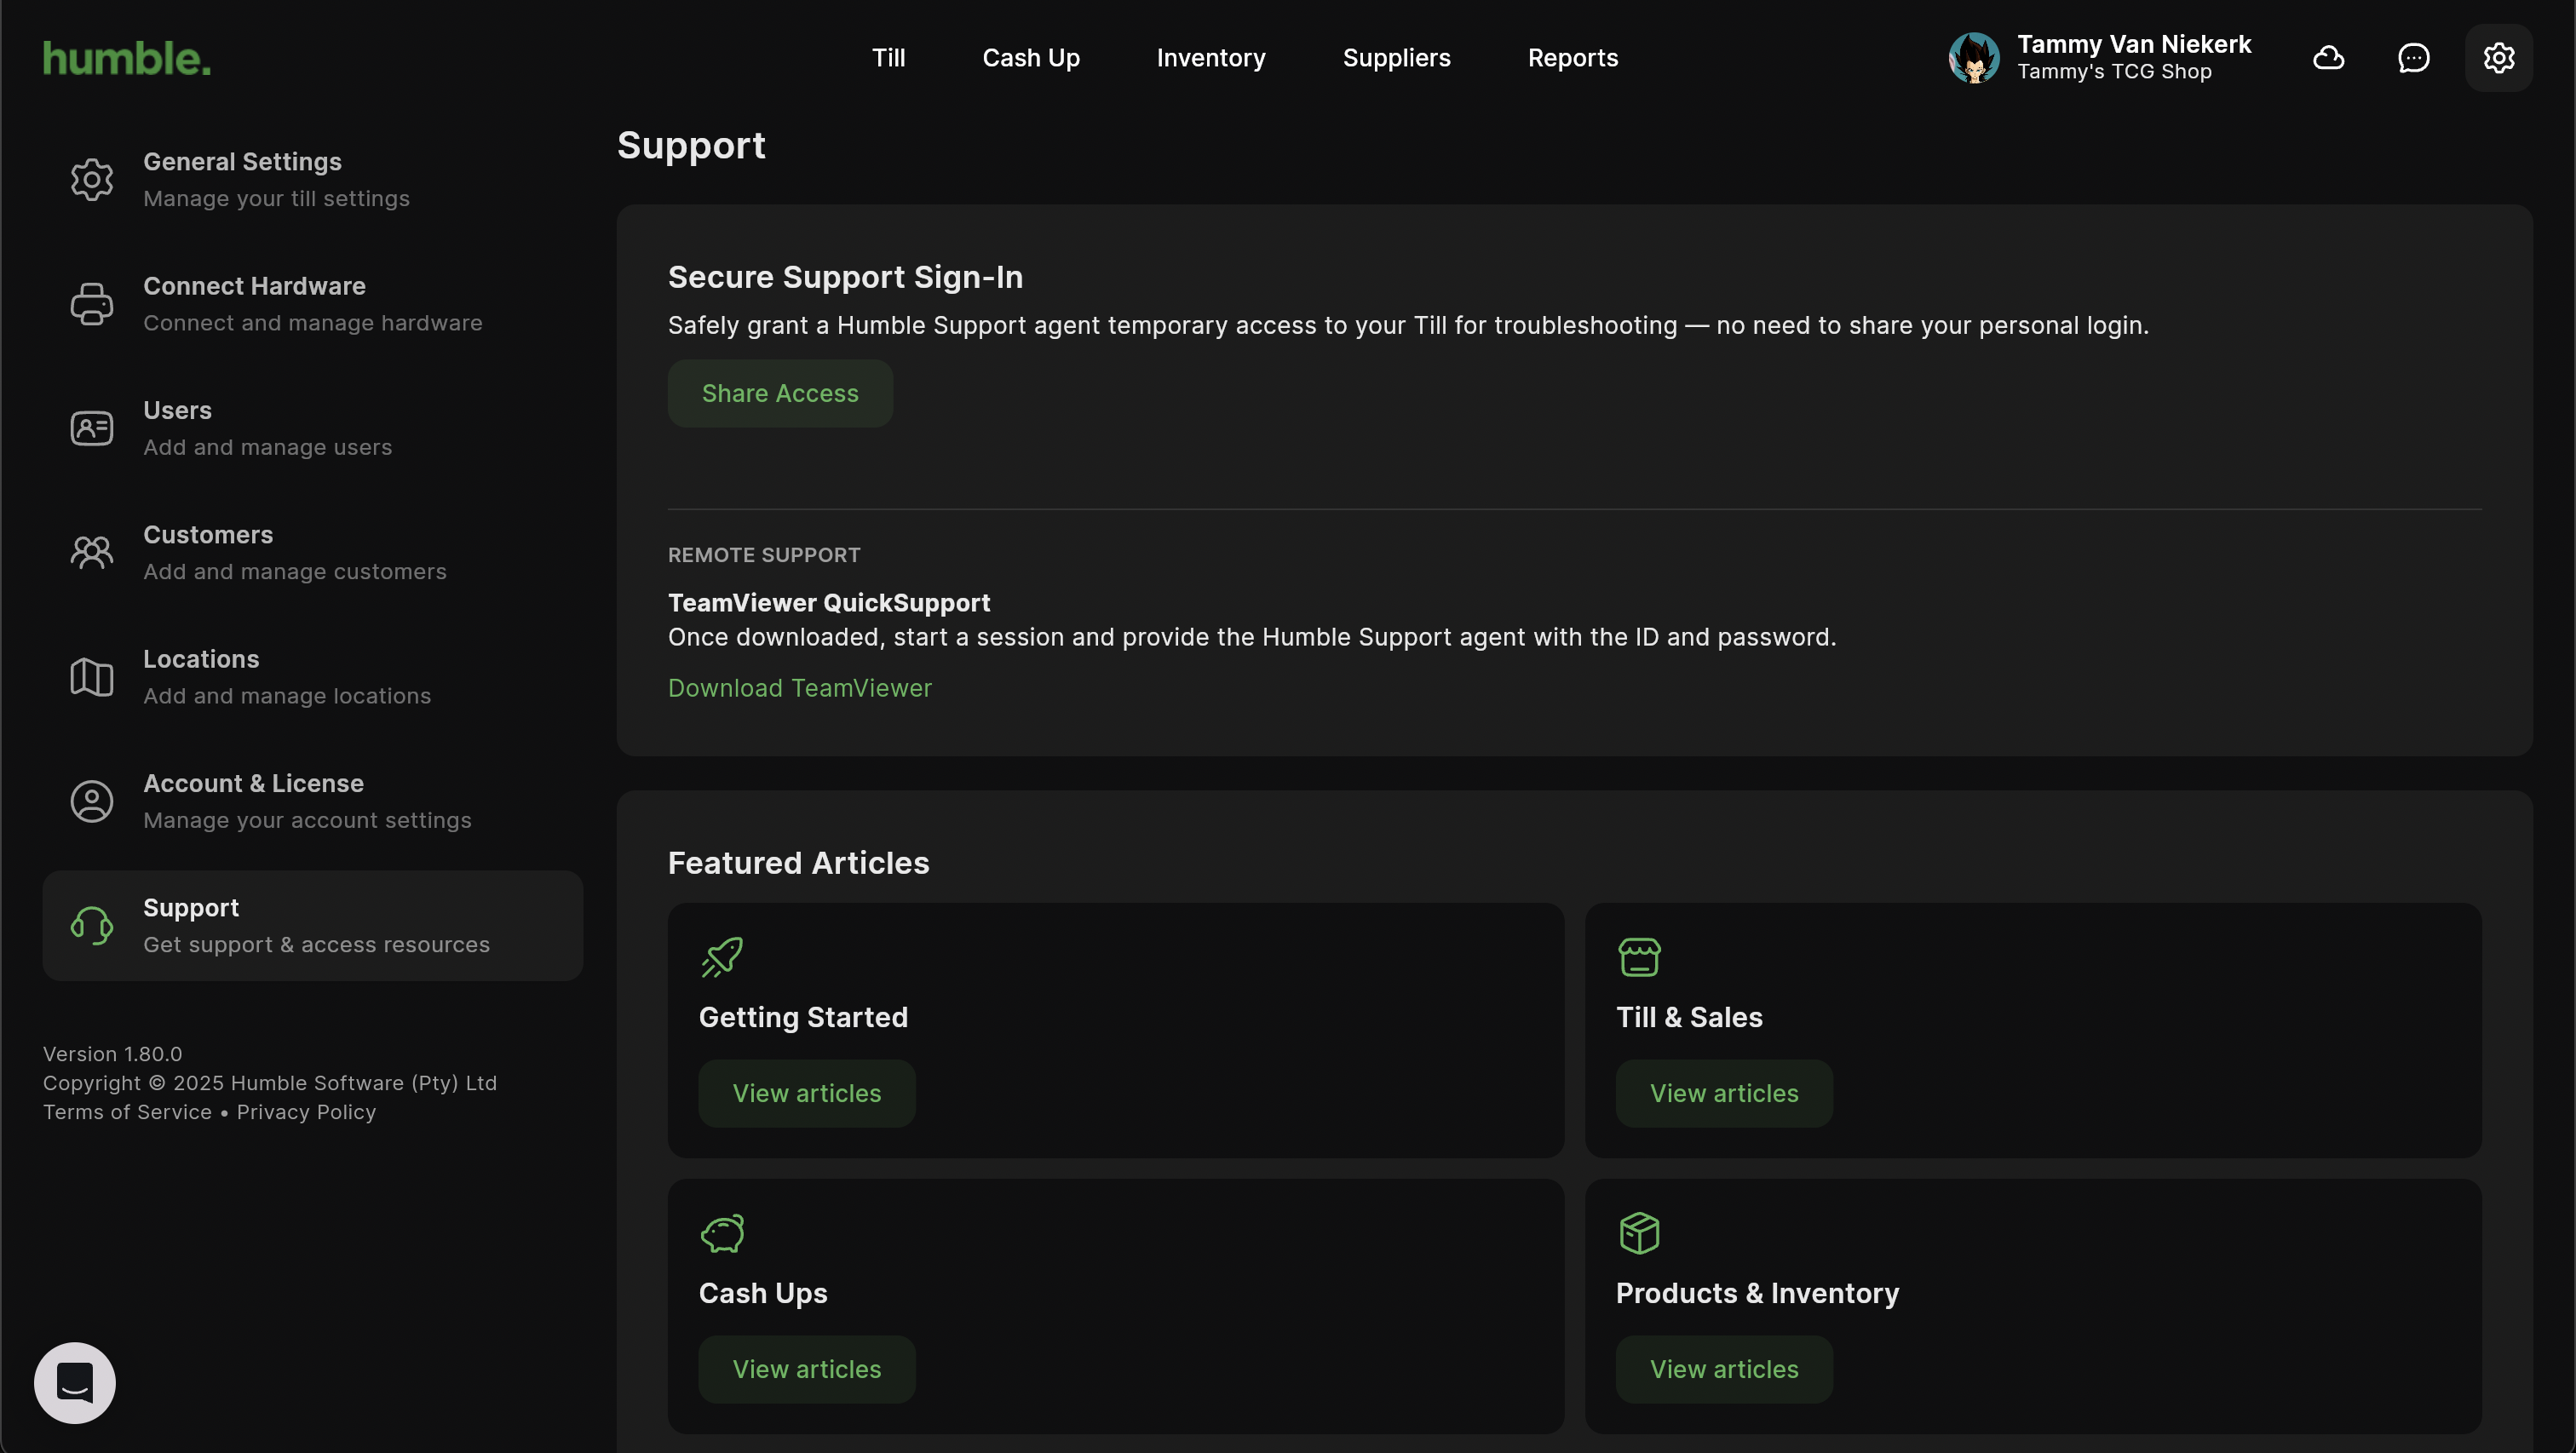
Support
We have a dedicated support section in case you get stuck.
Secure Support Sign-In - This sends an email to our support team granting them permission and access to sign it to your account to assist with any queries you may have.
TeamViewer QuickSupport - Want to watch us help you? Click the “Download Teamviewer” button to download Teamviewer Quick Support and allow our friendly support team to assist.
Featured Articles - Support articles to assist you with making your first sale, completing a Stock Order and even Kitchen Printing. There are tons of articles to help you run your business seamlessly with our POS.
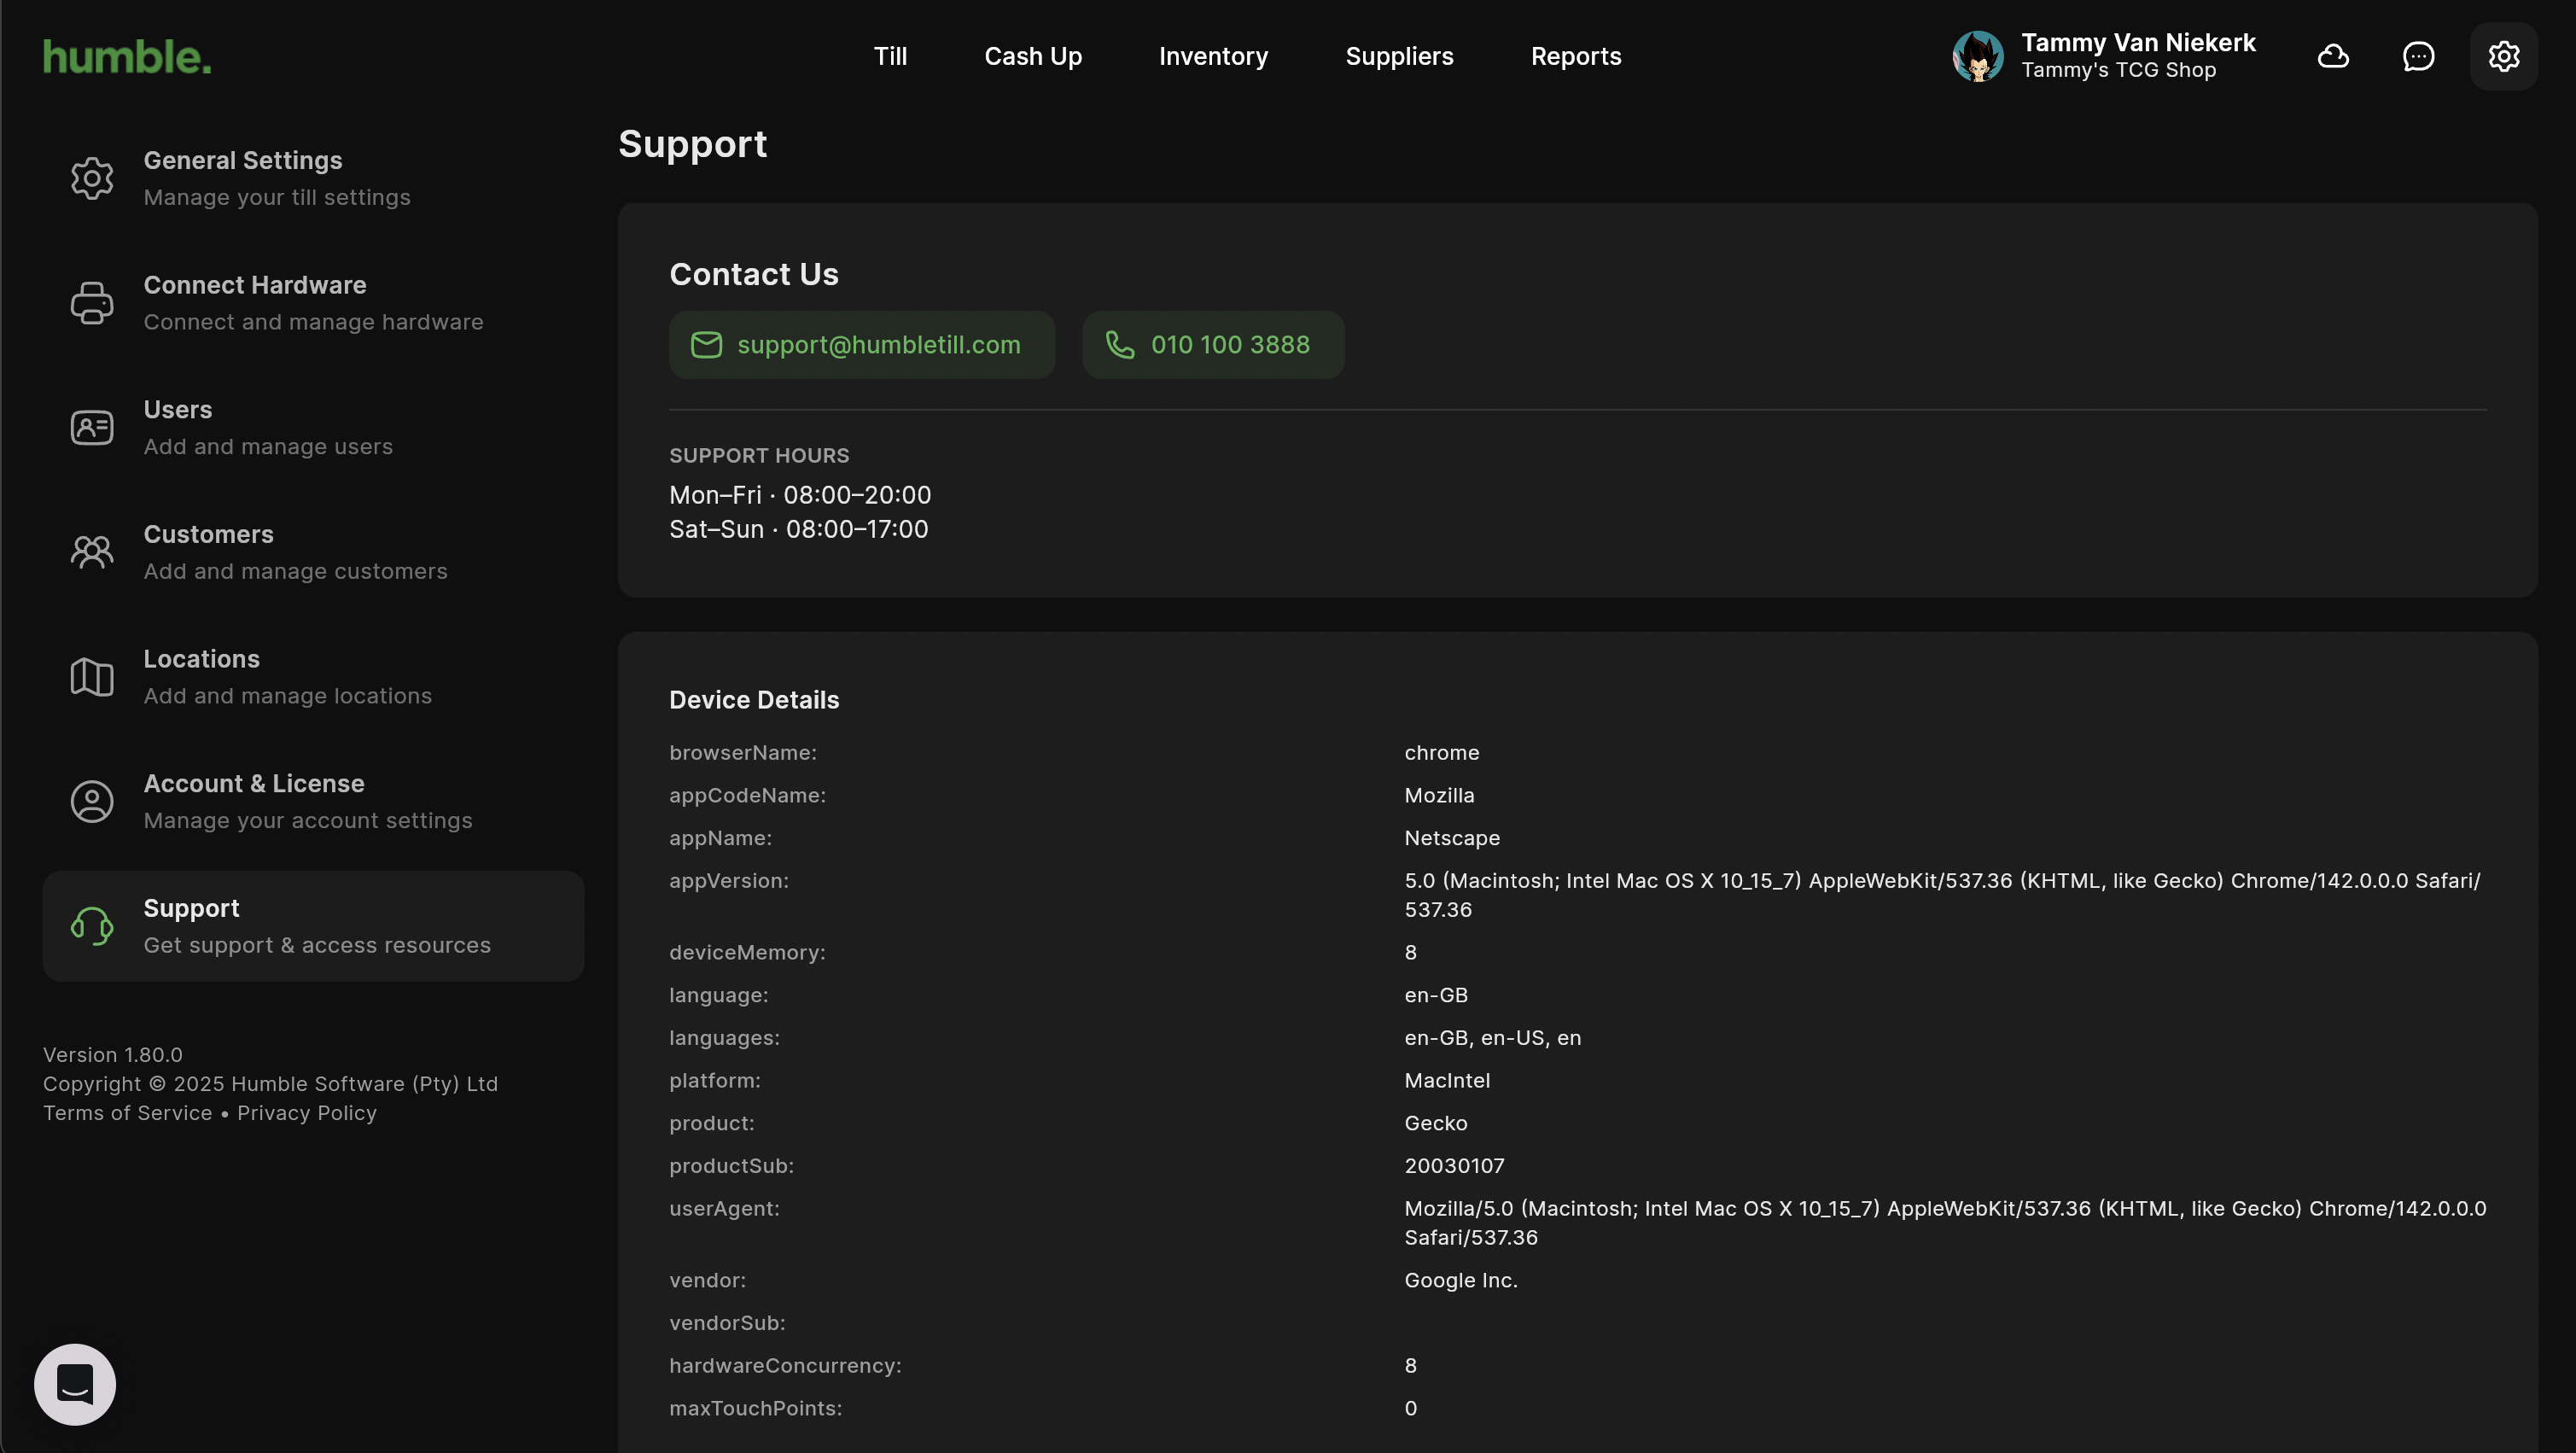
Contact Us - Our current contact details and trading hours.
Device Details - Your current device details, these can be used to help the support team resolve issues faster.
Was this article helpful?
That’s Great!
Thank you for your feedback
Sorry! We couldn't be helpful
Thank you for your feedback
Feedback sent
We appreciate your effort and will try to fix the article