Signing Up
Welcome to Humble 2.0 and thank you for choosing us! In this article we will explain how to sign up as a first time user. In order to start using Humble 2.0.
Please click on this link, you will be redirected to our login page.

To create a new account, click on Create a Humble Account.

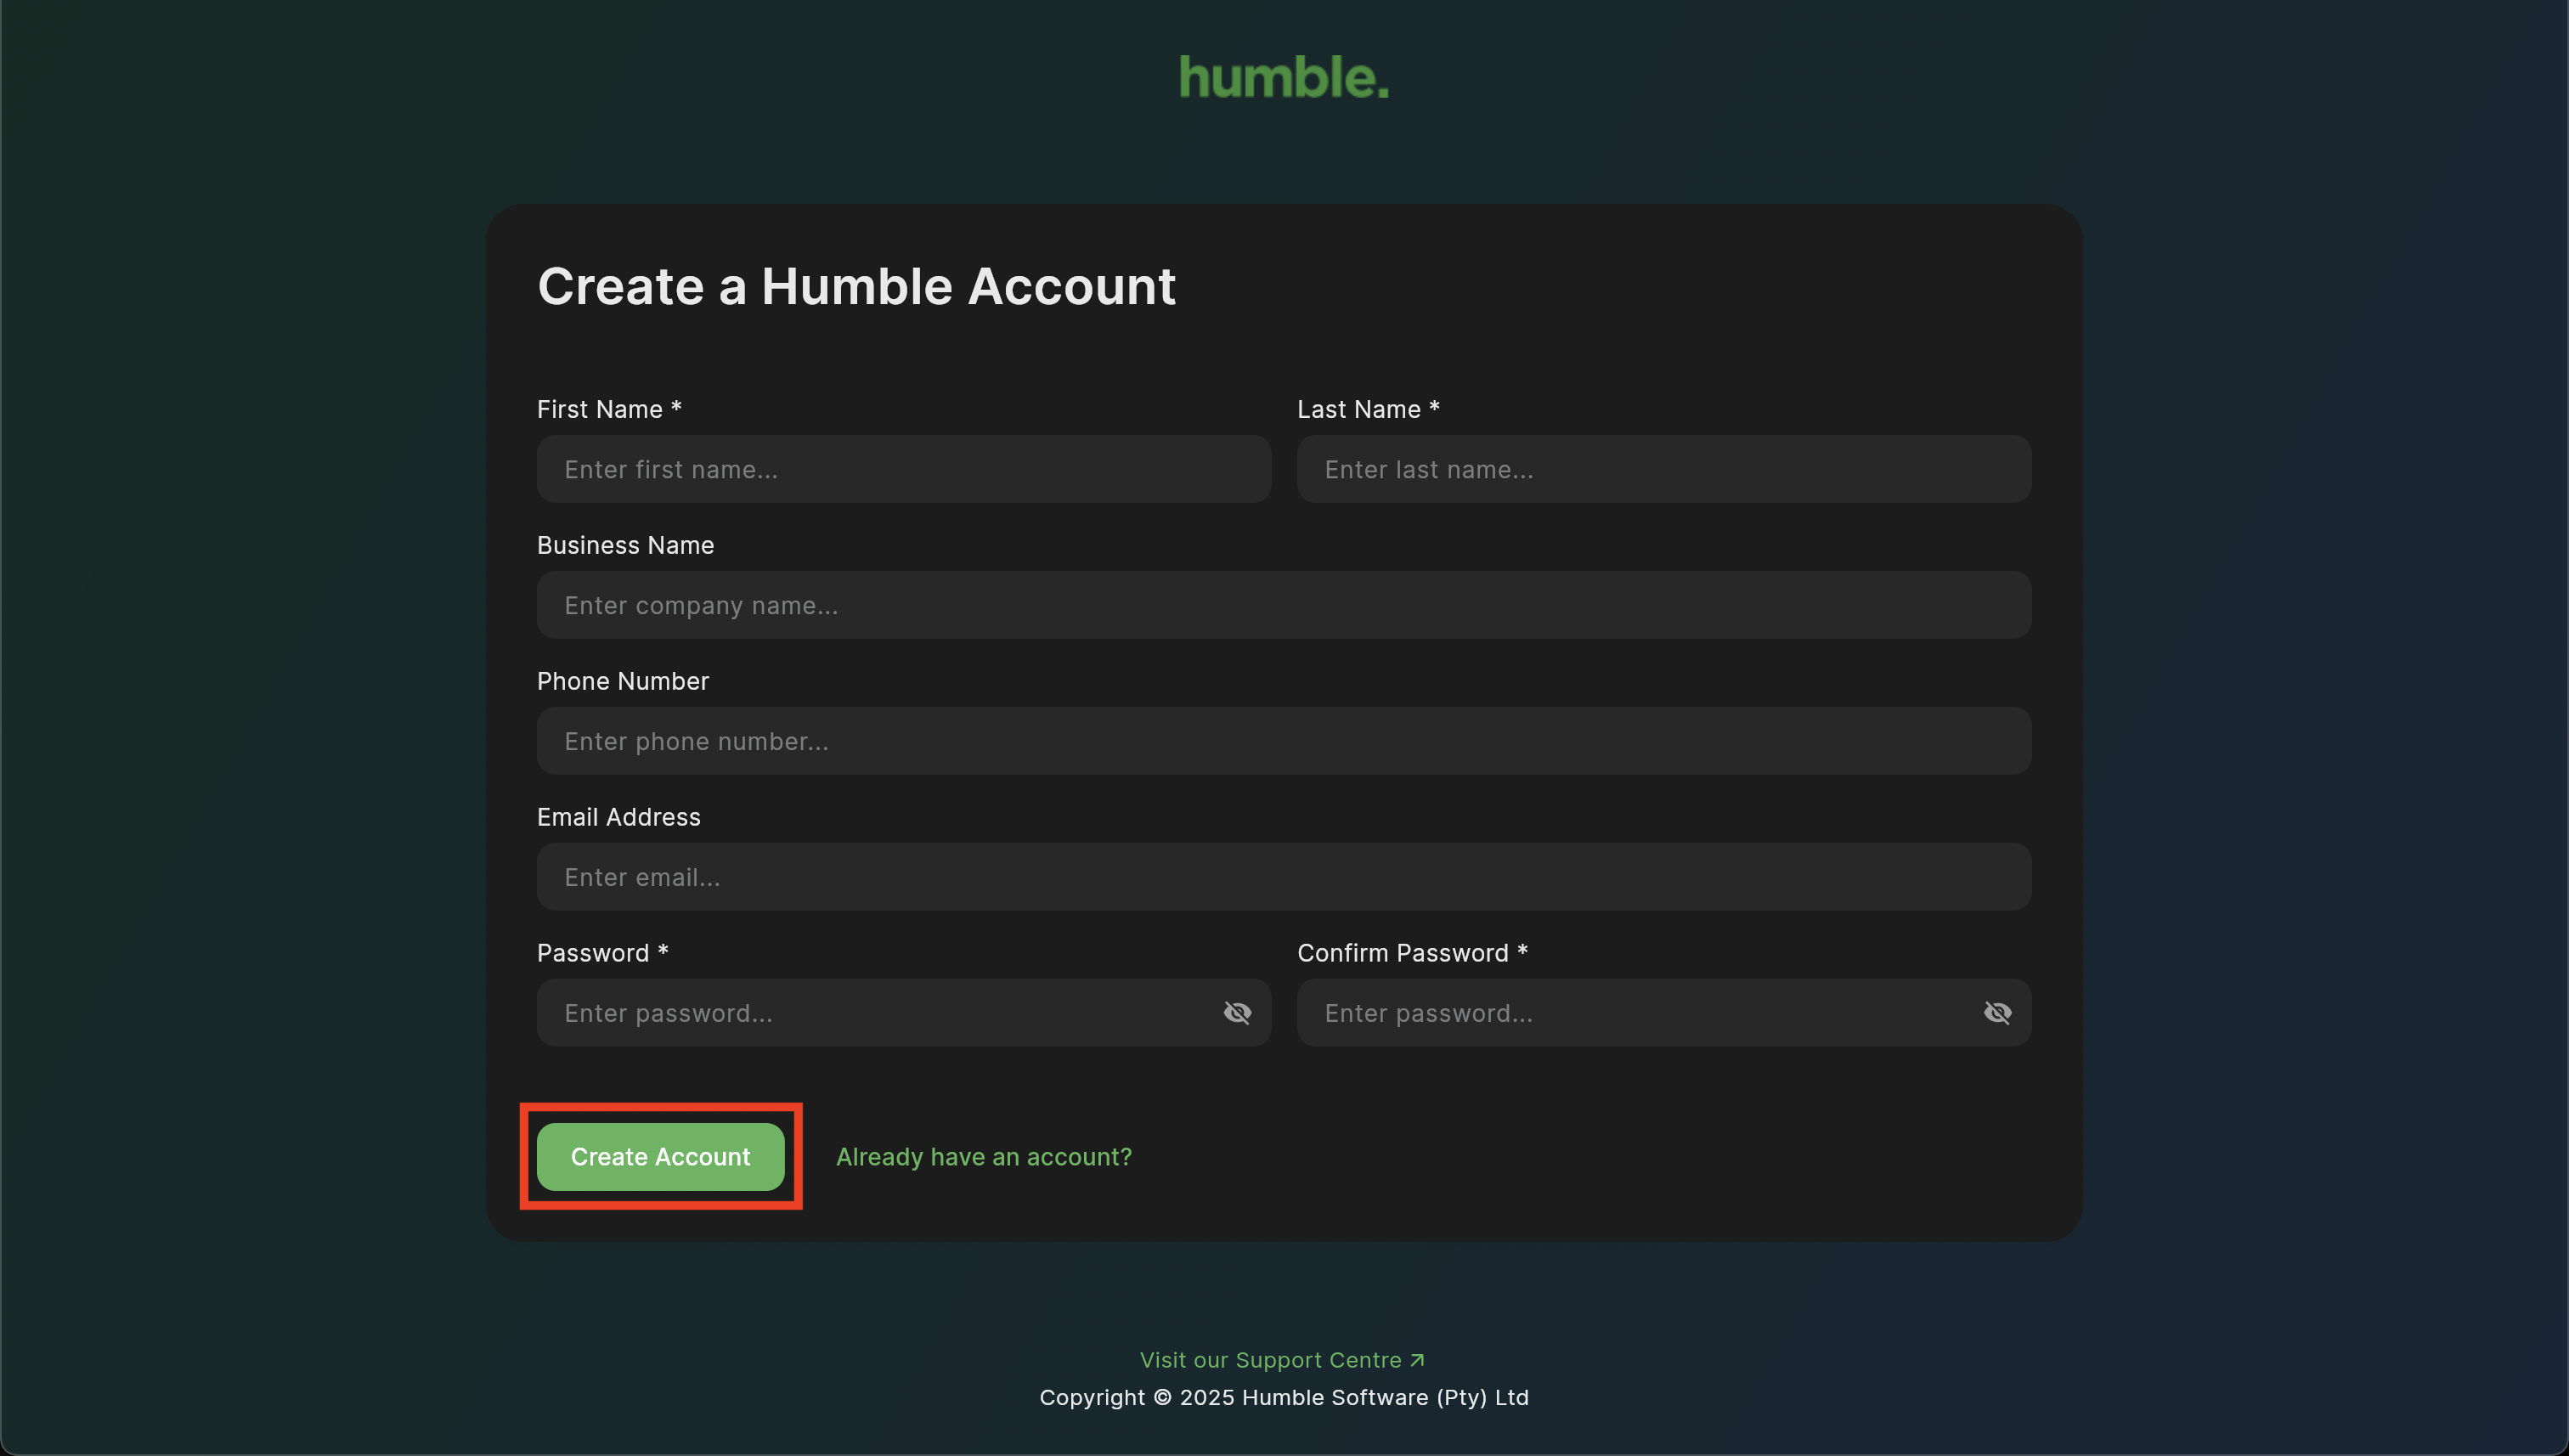
You will be taken to the Create a Humble Account page.

Here you can add in the following details:
First Name - Your first name
Last Name - Your last name
Business Name - The name of your business
Phone Number - Your cellphone/contact number
Email Address - Your email address
Password - A strong password that is at least 6 characters long, contains and uppercase, lowercase number and special character
Confirm Password - Please re-enter your password
Your password will need to match in both fields in order to continue.
Once you have added in your information, click on Create Account.
You will be redirected to the Sign In page, where you can now sign in with your email address and password.
If you have forgotten your password, you can click on “Forgot Password?” and follow the steps in the email received to reset it.

After clicking Sign In, the Setup Two-Factor Authentication modal will appear.

You will need to have an authenticator app installed on your phone. Google Authenticator is normally installed by default.
Please open your authenticator app. Click on the “+” on the bottom right and select either Scan a QR code or Enter a setup key.
Scan a QR code

Selecting Scan a QR code will open your phone’s camera. Line the borders on the camera up with the QR code on the screen. This will add an account and verification code to your authenticator app. Next, you will need to enter the verification code from your authenticator app into the blocks on the Setup Two-Factor Authentication modal, and click “Continue”. You will then be logged in to the till.
Enter a Setup Key

The above setup code is an example, your set up code will be different
Selecting Enter a Setup Key will take you to a screen where you will add a Code Name e.g. Humble Login and Your Key, which is the setup key above. You will have to manually type in the setup key that you see on your screen, and then tap “Add”. This will add an account and verification code to your authenticator app. Next, you will need to enter the verification code from your authenticator app into the blocks on the Setup Two-Factor Authentication modal, and click “Continue”. You will then be logged in to the till.
From now on, each time you log in, you will need to enter in a verification code.
Take note of the little blue circle to the right of your code. Each code has a time limit and will expire when the circle disappears. A new code will then generate and need to be used.
Onboarding
Once you have created your Humble account, you will be able to sign in. On first time sign in, you will be stepping through the creation of your store information.

You will be able to set up the following:
Store Locations
Users
Suppliers
Products
Payment Methods/Tender Types
Locations
This is where your current store is situated.. If you have more than one store, you will be able to set them up once you have finished setting up your profile. The locations consists of:
Location Name - The name of the location
Physical Address - The physical address of the location
Users & Permissions

Your user will show here by default. If you wish to add more users, click “Add User”.

You will be able to add the following information for your users:
First Name - The first name of the user
Last Name - The last name of the user
Email Address - The email address of the user
Password - A password that the new user will remember
Physical Address - The physical address of the user
Select a Role - The role of the user (this will predefine what permissions the user will have)
User Permissions - A list of user permissions that can be ticked and unticked accordingly
There are preset Roles that are available for your users:
Admin
Manager
Cashier
Based on which role you select, the permissions will be predefined. If you wish to have user permissions, you may set those up according to your preferences.

Suppliers
Here you’ll be able to add in your suppliers.
You will be able to add the following information for your suppliers:
Name - The name of the supplier (possibly company name)
First Name - The first name of the supplier
Last Name - The last name of the supplier
Email Address - The email address of the supplier
Phone Number - The phone number of the supplier
Physical Address - The physical address of the supplier
Products
Standard - Your standard product e.g. 300ml Coca-Cola bottle
Variant - A product that has a variation in flavour/colour/size e.g. Blueberry Muffin, Chocolate Muffin or Small Red T-Shirt, Medium Blue T-Shirt
Composite - A product containing multiple products (ingredients) e.g. Flat White, which contains Coffee Beans and Milk, or a Burger
A composite product needs to be composed of at least two products.
Each product uses the following fields:
Name - The product name
SKU - A unique code to used to identify different products
Description - The product description
Category - The category the product falls under, click to select from the drop down
Brand - The brand the product falls under, click to select from the drop down
If you are adding a Category or Brand that does not exist at this point, you will be able to create them in the product screen. This ensures that everything you need is at the click of a mouse.
Tags - These are keywords that you can add to your products to make it easier to search for them during a sale (✨ New)
Active - Keep toggled on to ensure the product is shown in the till and can be used for sales and stock management
Product Type
Standard - Your standard product e.g. White Bread
Product with Variants - A product with variants e.g. Size - Small, Medium, Large
Composite Product - A product with ingredients e.g. Burger
Manage Physical Stock - This allows you to set your product to be a physical product, where the quantity is tracked, or a service product, where the quantity won’t be tracked
Current Quantity - You are now able to set your opening quantity when creating a new product (✨ New)
Remind me to reorder at - Once your stock reaches that amount, an email will be sent to you, reminding you to order more stock
Weight - The weight of your product
Measurement Unit - What your product is measured in e.g. Each, Kg
Barcode - Used to scan your product to add it to the basket or a stock movement
Cost Price (Excl.) - The cost price of the item, excluding VAT
Selling Price (Incl.) - The selling price of the product, including VAT
Markup Percentage - The markup percentage for the product
Tax - Click the drop down to select the applicable VAT type
Payment Methods
Also known as Tender Types, your Payment Methods will be needed in order to complete a sale. Our three main tenders are visible, making selection super easy and quick.
Cash
Card
Account
Clicking them toggles their availability on your till. If you deselect any and find in future that you will need them, you will be able to add them back under Settings. The “Add Payment Method” button allows you to add additional tenders.
Once you are done setting up your tenders, you will be ready to start trading.

Click “Go to Till”. This will log you in to your till, which is all set up and ready for your first sale! Go out there and make Humble your playground!
Was this article helpful?
That’s Great!
Thank you for your feedback
Sorry! We couldn't be helpful
Thank you for your feedback
Feedback sent
We appreciate your effort and will try to fix the article